Kind of a placeholder page, lots of
photos, sorry about the load times. We're working on a better gallery
system.
There'll be more posted here before too long, but for the moment, here's a quick writeup of a recent project:
There'll be more posted here before too long, but for the moment, here's a quick writeup of a recent project:
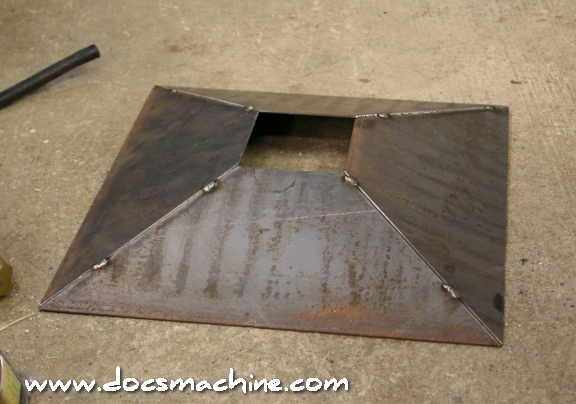 |
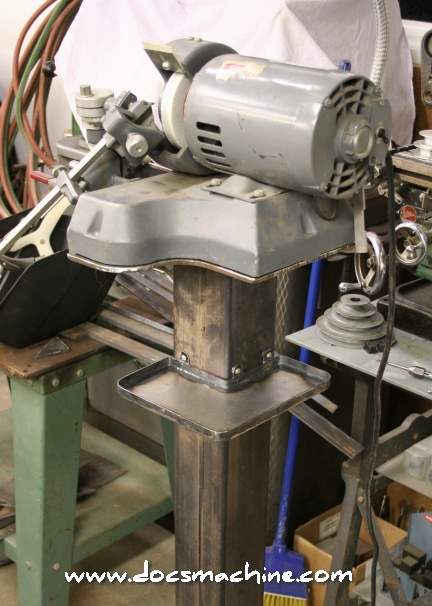
I needed a
stand for my Lisle Drill Grinder, and decided that, instead of the
usual pipe welded to an old car rim (already had some of those, they're
getting replaced) I'd build a stand that actually looks like a proper, factory tool
stand. I briefly pondered a design, and decided on a column made of 4" square tubing, with a tapered square base. I dug through my materials stack and found a likely chunk of 10-ga hot rolled. Not being one for CAD or trig, I made a cardboard pattern that gave me the base taper I wanted, and cut four sections with the plaz. |
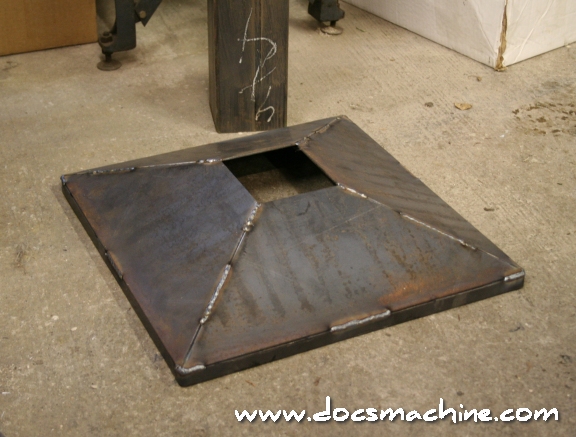 |
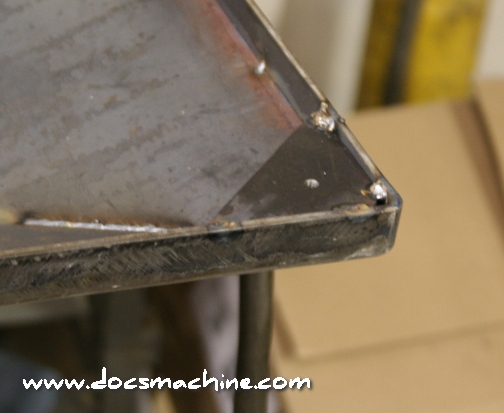
Once they were tacked and
partially welded, I found a strip of about 1/2" material that had been
sheared from a sheet of 16-ga, bent it in the appropriate places,
and tacked it to the lower edge. This gave the base the room for some rubber feet, and made it look more like the old cast iron stands we used to see in the 50s. |
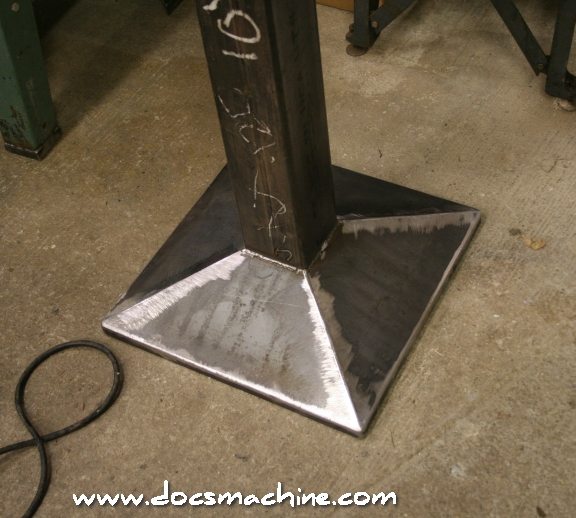 |
A few passes with an angle
grinder, then an air sander, and it was time to weld the column
on. A couple of light tacks, a quick check with the level, and then a
full weld. |
 |
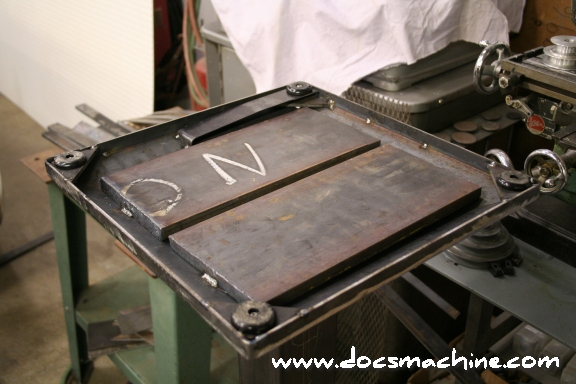
The baseplate had already
been cut, and came with the grinder (bought used) so I just needed to
clean it up a bit with the air sanders, and tack it in place. I was
happy with the height and the look, so it was time to finish it. Sorry about the crappy photo- the mill and boxes behind were distracting, so I roughly blurred it away. I was in a hurry. |
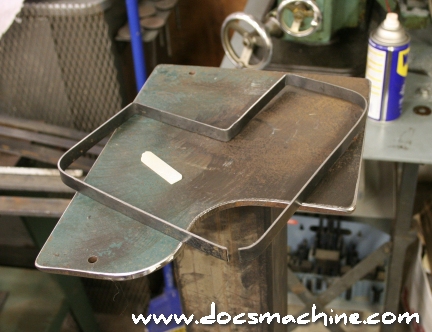 |
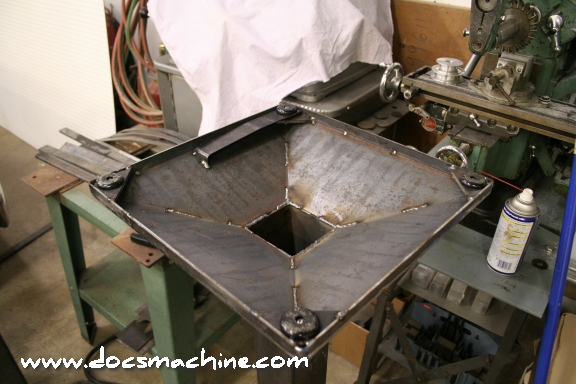
Now, I wanted a place to set
drills, gages and dressers, so I decided I'd add a tray, about belt
height on the column and fitted in the right side "corner" of the
grinder base. Again, I found some leftovers from the shear, and just hand-formed something that looks about right. |
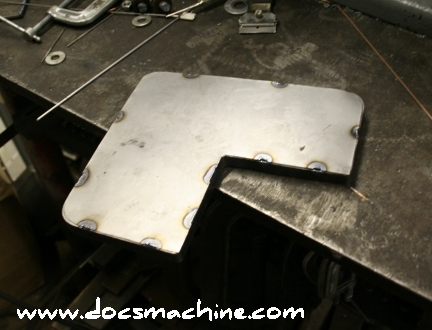 |
Then it was a simple matter
of setting the "outline" on a piece of scrap 22-ga, scribing it
closely, cutting it out with the Beverly-clone shear, and tacking it
into place. |
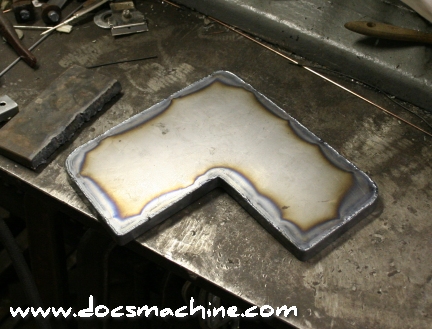 |
After a full weld, skipping
around and giving it time to cool so it wouldn't warp excessively, I
fabbed three mounting tabs, and drilled the column for 10-32 machine
screws. I decided not to tack or weld the tray on, as I might decide to change, move or enlarge the tray in the future. |
 |
A quick test fit, and three
allen-drive countersunk stainless screws from the parts bin, and it's
looking good. It's not terribly sturdy, but it's also not designed to
have more than a few drills or a couple of adjustment tools on it. |
 |
Time for some feet! More
rooting through the scap bins located some 1/4" bar, and a few moments
with the plasma cutter got me four triangular mounts. Three of these were drilled for 10-32 and tacked into place (using the rubber feet as a rough depth guide) and the fourth was drilled for 3/8-16 and tacked in somewhat higher in the base. |
 |
The "feet" are just 1-1/2"
black rubber furniture feet from Home Depot. They have a thin steel
washer molded in, with a hole in the center for a screw. They worked
great! |
 |
The odd corner got it's foot
mounted to a chunk of thin scrap strip, bent into an appropriate angle,
and located over the 3/8" hole. It's located pretty firmly, but still
allowed to float up and down a little. |
 |
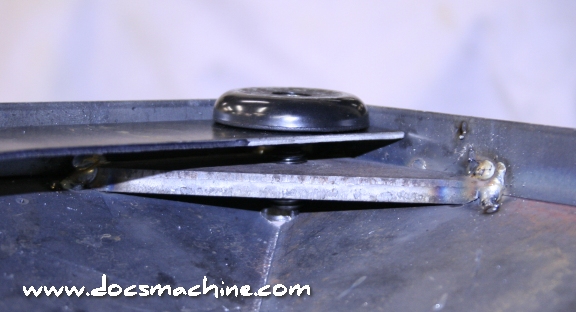
A hole drilled through the
base allows an allen wrench to pass through to a 3/8-16 setscrew. This
presses down on the movable foot, to compensate for an uneven floor.
That gives me a wider foot and somewhat better stability than a
triangular foot of the same dimensions. |
 |
Now, the grinder's a bit
heavy, and the stand is thinwall steel, so I decided to add some
ballast. I'd considered pouring some mortar or concrete in, but I had
this chunk of 5/8" plate that wasn't doing anything... A quick pass with the gas-axe into two roughly even pieces, a relatively light tack (in case I change my mind) and it's now well balanced and very stable. |
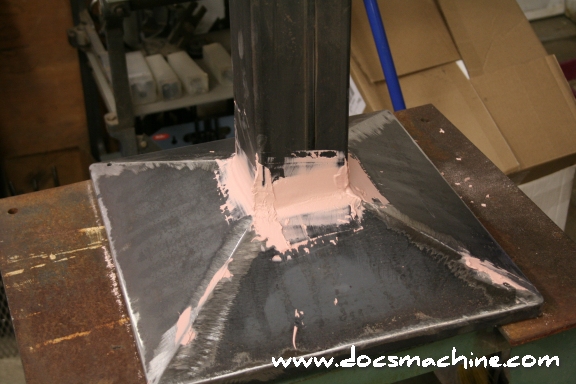 |
Since I was going for the
molded/cast look, I used a little Bondo to fill in the base-to-column
seam, and to lightly fill in some of the various dings and scraes from
the grinding. |
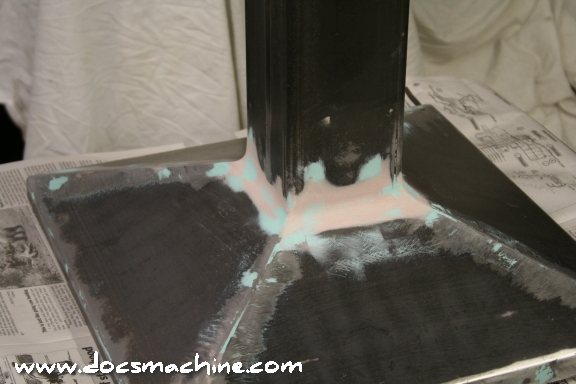 |
Some sanding, and a few licks
of spot putty, and it's ready to paint. |
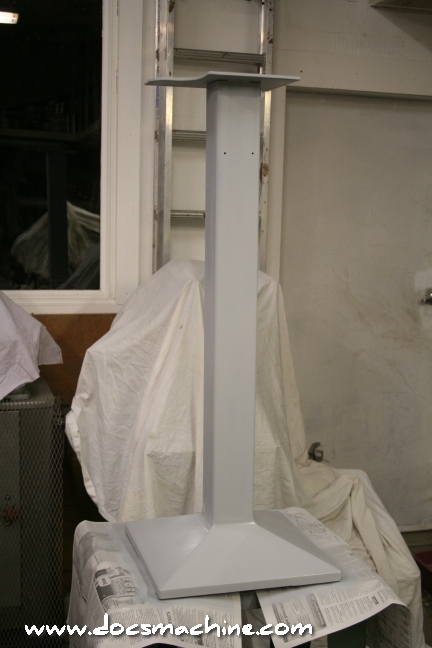 |
First two coats are
Rust-Oleum light grey "Industrial" primer. |
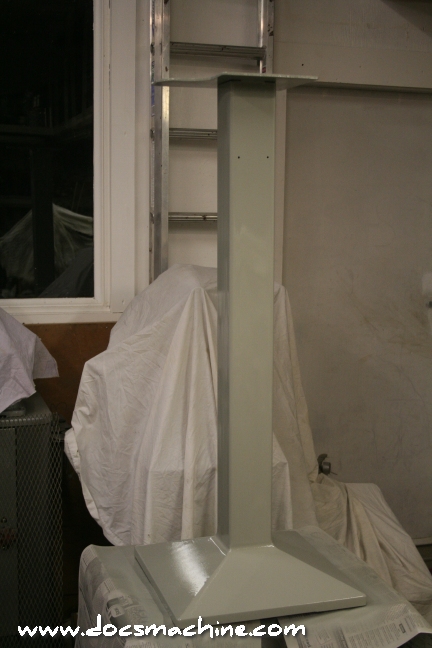 |
Then I tried the Rust-Oleum
"Light Machine Grey". It was both much too light, and also, as seen
here, a little on the green side. Not what I had in mind. |
 |
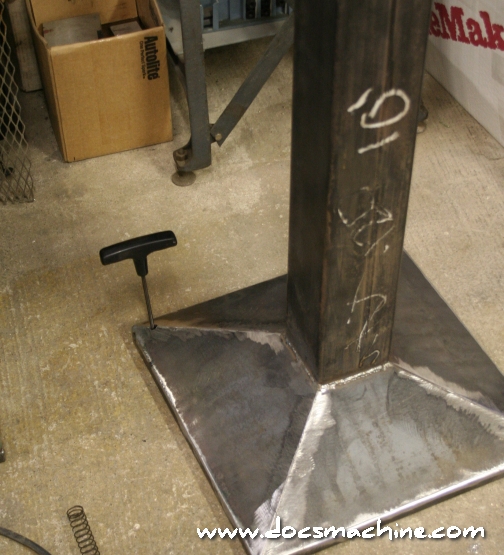
So I switched to the "Dark
Machine Grey", which turned out to be a very close match to the grinder
itself, which is what I was hoping for. Two more coats of that, some
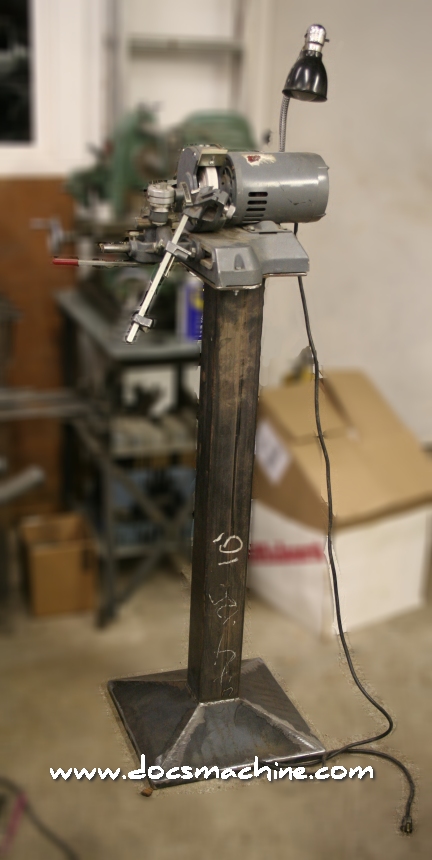
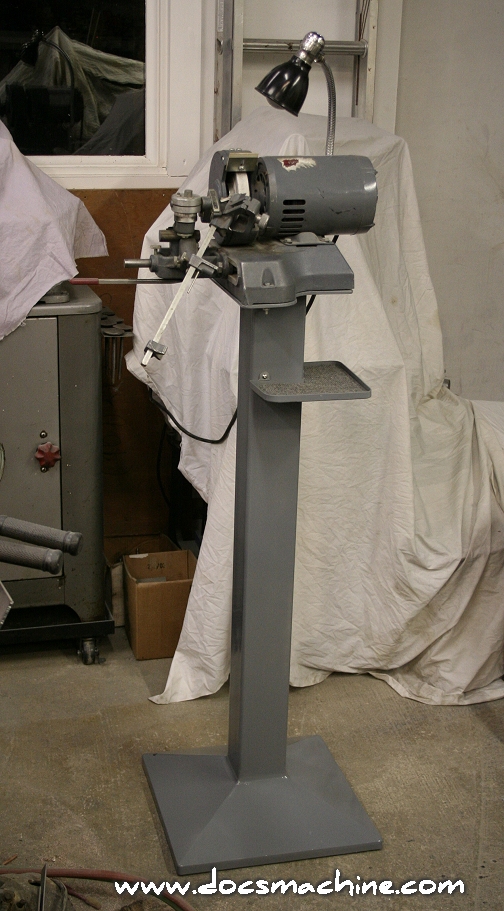
impatient drying time, and here it is. Works perfectly. Not that there's really much way a simple stand can "not work", but it's firm and stable, looks like a real machine tool stand, and places the grinder at the perfect height for working (almost a foot higher than any of the benches.) I liked it so much, I made two more to replace the pipe-and-old-rim stands on the bench grinder and buffer. |
[ Home ][ Tinker's Guild
Tech Forum ] [ The
Whiteboard Paintball Webcomic ] [ Guild Classifieds ] [
Contact Us ]
tracker
All text, graphics, photos and content, Copyright 1998 - 2008, Doc's Machine & Airsmith Services. All rights reserved.
Unauthorized use, private or commercial, prohibited. All data contained herein presented for informational purposes only
May cause drowsiness, ague, irritability and violent incontinence Not responsible for chromosomal damage
due to improperly shielded monitors. Not responsible for excessive chronic disclaimer squinting syndrome.
Wash eyeballs thoroughly after use. Do not take internally or with alcohol. Use at your own risk.