The story:
Last spring, just after the previous update to this page, I drove the
thing, barely, to the local Show-And-Shine. It may not have been shiny,
but I wanted to show it anyway. It wasn't fully legal, having no headlights
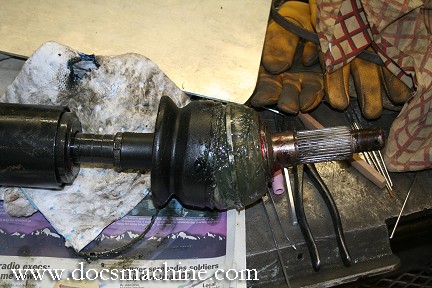
or front turn signals (nor was it insured) and on the way I blew out a
halfshaft boot
which got grease
everywhere, and it overheated. Besides that, it
rained.
I was happy anyway, since that was the first time the car had left the property in over a decade, but finances and time basically prevented me from doing much more. I'd hoped to have it painted the following (last) winter, but didn't get the mods done, couldn't afford it, etc.
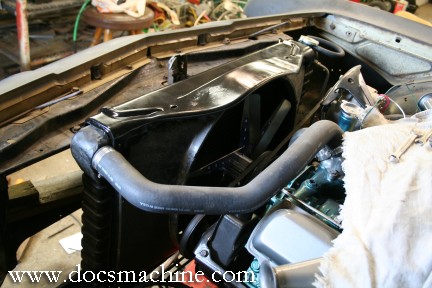
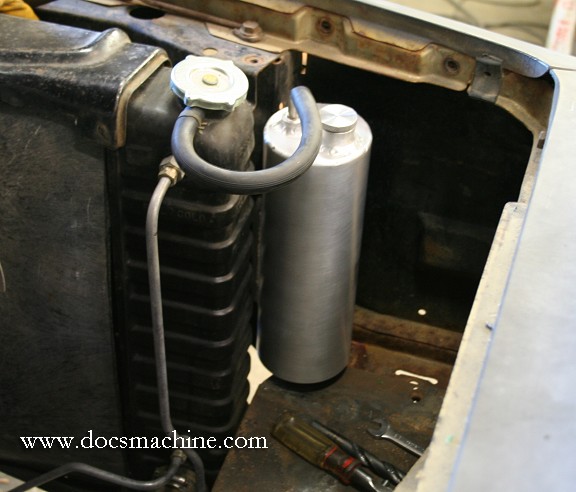
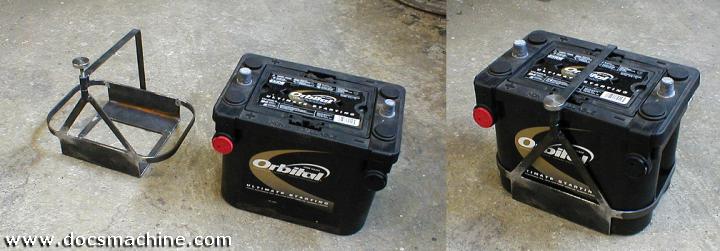
Come spring of '05, another show-and-shine loomed on the horizon, so between that and being badly in need of a break from the "day job", I threw myself back into the project. To cure the cooling problem, I put in a radiator shroud, which I had to trim-to-fit off a different car. I also welded up an aluminum "puke tank" for coolant recovery, and the heat problem was solved. I'd had problems with it keeping the battery charged, so with a little analysis I realized that since I'd painted the engine and the alternator brackets, I'd basically electrically isolated the alternator from a ground. A little scraping and some new ground cables at strategic locations and that problem too, was solved. Oh, I'd mounted the battery box in the trunk last year.
For the headlights, since I was 'deleting' the pop-up lights, I mounted a set of '94 Chevy pickup halogens in the grille opening. Unfortunately they don't have quite the "look" I was hoping for, but until I figure out a better mod, they'll do to make it legal. They're run through underhood relays for max output.
I also lowered the nose by about an inch and a half by making a new set of torsion bar adjusters. I think it still needs to come down an inch to an inch and a half, and the back about the same, but it's better than it was.
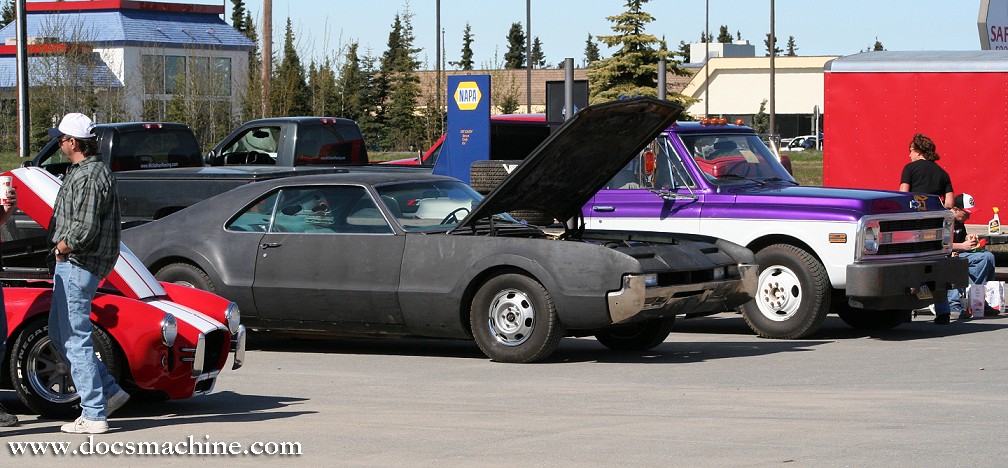
Best of all? The day of the show was perfect. Sunny, warm, lots of nice cars, and not a single mechanical problem either on the way there, or on the way home, or since.
Shortly after the show, I finally had it properly aligned, finished
and fitted the custom hubcaps (which by themselves change the whole character
of the car) and decided that, because I'm planning on focusing on the mechanicals
for now, and paint will come later, since it has a spraycan paintjob already,
why not go with a glossy spraycan paintjob? :)
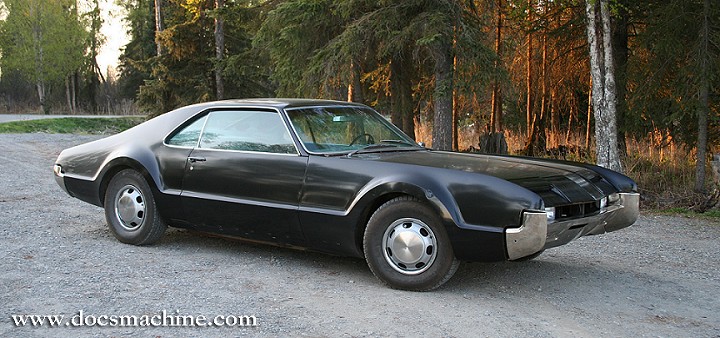
Some newspaper, a couple rolls of masking tape and nine cans of Rustoleum
Gloss Black Enamel later...
Don't be fooled, this is the best side and the paintjob only looks good from a distance. But it's better than the flat black primer, and for the first time in a gazillion years, it gives me a glimpse of how it will finally look when it's done, considering I've owned this car for about twenty years and I've put less than 3,000 miles on it.
Still to be done:
Spring '04 Update:
Progress has been slow, due to lack of time and finances (so what else
is new?) but I've managed a few things.
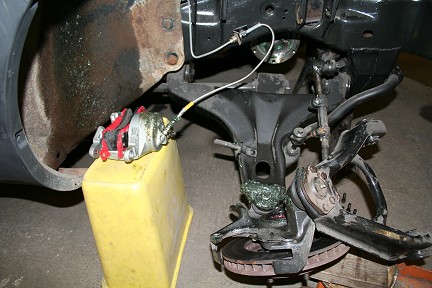
The four-wheel disc brakes are finally complete, after discovering
the power booster and the master cylinder were both bad. A little cursing,
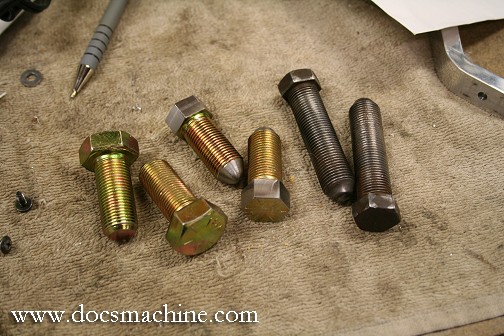
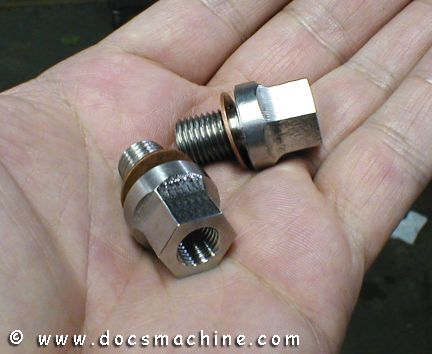
a new (reman) booster and some plumbing, a couple of Custom
Parts for the rear brakes to connect the hardlines to the rear calipers,
which are GM front calipers, usually plumbed with a flexible line and a
banjo bolt. Some carefully-fitted 304 stainless, a couple of crush washers,
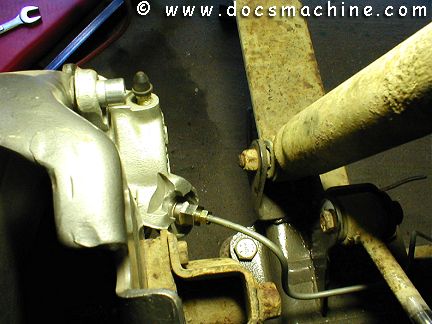
and Viola`:
I reran the hard line after this photo was taken, to better protect it and mount it to the axle. I haven't tried them at speed yet, but they've gotta be better than the old single-pot master and four-wheel drums. The system now consistes of a '77 Toro vacuum booster, a '77 Corvette master cylinder, Goodrich braided stainless lines, a Behr proportioning valve, four GM fullsize calipers and four 11.5" GM rotors. Can't wait to try it on the street.
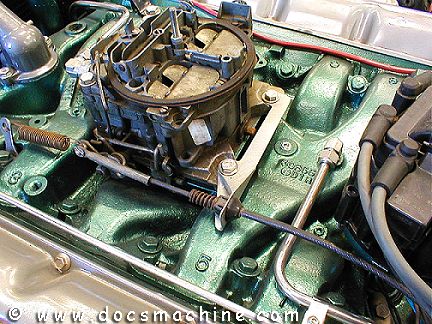
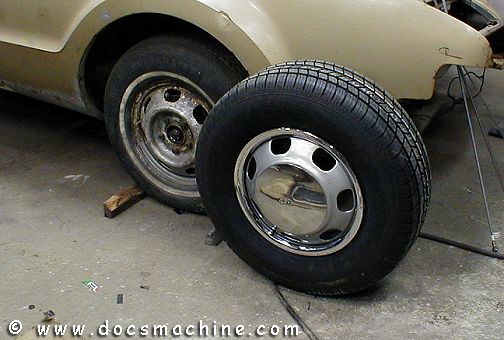
Now that I have brakes, a Throttle Linakge, the power steering is hooked up, the radiator is installed and both coolant and ATF lines are run, the exhaust is connected, and I have some shiny new rims and tires, it actually moves under it's own power! I'm still looking for the trim that goes between the bumper and fender, if anyone knows where I can get some.
The rims are a custom setup, since aftermarket "custom" rims don't exist for this car. (Due to the offset.) I took a set of seven-hole steel rims, sandblasted and painted them, added some small mounting tabs to the center section, and cut some stainless steel discs out of the middle of some old stock hubcaps. Topped it all off with some thin trim rings, and Here Ya Go!
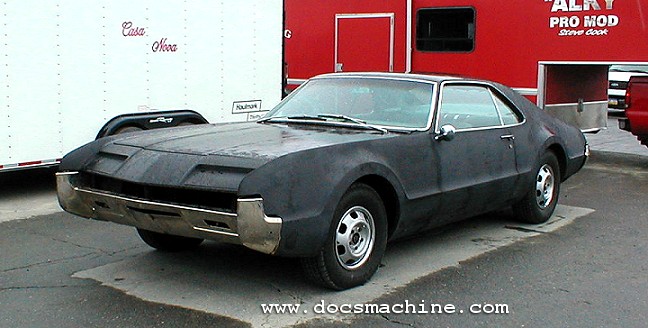
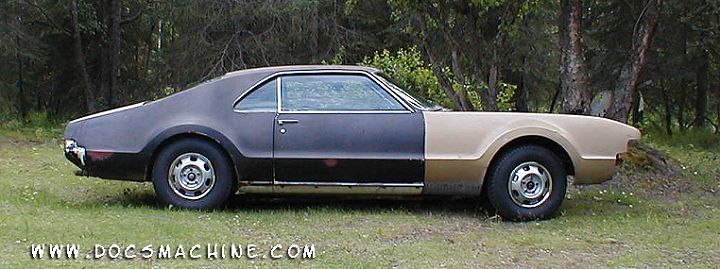
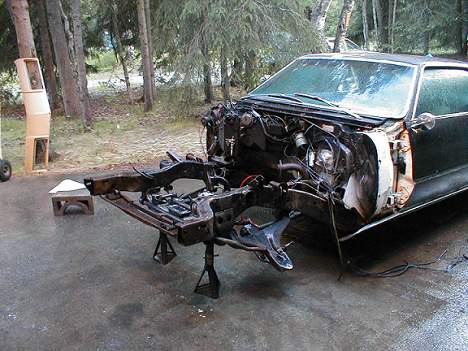
While not the first front-wheel drive car, the '66 Toronado was the first, successful, mass-production front-wheel drive American car. It was actually designed to be a "sport luxury" car, something like today's full-size Lexus'. However, being mid-60's technology, it had it's good points and it's bad. For example, it originally had a 425-cid V-8 listed at well over 350 hp, and was capable of some 130 mph. However, originally it also had weak drum brakes all the way around, made worse by a single-master-cylinder system.
My particular example here was hardly a candidate for a "restoration", having already been in at least one accident and having had much of the front sheetmetal replaced. In any case, there really are only two kinds of first-gen Toronados out there: Parts cars and restored. I haven't seen any modified any further than seatcovers and a paintjob, so I figured I'd build this badboy MY way! Among other things, I plan on painting the bumpers body color (probably black) I'll be deleting the old "pop up" headlights (which are terribly ugly when the lights are on) and blacking out some of the chrome. Not all of it, just some bits like the old wheelwell trim, the rocker moldings, and some of the badges and script. The wheels, grille (a custom unit) and window trim, among others, will be left polished and shiny. I'll also be "shaving" the doorhandles, replacing them with modern "flush mount" handles.
First to go were the brakes. The fronts received transplanted '77 spindles and discs, while the rears got a set from a '78 Eldorado. They're now powered by a '77 booster and a '76 Corvette all-disc master cylinder. A Bahr adjustable proportioning valve will keep the braking power balanced front-to-rear, especially important with the Toro's sixty-some-odd percent front weight bias. The old steel lines were nearly completely replaced with new steel lines and Goodridge braided-stainless flexible lines.
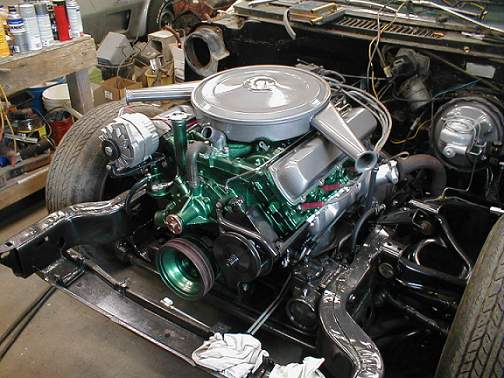
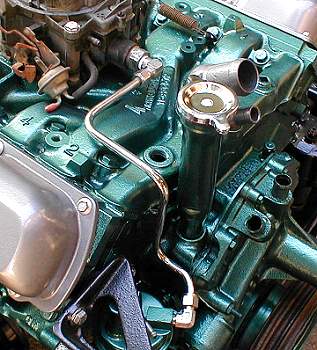
It actually has a '68 Toronado 455, instead of the car's original 425. In '68, the 455 was factory-rated at around 385 hp and over 500 ft/lb of torque. This one's actually .030" over, making it closer to a 462, and has both a Crane Fireball cam and mild porting work to the "C" heads. The Fireball was, when I built the engine, the "hottest" cam I could get and still have decent engine vacuum to run the brakes, heater controls, and other vacuum-operated accessories (such as the headlights, which were raised by large vacuum cannisters.)
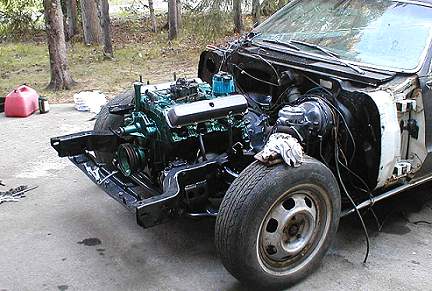
The engine only had about 3,000 miles on it after I rebuilt it some fifteen years ago, so I gave it the proverbial Krylon-rebuild, since I was already tearing the entire front end apart. I pressure washed it, painted it, did some little things like replace the valvecover gaskets and the waterpump, and replaced the old points ignition- which I'd never been able to set right- with a more modern "HEI" electronic distributor. I also pressurewashed and serviced the transmission, replaced the slightly-noisy differential with a '77 unit, and painted the motormounts. Once the engine was reinstalled, I started doing little tricks like running a stainless steel fuel line and another for the oil-pressure guage and idiot-light sender. (Visible just above the power steering pump.)
I've also replaced the old alternator and external, mechanical voltage regulator with a modern high-amperage internal regulator alternator, replaced both halfshafts, and replaced all the rubber fuel lines from stem to stern. I'm currently in the process of building a new heater-core "plenum", since I yanked the old, massive A/C housing. Once that's done, the rest of the nose will get reinstalled, and I can move on to the bodywork.