[
Return to Main Page ] [
Return to Projects Index
] [
Doc's Machine & TWB Store] [
Contact Us ]
[
The Whiteboard Webcomic
]
Grinding a Step Drill: drill and counterbore in one operation!
 I'd had a small recurring job for several months, for a local
(non-paintball) startup. It's a piece of
I'd had a small recurring job for several months, for a local
(non-paintball) startup. It's a piece of
curved aluminum that needs four
bolt mounting holes drilled- but since it's curved, I also have to
spotface a flat under each hole, so the bolt has something to properly
bear against.
I'd been doing the job with endmills, but that of course meant that I had to keep swapping tools,
or swapping the part in my fixture. After I'd gotten yet another order in, I'd decided to
make my own stepped drill, do do the entire process in one operation.
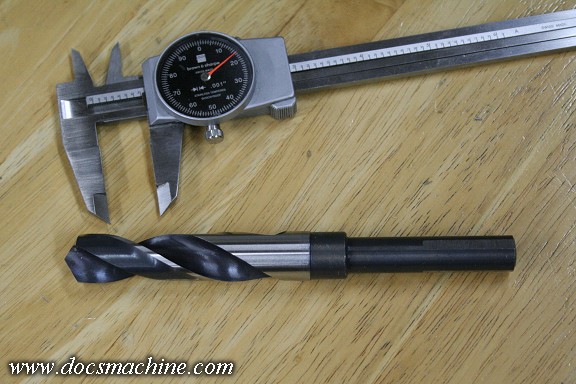
Now, the idea is simple- just reduce the tip of the drill bit down
to the thru-bore size
(in this case, 3/8".) Well, can't just chuck it
up in the lathe- even carbide won't
cut it well, especially not with an
interrupted cut like that.
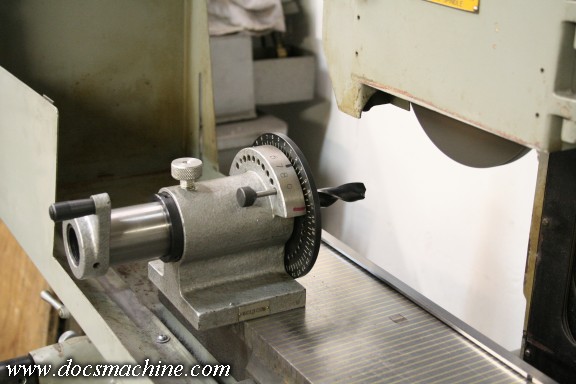 Grinding is therefore a better choice, and since it's a precision
operation, we use the surface grinder.
Grinding is therefore a better choice, and since it's a precision
operation, we use the surface grinder.
As it's round, a cheap
import "spindex" with a 5C collet holds the drill and rotates it
under the wheel.
Due to the travel of the table, I had to have the spindex hanging
off in the breeze a bit like that,
but the grinder doesn't put a lot of
force on the workpiece, so it was sufficient.
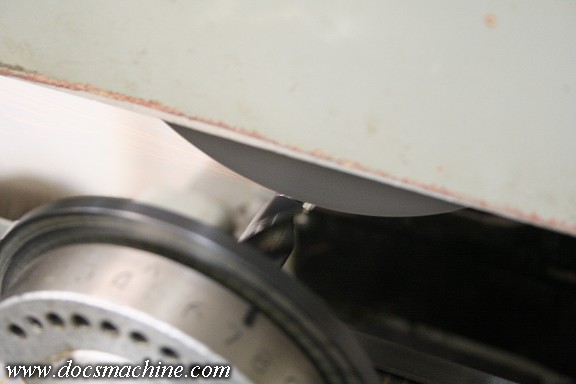 Then it was just a matter of tediously cranking, cranking and more
cranking.
Then it was just a matter of tediously cranking, cranking and more
cranking.
Then, to mix things up a bit, I cranked it some more.
 Eventually, I worried it down so I had a nice step-drill, with
what's essentially a .3745" pilot drill. (I was
Eventually, I worried it down so I had a nice step-drill, with
what's essentially a .3745" pilot drill. (I was
actually kind of annoyed
I was a half-thou off. This machine makes it easy to split hairs. :) )
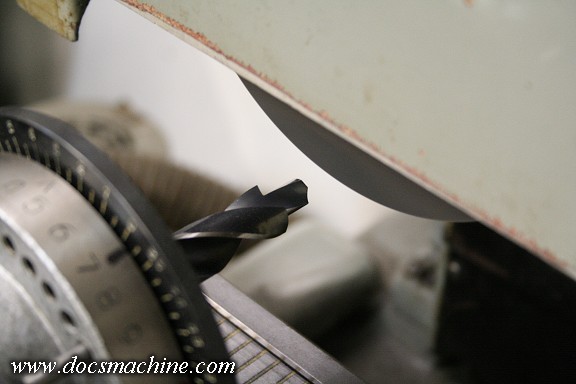
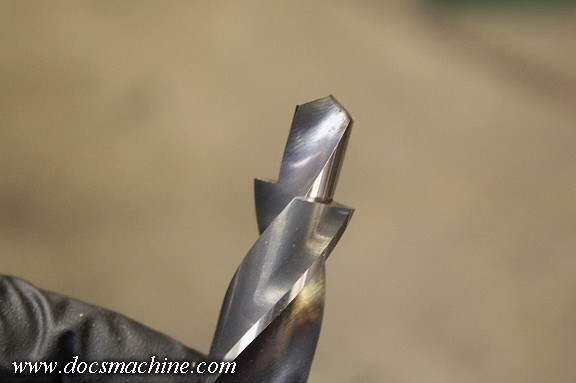 Et Voila~!
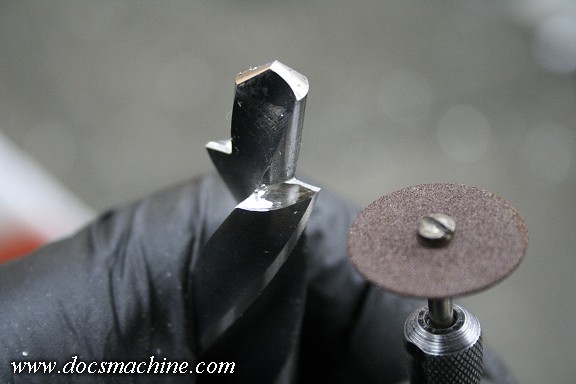 We're not done yet. The stub/pilot drill can get away without any
side clearance, as the holes are
We're not done yet. The stub/pilot drill can get away without any
side clearance, as the holes are
shallow and in aluminum. But the
cutting edges of the counterbore must have clearance, else they
can't or won't cut.
If I'd had a proper (and well-equipped) tool-and-cutter grinder, it
would have
been a trivial exercise to give each face a back rake, but I
have no such animal. So I got
out the trusty Dremel, a cutting wheel,
and with care and patience, gave each one a
rough but functional
clearance.
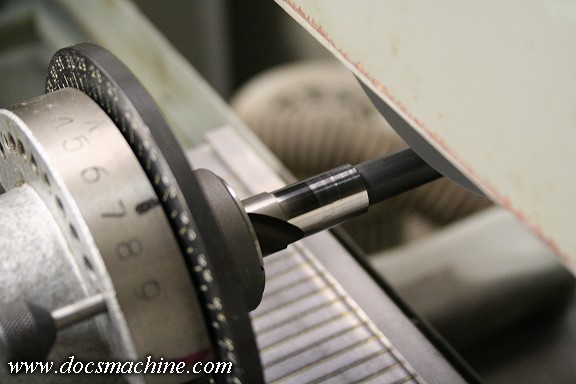 Finally, I wanted to both keep the entire tool as short as I can,
and as rigid as I can, so the tip doesn't
Finally, I wanted to both keep the entire tool as short as I can,
and as rigid as I can, so the tip doesn't
wander when it starts cutting
on the curved part. The reduced portion of the drill body between the
actual cutting OD and the drill shank proper, was .652", or plenty of
meat to turn it down ever so
slightly to 5/8".
Back in the spindex for another ride through the grinder.
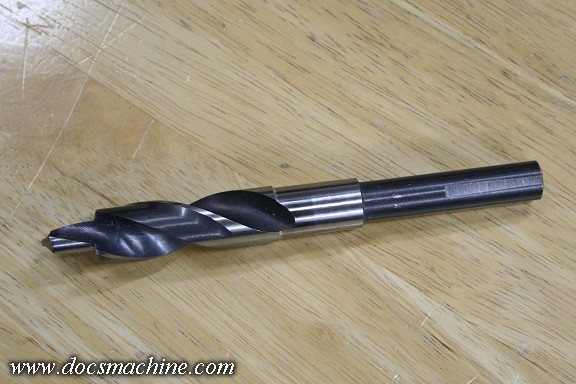 Trim about 1/8" off the end of the shank so it can seat fully into a 5/8" R8 collet, and she's done.
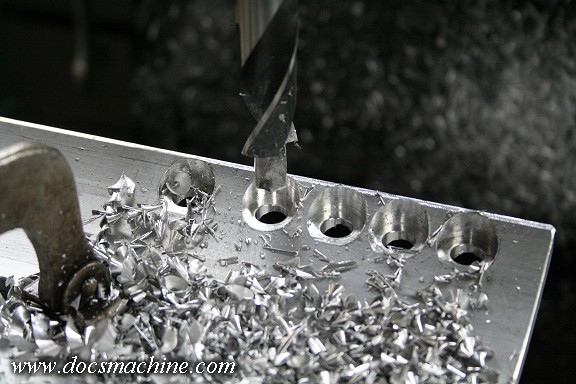 A quick test on a scrap part shows it worked... well, not great,
but pretty good, and well enough to do
A quick test on a scrap part shows it worked... well, not great,
but pretty good, and well enough to do
the job. I eventually added more
rake to the counterbore faces, as it seemed to take a lot of effort to
cut.
Overall, it reduced the per-part time by at least a third. (There was
more to each one than just the drilling.)
All text, photos and graphics
Copyright 1998- 2018, Doc's Machine & Airsmith Services. All Rights
Reserved.
Information contained in
these pages is for reference and entertainment
purposes only. Our methods are not always the best,
quickest, safest, or even the correct ones. It's up to you to know how
to use your own machines and tools.
Keep your fingers away from the spinny blades o' death and you should
be all right.


