[
Return to Main Page ] [
Return to Projects Index
] [
Doc's Machine & TWB Store] [
Contact Us ]
[
The Whiteboard Webcomic
]
Rebuilding A Junkyard 455 On The Cheap, Part 2:
With the block mostly ready to go, now I needed some heads. Unfortunately there's not much of a hotrodder
group around here, and virtually nobody has any old Olds parts- they've all been junked or recycled years ago.
So my choices were slim, unless I wanted to pay astronomical shipping prices for parts from the States.
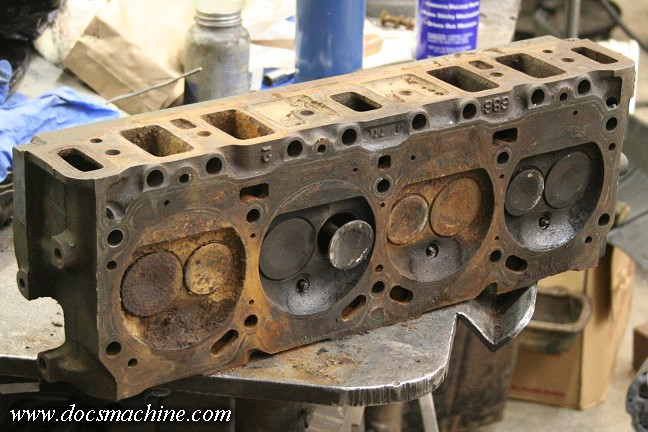
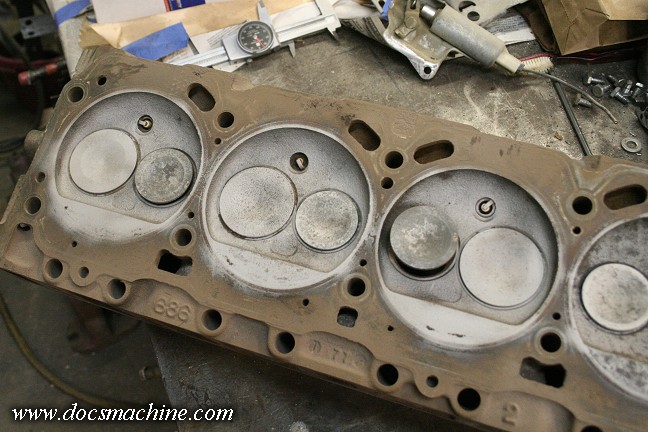
Eventually I was able to find these, a set of smog-era E heads that had been left outside to 'season' for a
couple of years. Not my top choice, but they were cheap, and again, I'm not making a race engine here.
I suspect these had been left on an engine that was itself left out in the weather, so several cyclinders
got filled with water- note the gasket sealing surface is mostly rust-free.
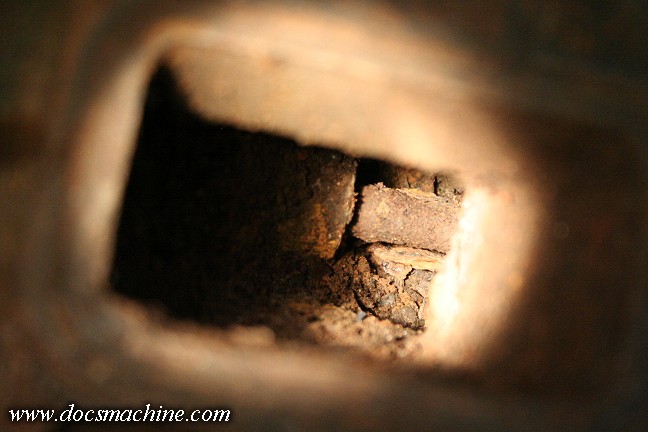
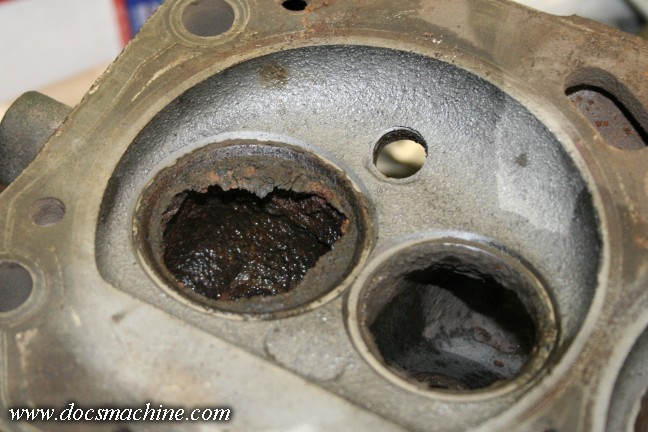
Several of the ports were badly encrusted, almost to the point of being clogged.
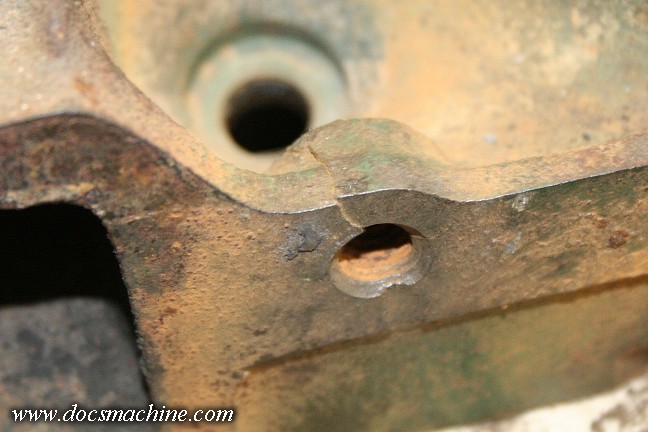
Thankfully, however, the only crack was here, on one of the center exhaust port bolt bosses.
I'll patch that up with a little Muggeyweld rod and retap the hole.
 I ran 'em through the beadblaster to give the chambers a
preliminary cleanup, and tried to
I ran 'em through the beadblaster to give the chambers a
preliminary cleanup, and tried to
do what I could by blasting into the
ports. That got most of the loose stuff out.
 Then it was some WD-40, a little heat, and a big honkin' hammer to
get the valves loose and removed.
Then it was some WD-40, a little heat, and a big honkin' hammer to
get the valves loose and removed.
(Actually, only two or three were
truly stubborn, the rest were just sticky from dried oil and carbon.)
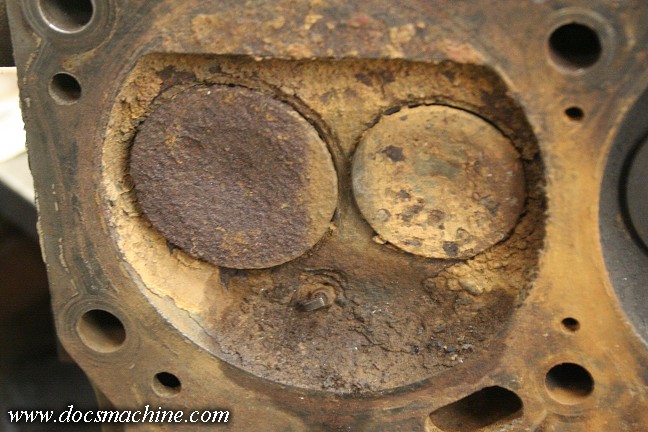
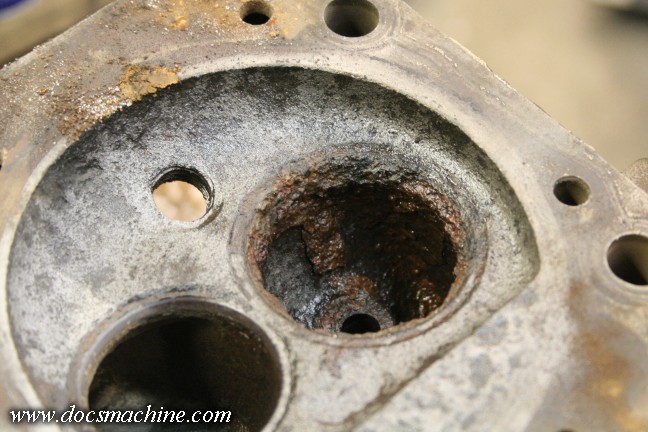 You can see, however, that the rust has damn near killed a couple of the seats.
That should be repairable by machining them out to the big-valve size; 2.072" rather than these 1.97".
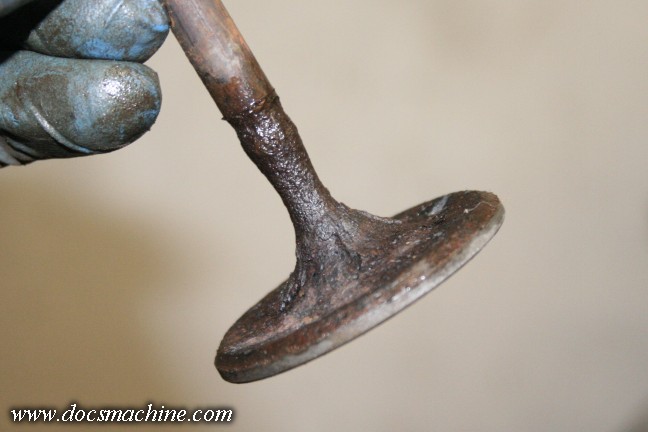
Speaking of the valves, you can see how the rust flaked a couple so bad the stem is down to half it's original size.
 Ultimately, they proved to be in good shape. I blasted 'em some
more, hit the machined faces with a Scotchbrite
Ultimately, they proved to be in good shape. I blasted 'em some
more, hit the machined faces with a Scotchbrite
wheel (I'd have
the decks machined flat anyway) brushed out the guides and degreased and
pressure washed 'em.
No other cracks were found, the guides have some
wear but not significant, no threaded holes were stripped, etc.
They're not the best choices I could have used, but again, this is for a daily-driver motor, and I'm trying
to put it together on a budget. Besides, I can grind part of the "E" off and make 'em into fake
ultra-rare "F" heads, to go along with the "you're not fooling anybody" fake "442" Cutlass. :)
All text, photos and graphics
Copyright 1998- 2017, Doc's Machine & Airsmith Services. All Rights
Reserved.
Information contained in
these pages is for reference and entertainment
purposes only. Our methods are not always the best,
quickest, safest, or even the correct ones. It's up to you to know how
to use your own machines and tools.
Keep your fingers away from the spinny blades o' death and you should
be all right.


