[
Return to Main Page ] [
Return to Projects Index
] [
Doc's Machine & TWB Store] [
Contact Us ]
[
The Whiteboard Webcomic
]
Converting a Logan 11" x 32" Lathe over to full CNC, Part 17:
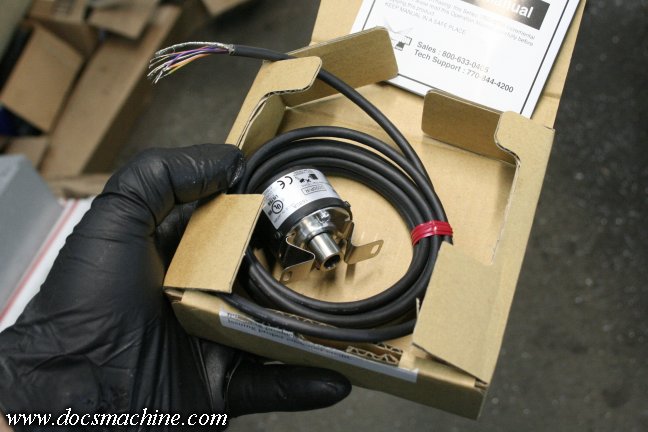
In late summer of '17, Centroid, a well-respected manufacturer of quality industrial-level CNC
controllers, announced a new DIY/conversion-level CNC controller board called the Acorn.
It promised quite a few pretty significant benefits, one of the biggest of which, for me, was the use of a proper
spindle encoder. Mach 3 could only use a single-point signal; that is, one data point per revolution- this is far
from ideal for threading, and makes rigid tapping basically impossible. The new Acorn board, however, can
take proper encoders- in this case a 2000-line quadrature encoder, for 8,000 data points per revolution.
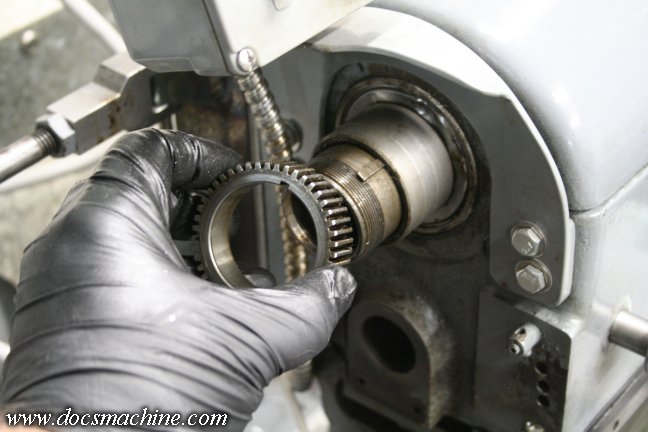
The encoder needs to be driven 1:1 from the spindle, and since we want to preserve the ability to run bar stock
through the spindle bore, that means setting up a belt drive to offset the read head to the side. On my Logan,
I figured I'd simply replace the original drive gear off the back of the spindle, with a timing belt pulley.
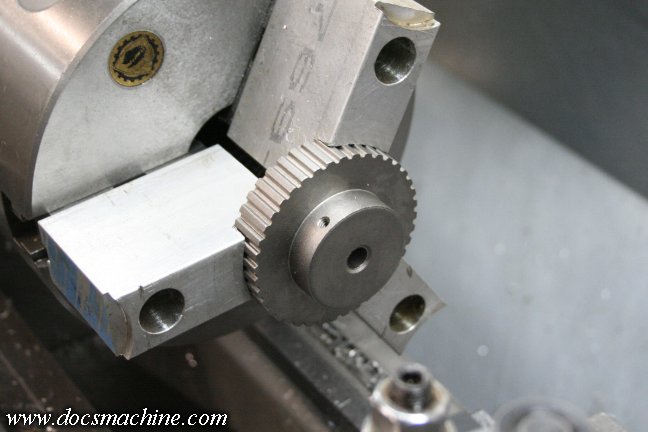
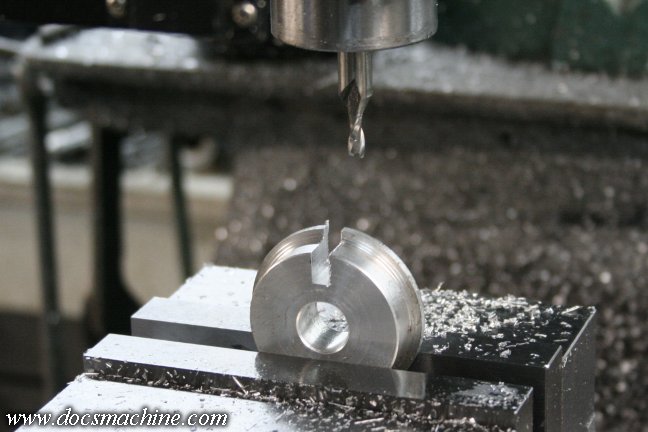
I found and ordered a couple of small toothed-belt pulleys of an appropriate size from McMaster-Carr, and
when they arrived, set up some soft jaws to hold them for boring out to the spindle size.
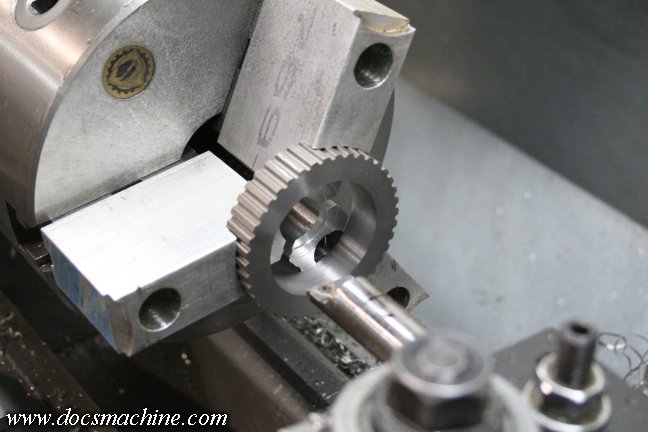
And done, bored to 1.251" on the nose.
I needed to broach a 1/8" keyway to match, and luckily had this bit of scrap from the bin
that was exactly the right size. I just had to mill a slot to guide the broach.
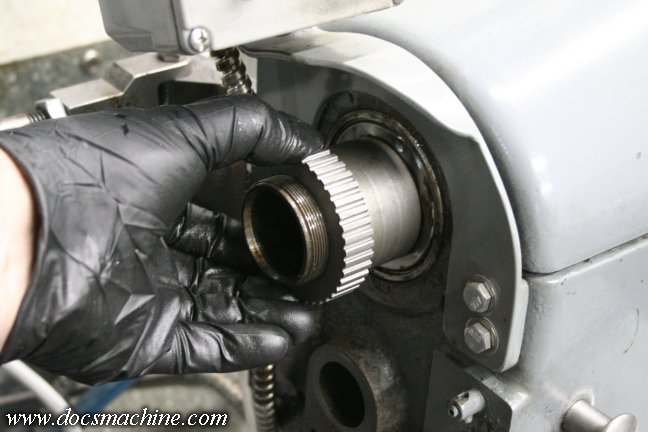
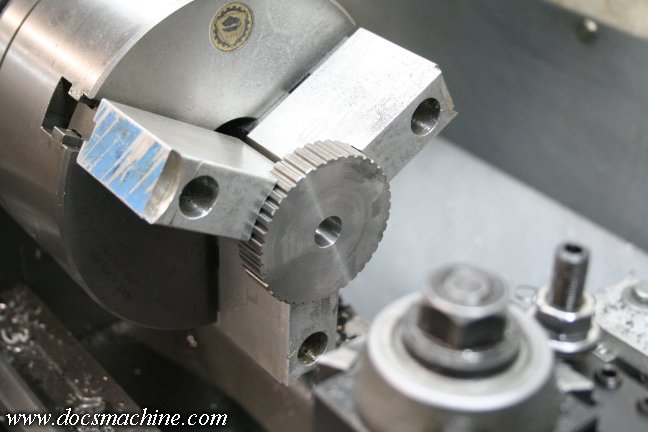
Once the keyway was broached, the new pulley slipped right into place...
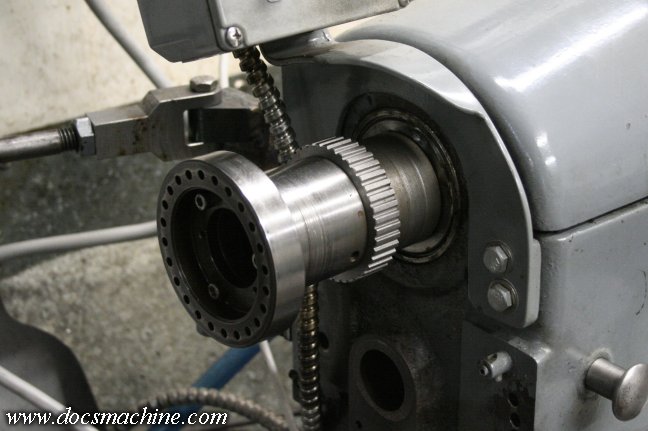
And the collet-closer adapter screws on and holds it snugly.
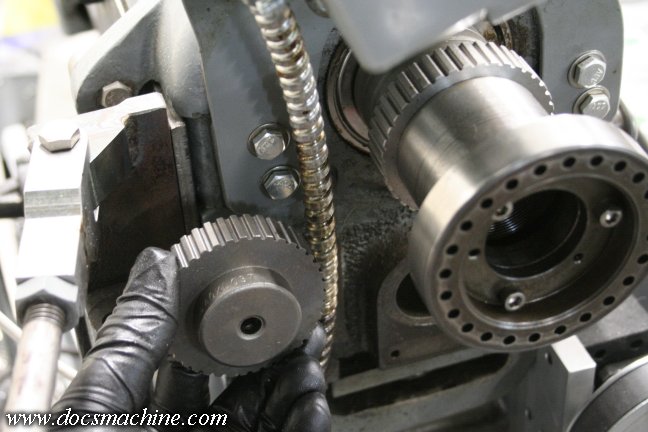
Now, we have to come up with a way to hold the encoder and the other pulley. The Koyo encoder I bought
is "light duty", and shouldn't necessarily be used as an "axle" to support the pulley and belt. So I pondered,
and came up with what I thought was a workable solution. I decided to set the encoder just a little off to the
side of the spindle, so that if I ever used coolant, it wouldn't drip out of the through-hole onto the read head.
This time, I turned the "step" off the pulley and bored it out to .500".

I then turned a short shaft out of some scrap-box mild steel, gave it about a 0.002" interference fit
and pressed it into place.

That then got carefully turned down on both ends to snugly accept a small sealed bearing on each side.
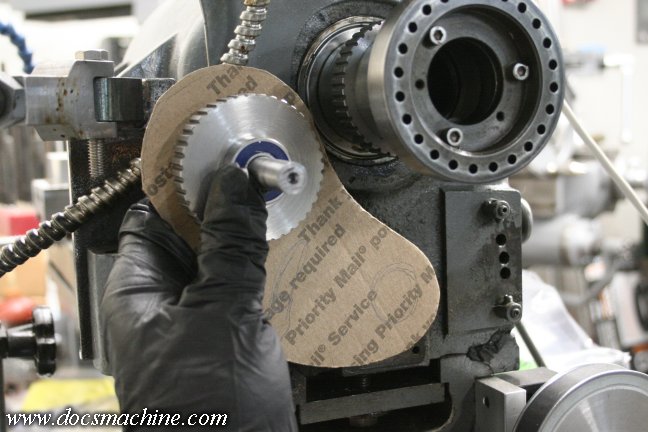
And now it was time to design a mounting bracket. Not wanting to drill and tap any new holes in the headstock,
I elected to use the back-gear shaft bore as a pivot (the geartrain tumbler used it as a pivot previously) and
will use a second threaded hole to it's left as an adjuster slot bolt. With that in mind, I got out a bit of scrap
cardboard and some scissors and scribbled up something that looked somewhat workable.
All text, photos and graphics
Copyright 1998- 2017, Doc's Machine & Airsmith Services. All Rights
Reserved.
Information contained in
these pages is for reference and entertainment
purposes only. Our methods are not always the best,
quickest, safest, or even the correct ones. It's up to you to know how
to use your own machines and tools.
Keep your fingers away from the spinny blades o' death and you should
be all right.


