[
Return to Main Page ] [
Return to Projects Index
] [
Doc's Machine & TWB Store] [
Contact Us ]
[
The Whiteboard Webcomic
]
Building- slowly- a Classic KMG-Style 2" x 72" Belt Grinder, Part 2:
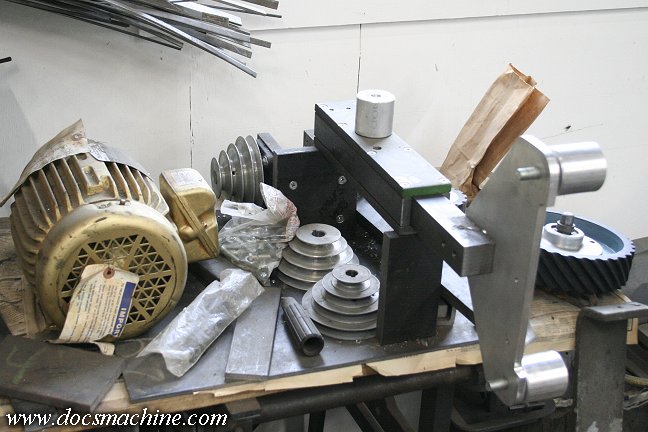
After the pulley, the only other parts I managed to do were a few of the idler wheels. The rest of the
time it just... sat. Too many irons, not enough fire. :) Fast-forward to 2018, closing in on ten years (!)
since this little project started, and I finally decided to dust it off again.
Fortunately, when I had the steel cut, I'd labeled each piece, which has helped me keep
track of all the pieces over the years, and not wind up using them on other projects.

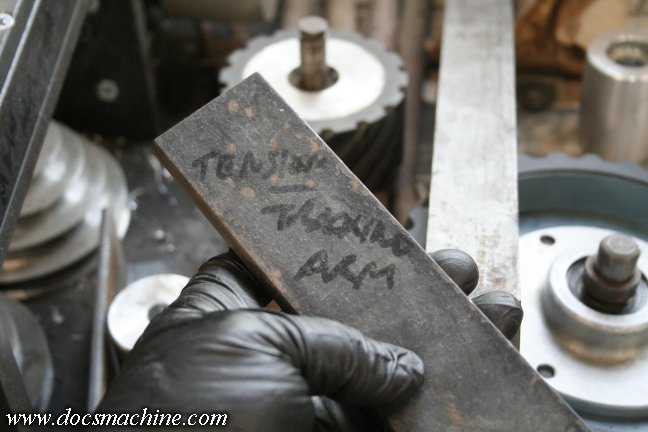
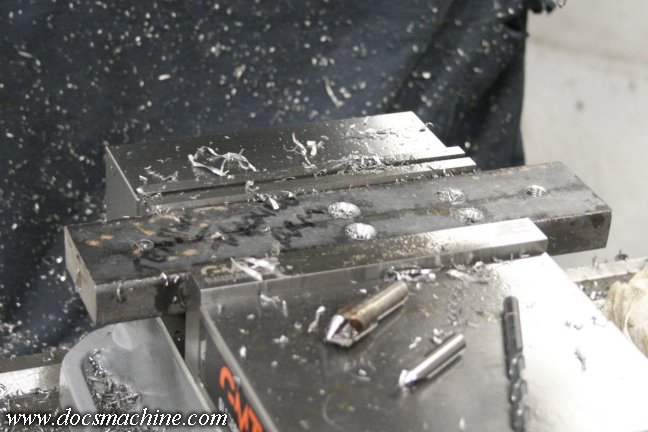
So, I found my dusty copy of the plans I'd downloaded all those years ago, found the next part that
needed to be made, and set to it. Here, I'm milling the slot in what will become the tesioner-arm
support block, using my recently-rebuilt
Exacto mill.
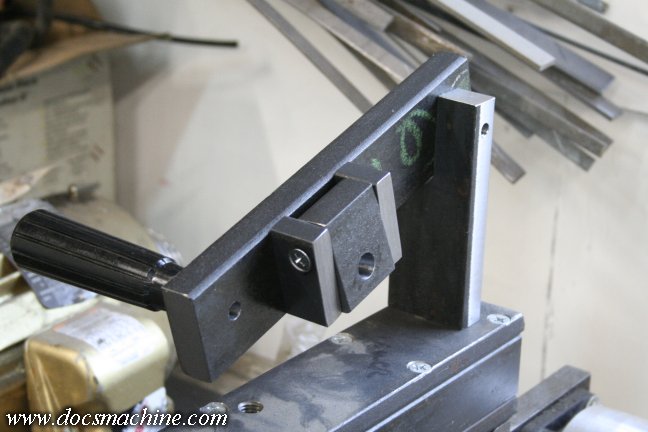
After that, the tensioner arm itself gets a scattering of holes drilled and in some cases tapped...
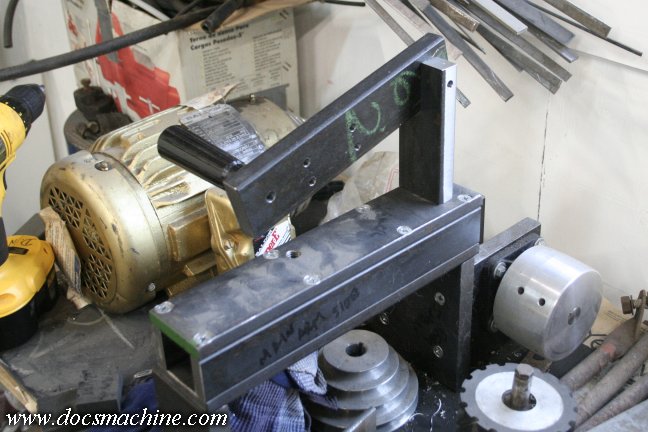
And then she's bolted in place. The black handle is something I found at the local secondhand
shop and bought specifically for this project. For a whopping sixty-nine cents.
Three more pieces drilled and tapped and we have the tracking adjuster. This idler is allowed to pivot
up and down on a setscrew, which helps keep the belts 'tracking" properly on the wheels.
Not all belts 'track' the same, so it's necessary to be able to adjust it easily.
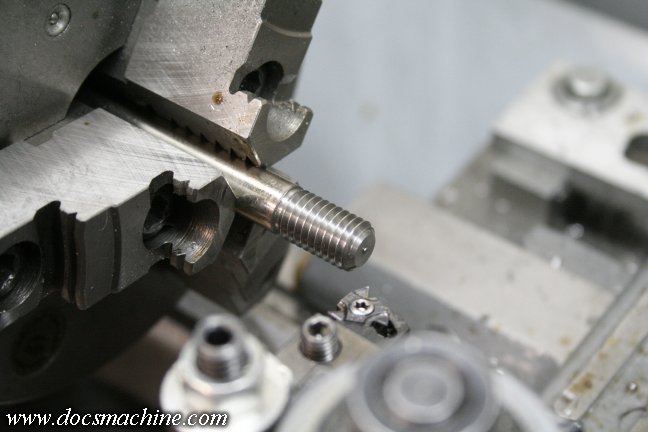
One place I deviated from the plans was in the axle for the tracking wheel. The instructions just wanted the
block tapped to 1/2"-13, and you just use a bolt to affix the wheel. The problem is, the shank of the typical
bolt is usually smaller than 1/2", and the bearings can 'rattle' on the shank- you can't tighten them down
too much or you add drag on the bearings. So I found a chunk of .499" free-machining steel in my
scrap bin, and single-pointed some 1/2" coarse threads on one end.
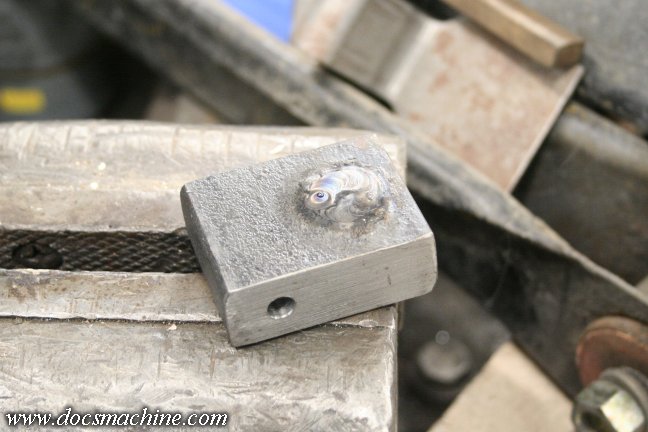
I'd bored out the block to exactly .500", so I just slipped the shaft in, and TIG welded them together.
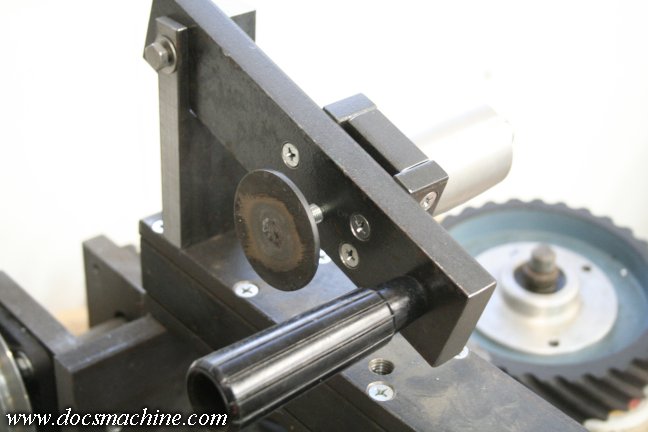
For the adjuster, I could have gotten fancy, but for the time being, I just parted off a section of 3/8"-24
allthread, and TIG welded a big fender washer to it as a quick-and-dirty knob.
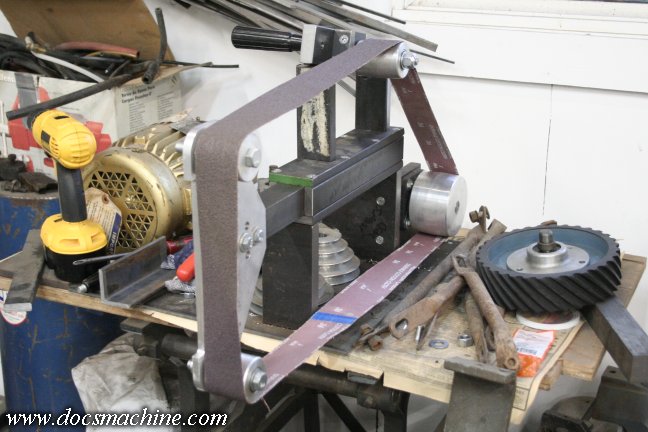
And, for the very first time since this projects started nearly ten years ago, she's finally got a belt on 'er.
Yeah, it's just a mock-up for the moment- I still need a spring for the tension adjuster, a clamping
bolt for the tool arms, a motor mount, a tool rest... :)
All text, photos and graphics
Copyright 1998- 2018, Doc's Machine & Airsmith Services. All Rights
Reserved.
Information contained in
these pages is for reference and entertainment
purposes only. Our methods are not always the best,
quickest, safest, or even the correct ones. It's up to you to know how
to use your own machines and tools.
Keep your fingers away from the spinny blades o' death and you should
be all right.


