[
Return to Main Page ] [
Return to Projects Index
] [
Doc's Machine & TWB Store] [
Contact Us ]
[
The Whiteboard Webcomic
]
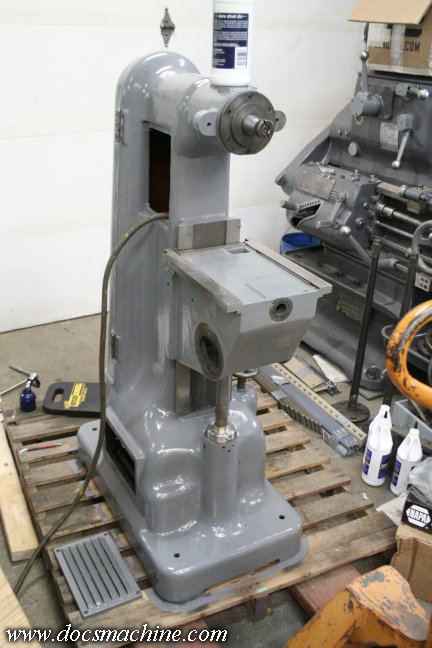
Rebuilding an early Covel Type 15 Surface Grinder
Part 4
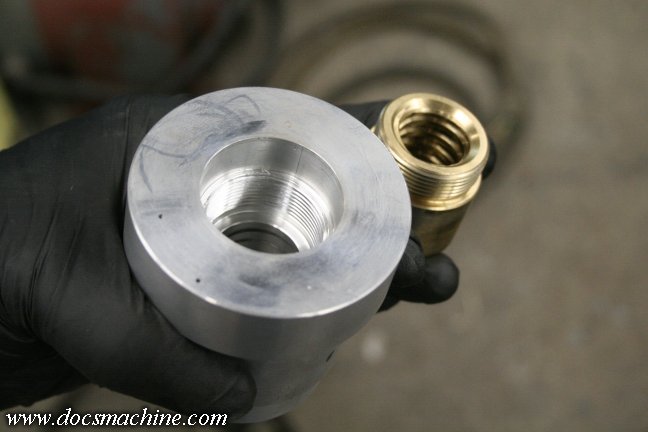
Moving back around to the front, we take a fresh look at the new knee screw and nut I'd made back in 2010.
The original nut was a large bronze casting, that had been damaged at least once, repaired, and as I recall,
had been badly "reseated" with both poured lead and later, epoxy. I pried that mess out years ago, and
came up with this to replace it: An aluminum "slug" to fit into the cast-in boss at the base of the machine,
threaded to accept an off-the-shelf bronze ACME nut.
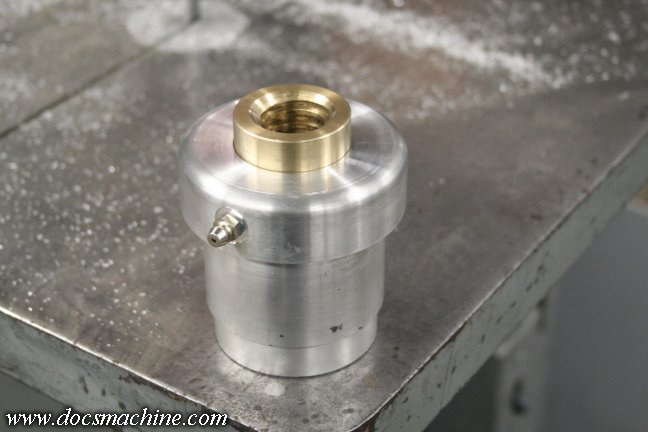
To make it properly ready, I unscrewed the nut, rounded the corner of the aluminum slug just for
aesthetics, cleaned both parts well and reattached the nut with Loctite and tightened it.
I then drilled and threaded it for a grease zerk to finish it off.
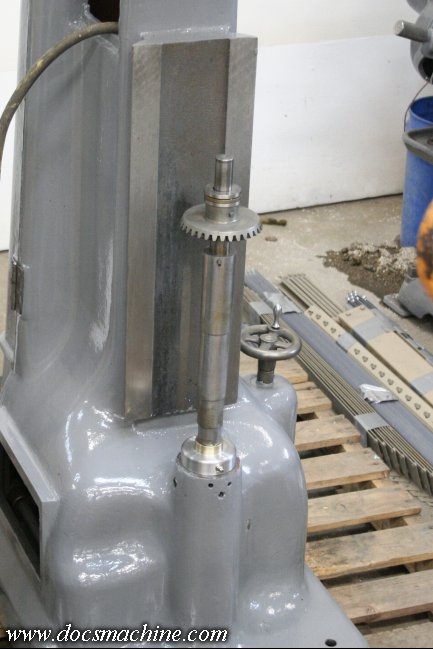
The screw itself had been fabbed years before, cutting off the old worn
screw, boring it, and shrink-fitting it to a new section of ACME allthread.
I'd heat-shrunk it back then, but before final assembly, I popped it in the
hydraulic press (which I didn't have back then) and made sure they were
well and truly seated.
Then it was a simple matter of cleaning up the telescoping screw cover,
and threading the rod partway into place.
After that, the already long-ago cleaned and repainted knee
could be set into place...
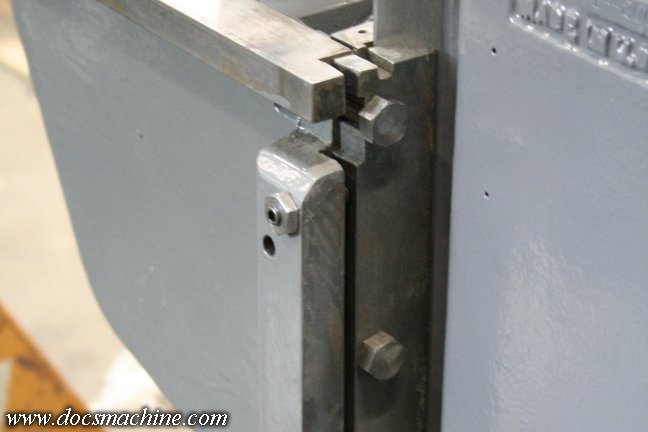
And affixed with it's removable gib and adjuster screws.
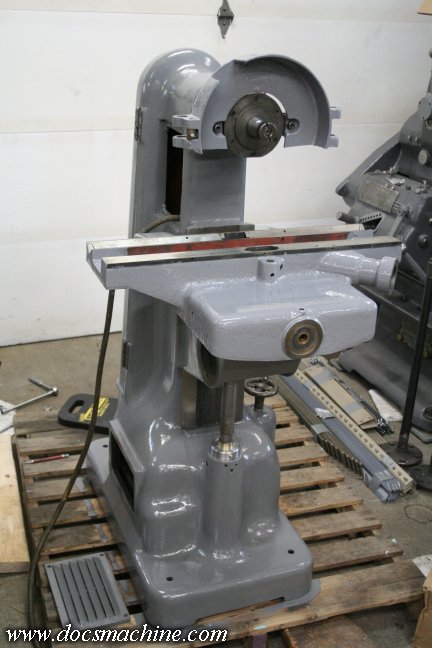
The saddle was then pressure washed, scrubbed, washed again, set onto
the knee, and then carefully painted. The wheel cover was also installed.
The original hinge pin had been lost at some point, replaced with an incorrect bolt before I got it.
I found a proper bolt, cut it to the correct length, and added a Nylock nut to keep everything in place.
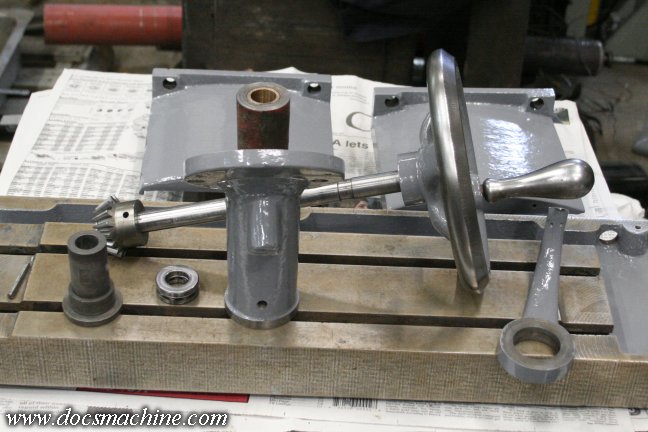
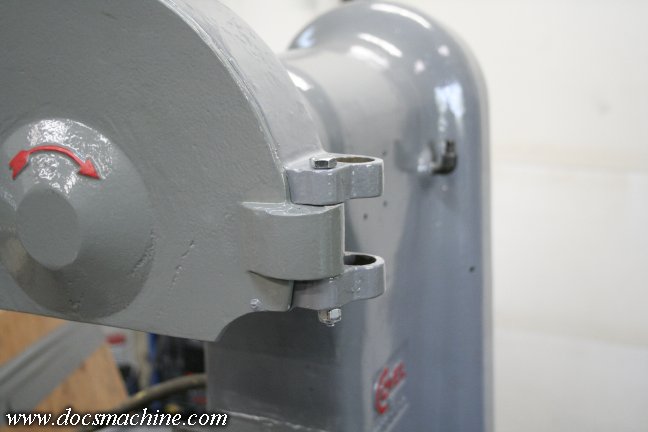
Then it was a few interesting minutes of "hide and seek" to find all the parts to the knee lift handle assembly,
figure out how they all fitted together, then clean and paint them. Turns out the thrust bearing, at the left,
did NOT go with this assembly. :)
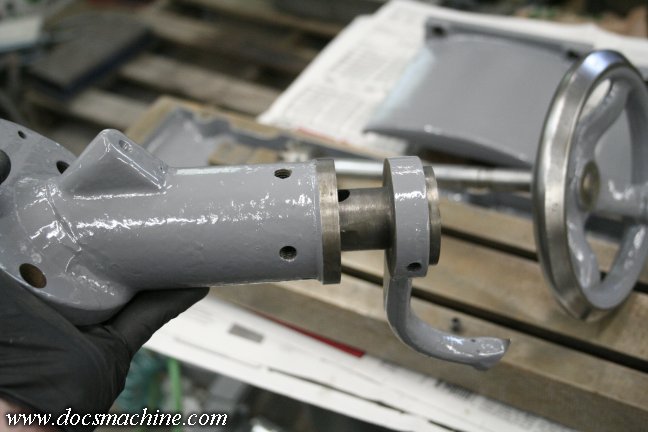
The internal collar slides in, with the open oil hole facing to the left (up, in this picture)
and a locking setscrew flat facing down (toward the viewer, in this pic.)

The setscrew then holds everything into place.
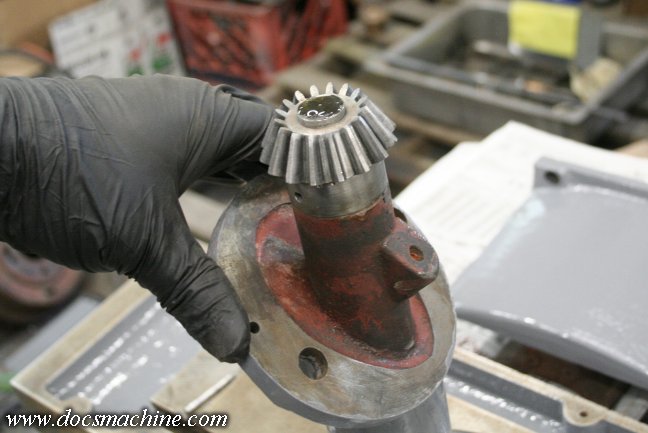
The handwheel and shaft are well-oiled and slide into place, capped off with the bevel gear,
which is held in place with a taper pin and a setscrew.
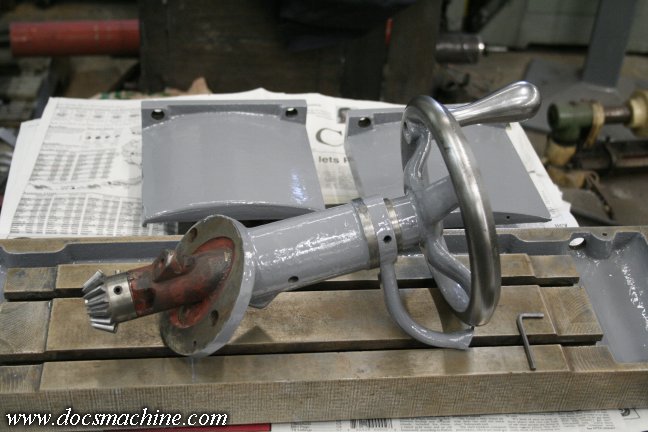 Et voila`!
 That's all there is to it.
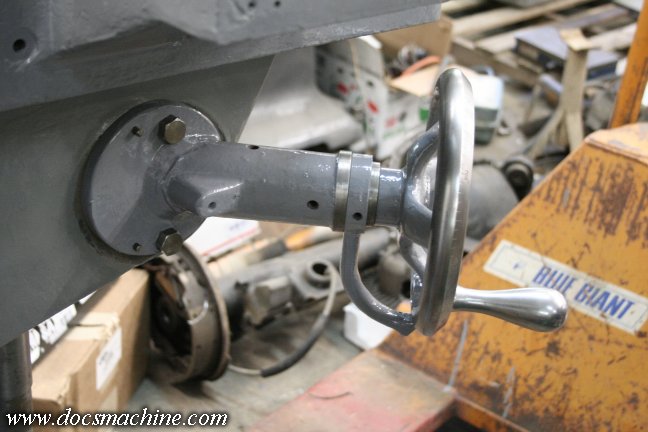
The assembly simply bolts to the side of the knee, with the bevel gear meshing with the gear on the knee
screw. Note, however, the two taper pins to the left of the two mounting bolts- those help align the
assembly so the gears mesh properly, and should be installed first before the bolts are tightened.
All text, photos and graphics
Copyright 1998- 2017, Doc's Machine & Airsmith Services. All Rights
Reserved.
Information contained in
these pages is for reference and entertainment
purposes only. Our methods are not always the best,
quickest, safest, or even the correct ones. It's up to you to know how
to use your own machines and tools.
Keep your fingers away from the spinny blades o' death and you should
be all right.


