Rebuilding and Upgrading a Jet JMD-20VS Mill-Drill, Part 1:
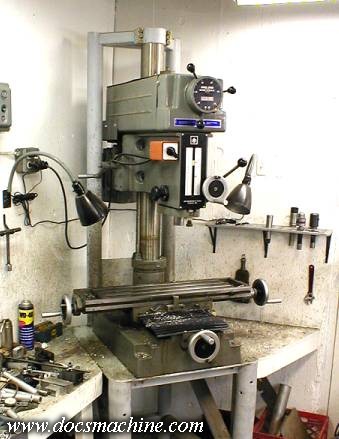
Many years ago, my first mill was this Jet JMD-20VS-1 variable-speed mill-drill. It was adequate,
and I made a great deal of parts and mods with it, but within a relatively short time- three or four years
at best- I had pretty much worn it out. The spindle bearings were loose, and several components in the
variable-speed drive had worn out to the point of rattling. I eventually replaced it with a full sized
Bridgeport clone, which was far and away a better machine.
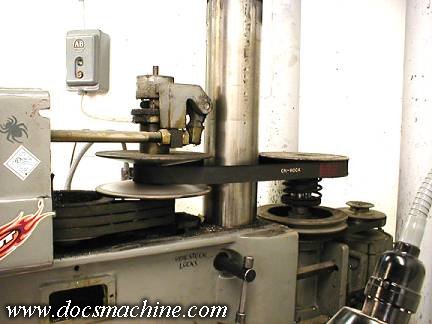
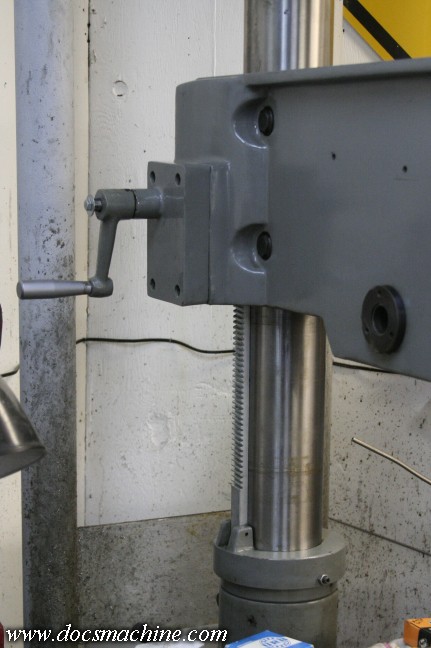
This particular style of mill-drill was essentially a lightly altered copy of a Clausing industrial
drill press. The dial on the front of the machine pushes on the rod seen here on the left, which
forces those two pulley halves together or lets them move apart. That alters the pulley ratio, and
thus the spindle speed. The rear pulley is spring loaded to compensate as the belt moves.
What went wrong? Well, the motor's start capacitor was going out, which caused the occasional
blown breaker. The bearings on the motor-to-VS jackshaft are worn and noisy, and the pulley is
loose enough to rattle. The wide belt is worn, and the bearings at both the VS assembly and the
spindle drive were both worn and noisy. The pushrod assembly was stiff from old dried grease
and the spindle bearings themselves were going bad. But hey, other than that... :)
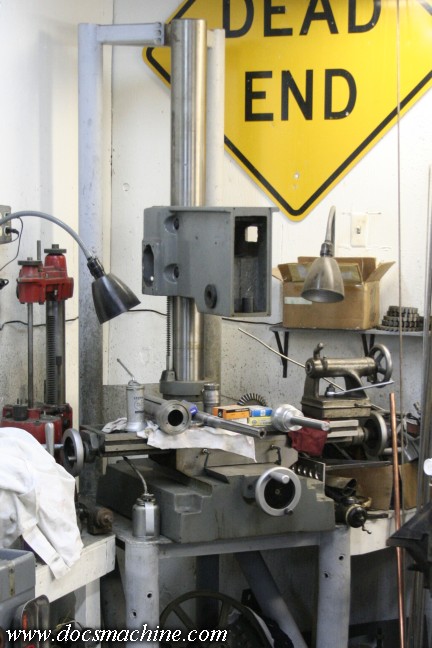
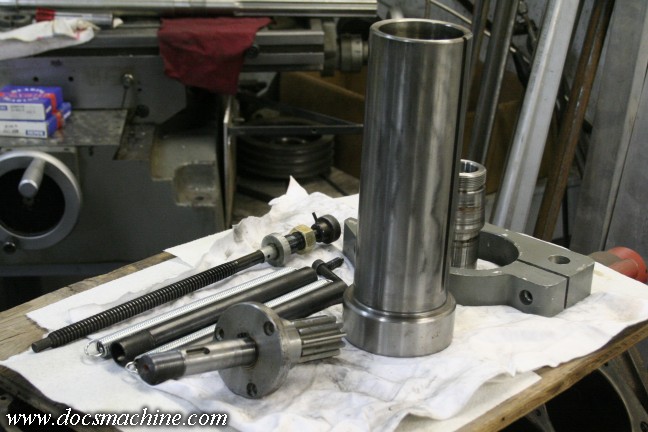
I'd dismantled the machine years ago for a fairly comprehensive rebuild, but
with my work schedule, it was several years before I was able to do anything
more than clean a few parts, but eventually I decided it was time to piece it
back together. As shown above, it had been sitting for quite a while, but I'd
been able to obtain some new spindle bearings, and set to starting the rebuild.
Being a mill-drill, the head travels on a round column, raised and lowered by a rack-and-pinion arrangement.
The round column allows the head to swing from side to side- useful for certain milling setups, but
it also means you "lose your zero" when unclamping the head and cranking it up or down.
Some mill-drill owners will thus try various tricks like pinning or screwing the 'rack' to the column, so
the head can no longer swivel. I'd thought about doing the same, but the swivel is, at times, useful
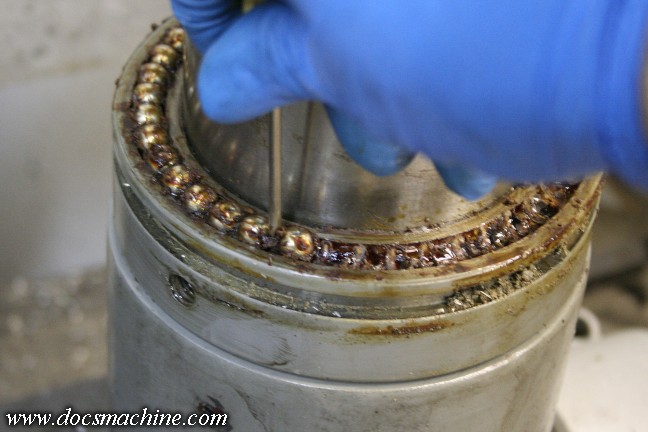
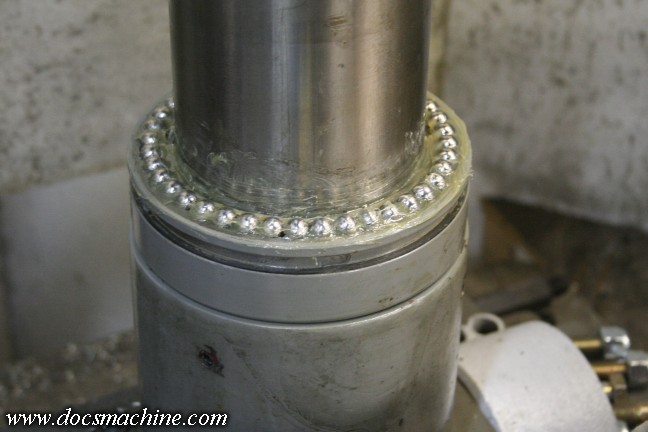
so I decided to leave it as is, for now. However, the lower mount for the rack rides on a
ball-bearing track, which allows the head to swivel smoothly. And in my case, the grease
in the old track had dried out and hardened to the consistency of glue.
I actually had to pry the balls out of the track with a small screwdriver.
Fortunately, the old grease was easily dissolved by some good solvent,
and once cleaned, the balls still looked like new.
Then it was a simple matter of just applying some fresh grease
and setting all the balls back into their track.
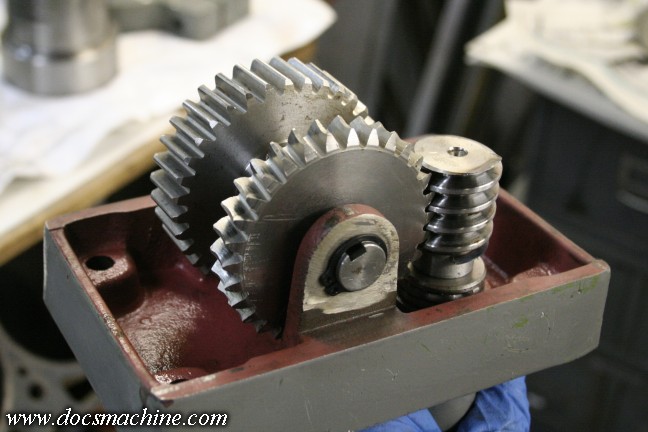
For the upper part of the rack, the crank mechanism for raising and lowering the head
was still in fine shape, with no appreciable wear. I would like to add some grease points
or oil cups, but for the moment it just needed a good cleaning and some fresh lube.
Eventually I will probably add two grease zerks or oil cups;
One for the shaft of the crank, and one that will drip down on the worm gear.
Also note how the rack doesn't extend past the head casting. I had, in the past, run out of
height on occasion- one can't raise the head higher than the end of the rack without external means.
I will probably add a spacer to the bottom, to raise the bearing track up several inches,
and thus adding several inches of upward travel.
Apart from the bearings, I was fortunate in that the spindle was in overall
good shape and needed little more than a good cleaning.
All text, photos and graphics
Copyright 1998- 2017, Doc's Machine & Airsmith Services. All Rights
Reserved.
Information contained in
these pages is for reference and entertainment
purposes only. Our methods are not always the best,
quickest, safest, or even the correct ones. It's up to you to know how
to use your own machines and tools.
Keep your fingers away from the spinny blades o' death and you should
be all right.