[
Return to Main Page ] [
Return to Projects Index
] [
Doc's Machine & TWB Store] [
Contact Us ]
[
The Whiteboard Webcomic
]
Building a Fake W-27 to go under the Fake 442, Part 3:
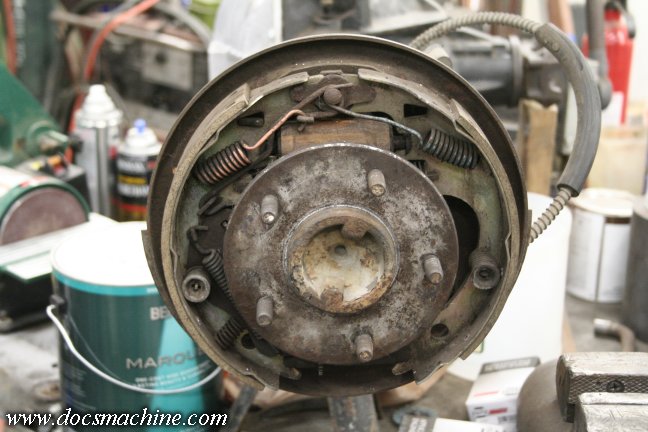
With the pumpkin done and the bracket fix taken care of, the only thing left to do was service the brakes.
The pads that came with it were in pretty good shape and
clean, so I figured I'd reuse them. To be on the
safe side, though, I'll replace the wheel cylinders since that's cheap insurance.
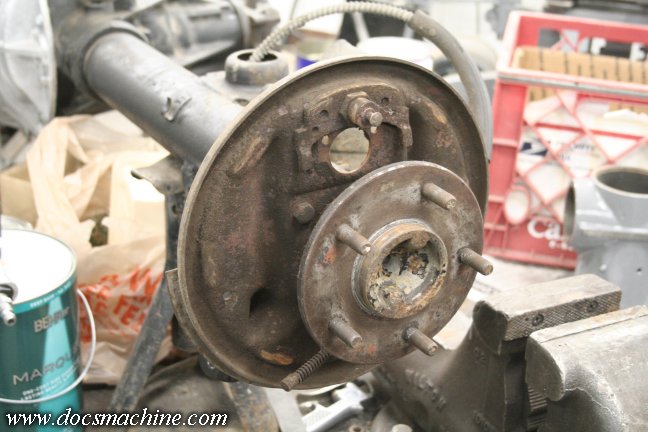
So, the first thing to do is strip it all off of there, and brush some of the loose crud away.

Then... just kind of put it all back together again. :) A brand new wheel cylinder with some new
Grade-8 bolts, a quick wash of degreaser on the pads, and that's about all she needed.
I suspected the brakes had been recently rebuilt before the previous owner removed
the axle, since it was all fairly clean inside, and the pads had barely broken in.
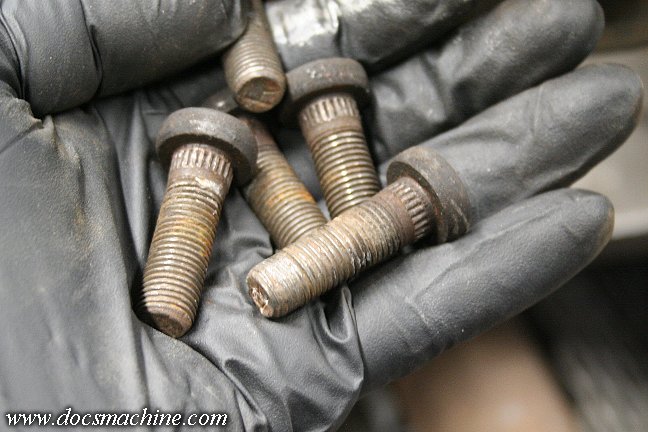
On the passenger side, however, one extra little bit that showed up was the discovery that one
of the wheel studs was badly stripped, and all five were loose. So I tapped 'em out, bought
five new replacements, and just pressed 'em back in.
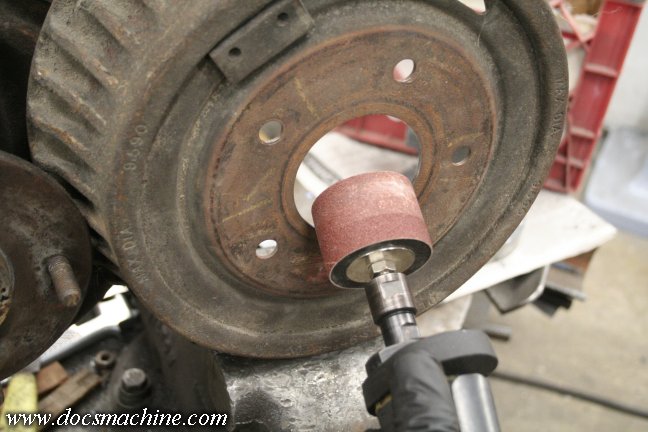
One of the other upgrades I did want to do was to swap the stock "smooth" drums for a pair of
finned drums off a larger GM car. The fins, of course adding surface area to improve cooling.
Again, I have no intention on racing this car, so the drums should be more than sufficient.
It's still worth the swap to the finned drums though, as I already had 'em. :)
Turns out I had to very slightly relieve the center hole so that it would properly seat on the axle flange,
a task easily taken care of with an air grinder and a large sanding drum. It only needed a few thou.
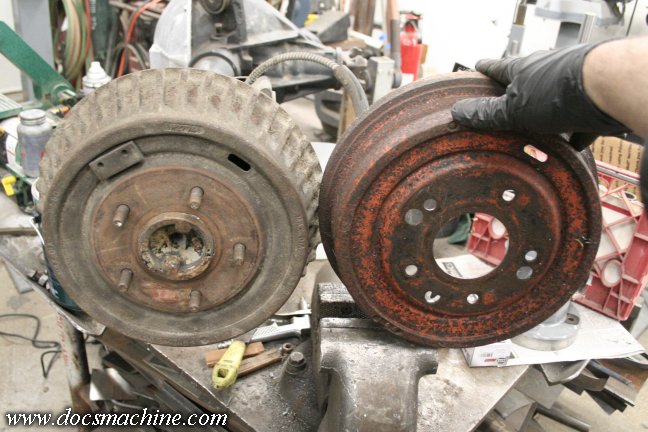
And it's just that easy. As a bonus, the finned drums had already been turned, too.
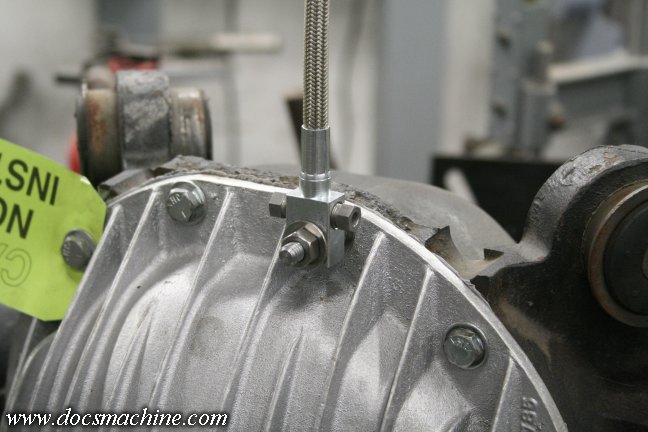
The last bit being running the brake lines. Like the front, I'm using braided-stainless lines instead of the
original rubber, as well as copper-nickel tubing and stainless flare nuts. To start with, I swapped one of
the cover bolts with a 5/16" stud, and using some stainless hardware, mounted the brake line
block in a rough approximation of the original location.
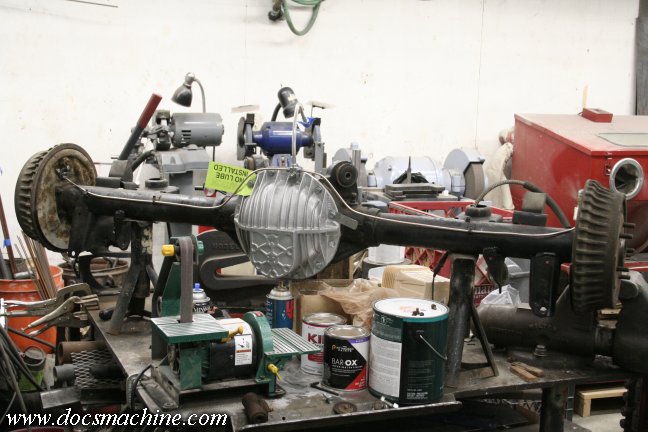
After that, it was an easy matter of running two lengths of copper-nickel line from the wheel cylinders
to the center block, and clipping it into the original brake line tabs. That pretty much finishes the axle!
(Also note the period-correct reproduction "use limited slip fluid" tag on the right.)
All text, photos and graphics
Copyright 1998- 2018, Doc's Machine & Airsmith Services. All Rights
Reserved.
Information contained in
these pages is for reference and entertainment
purposes only. Our methods are not always the best,
quickest, safest, or even the correct ones. It's up to you to know how
to use your own machines and tools.
Keep your fingers away from the spinny blades o' death and you should
be all right.


