[
Return to Main Page ] [
Return to Projects Index
] [
Doc's Machine & TWB Store] [
Contact Us ]
[
The Whiteboard Webcomic
]
Saving a 1943 Springfield Engine Lathe, Part 19:
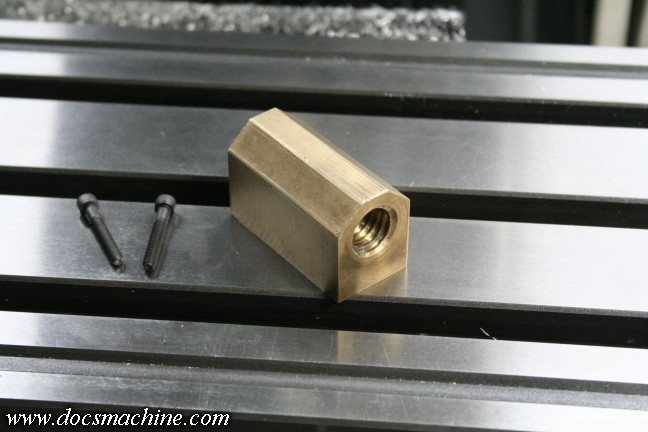
As I'd said, the nut I'm pretty sure had already been replaced- whereas other brass/bronze parts on the machine
had been cast, this was clearly a block that had been machined to shape. Also, I was kind of surprised to see
there was no mechanism to adjusting for wear. I have no idea if the original nut had such a thing, but given the
size and quality of the rest of the machine, I'd have expected something. (Then again, I'm making an assumption
that it's not the original nut, so I may be wrong on both counts.)
I'd pondered a couple options for adding some sort of adjustment, but clearances and access inside the carriage
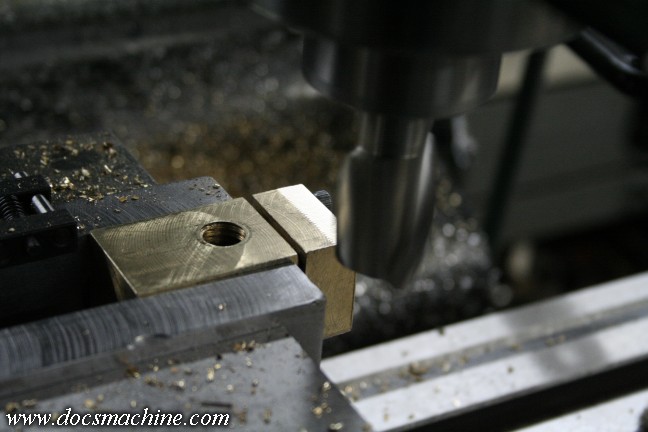
were an issue. Finally I lit on the simplest, and set it up to drill and tap two holes.
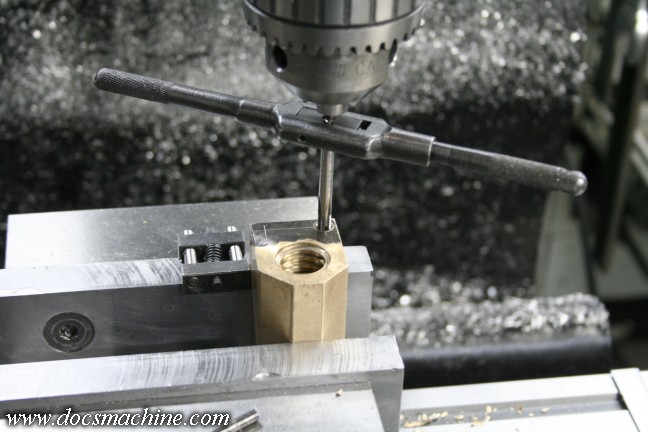
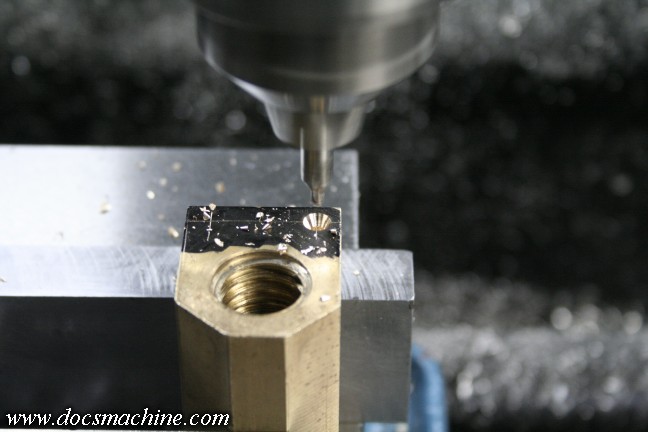
Tapped to 10-32, and fairly deeply.
And a couple of capscrews to finish it off.
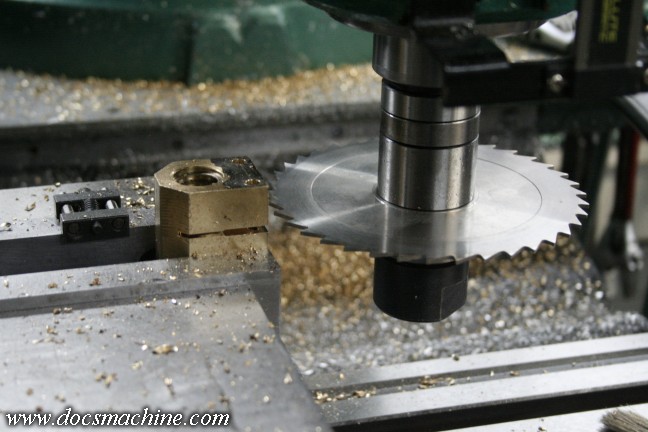
Then I just used some saws to notch the body- a thicker one at the top of the notch,
a thinner blade to reach the bottom of the threads.
And, eyeballing a slight angle to the nut, I clearanced the top of the parted section.
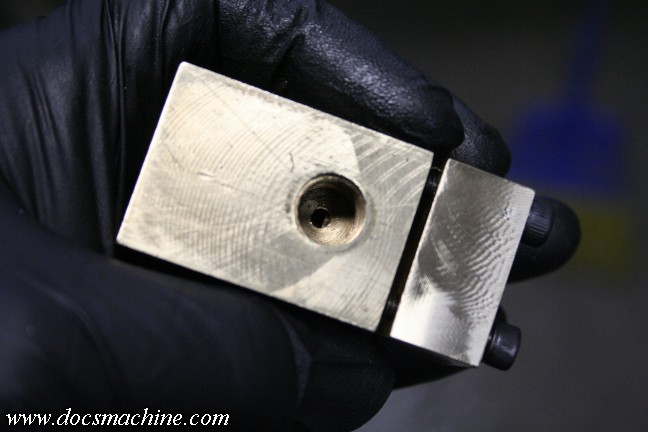
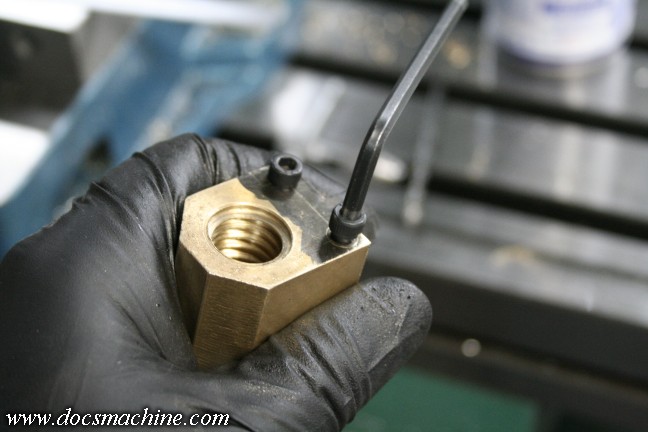
Finally, since there was no method to lubricate the threads, I drilled a small hole at the bottom of the bolthole
where the cross-slide attaches. This is how one lubes the nuts on my Logan and Sheldon lathes, so at least
for now, it should work. Note the chatter on the parted side- I really didn't consider how
unsupported the thin side was when I cut it.
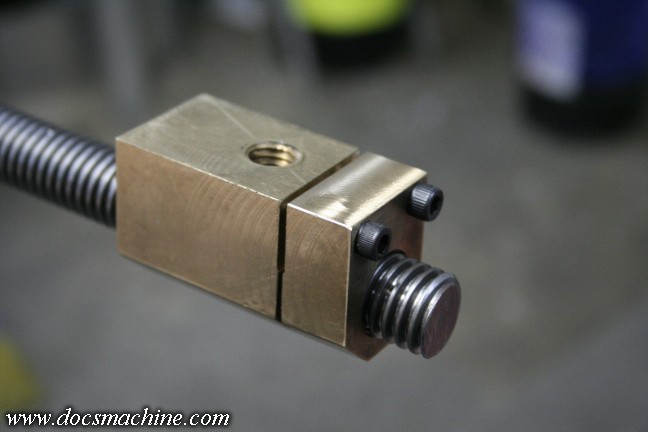
And done! The two screws are simply tightened to "pinch" the short section, and take up the slop.
It seems to work well, and needs a minimum of tightening, so there should be at least a few years
of use even in this already-worn nut.
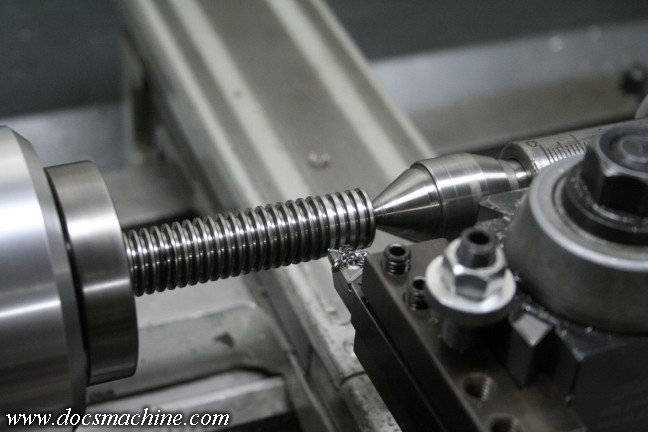
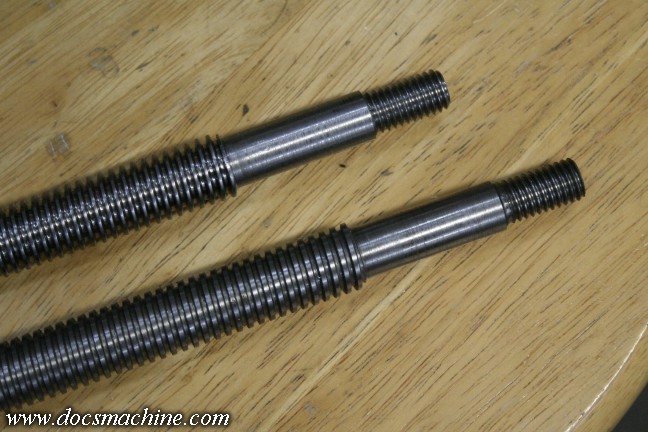
Making the new leadscrew is of course a simple turning job, copying dimensions off the old screw.
One clue on the old screw that makes me think it wasn't original, is that the keyway slot had been endmilled.
Since the lathe was made in 1943, I'd have expected the slot to have been milled using a
wheel type cutter, not an endmill.
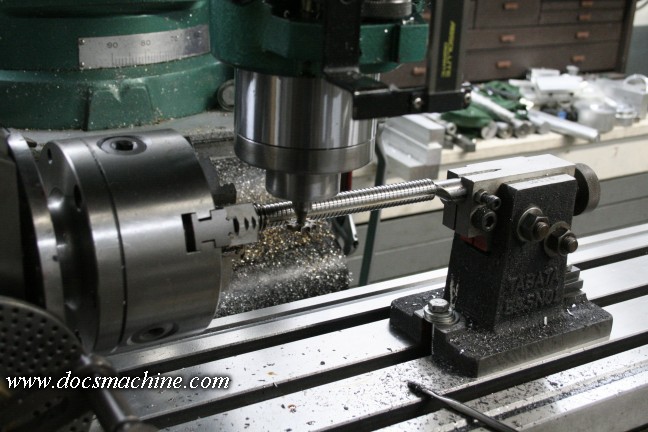
In that light- and since I prefer the cleaner cut it gives over a tiny endmill- I used a small
Woodruff-type cutter to slot the new screw.
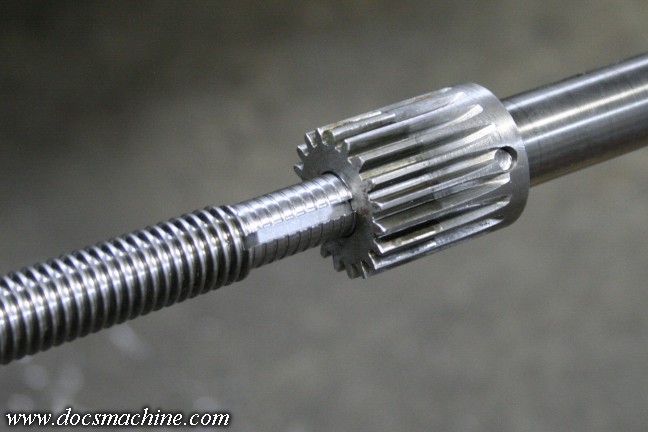
And done, again! It fits nicely inside the drive gear, though it doesn't go all the way in. That extra space might be
intentional, or was an error on the manufacture of the old part, or there may just be some junk in the gear
I haven't gotten completely cleaned out. I'll find out when I go to assemble it.
All text, photos and graphics
Copyright 1998- 2018, Doc's Machine & Airsmith Services. All Rights
Reserved.
Information contained in
these pages is for reference and entertainment
purposes only. Our methods are not always the best,
quickest, safest, or even the correct ones. It's up to you to know how
to use your own machines and tools.
Keep your fingers away from the spinny blades o' death and you should
be all right.


