[
Return to Main Page ] [
Return to Projects Index
] [
Doc's Machine & TWB Store] [
Contact Us ]
[
The Whiteboard Webcomic
]
Converting a Logan 11" x 32" Lathe over to full CNC, Part 19:
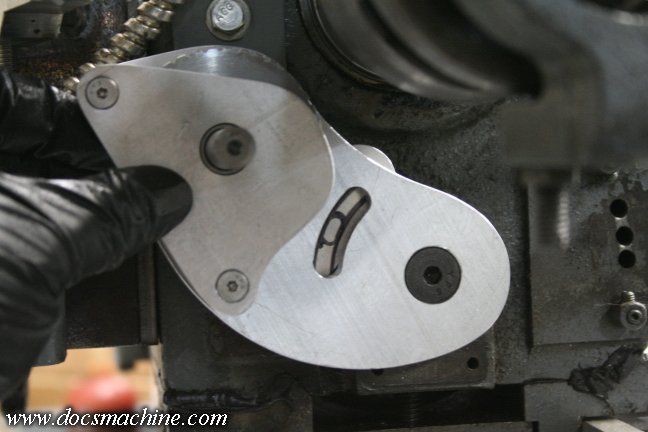
With both spacers installed, the pulley is now very solidly supported on both sides,
plus the second, smaller plate will provide a mounting face for the encoder itself.
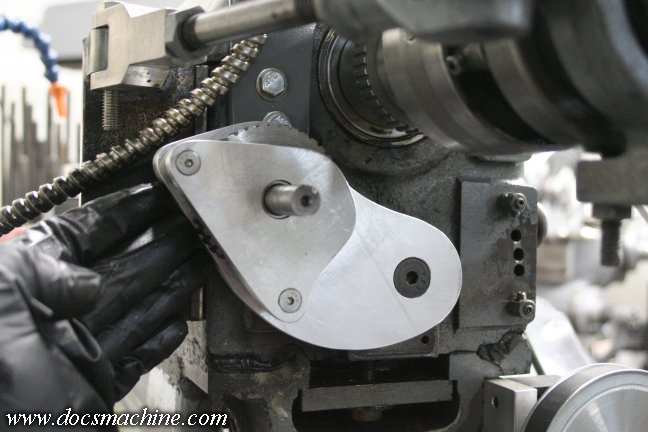
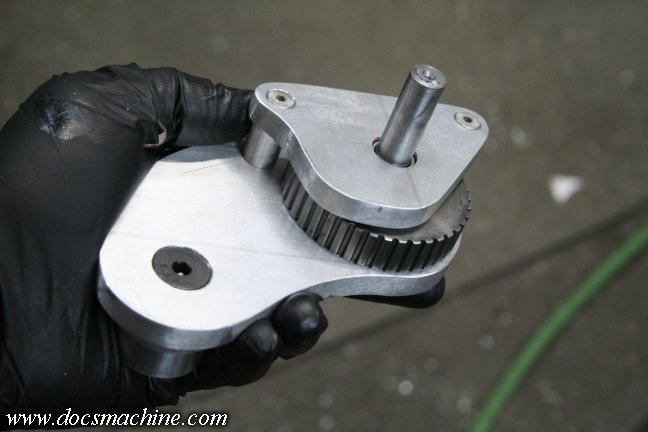
Another quick trial fit- I figure the whole mess will wind up about here,
relatively out of the way of the collet closer linkage.
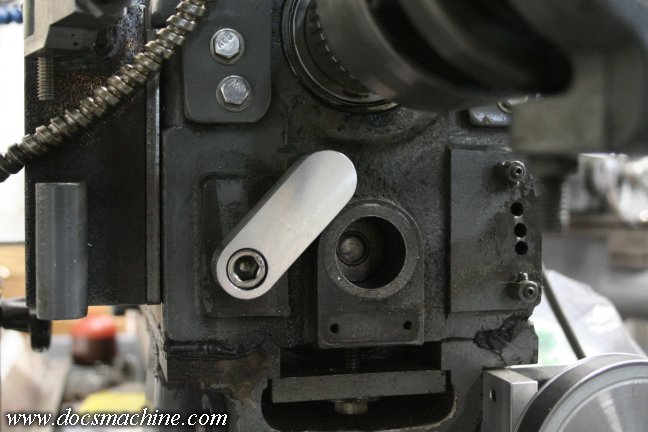
Now, I'd hoped to use the one existing threaded hole directly, for an adjuster/locking bolt, but that
wasn't quite going to work due to both placement and it's almost 13/16" away from the aluminum arm.
So I whipped up this quick spacer, allowing me to put the bolt in a more advantageous position,
and it provides a larger surface for the aluminum arm to locate against.
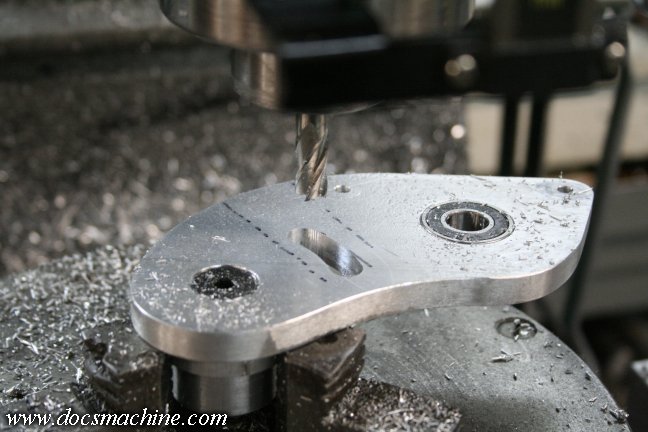
After a bit of guesswork, I got out the rotary table and milled a short adjustment slot.
With the slot in place, I then marked a suitable location for the bolt itself, and drilled and tapped the spacer.
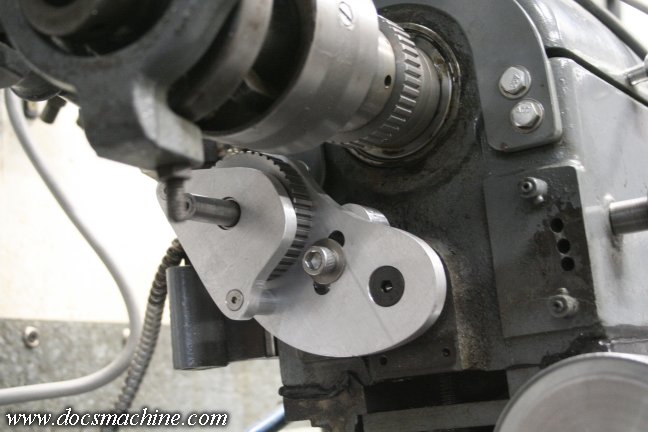
Voila`! It's just that easy. :)
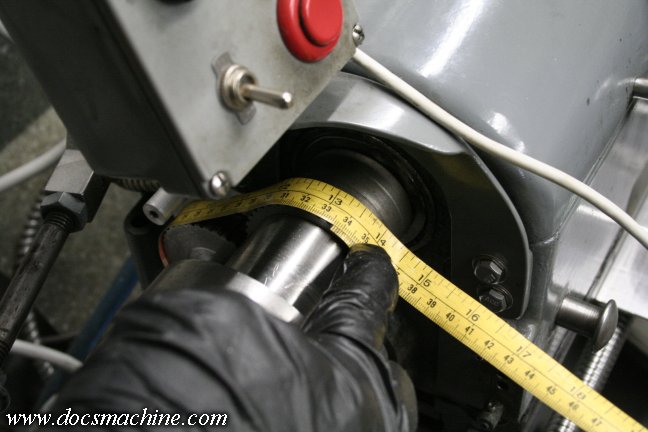
Now we need a belt. I closed up the movable arm to get a minimum size, and used a flexible
tape to wrap around the pulleys and get a good measurement. An absolute minimum size belt
would have to be 14" (they come in 1" increments) but I let it out a bit and ordered a 15",
which moves it out to about where I'd wanted it.
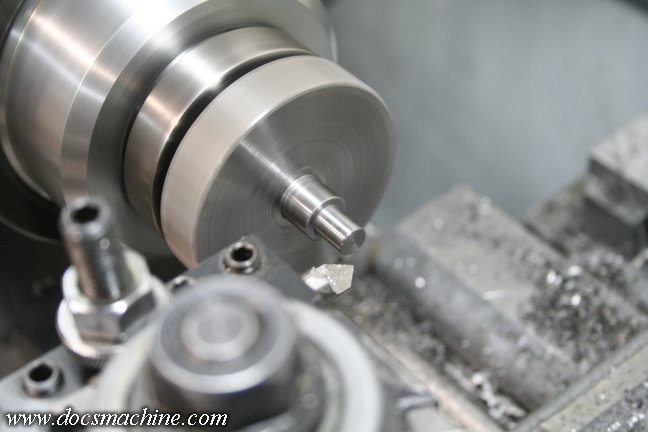
And finally, time to mount the encoder itself. I'd left the axle shaft long until I could get an exact
dimension, so it was a simple matter of cutting it to length and reducing the stub OD to fit the reader.
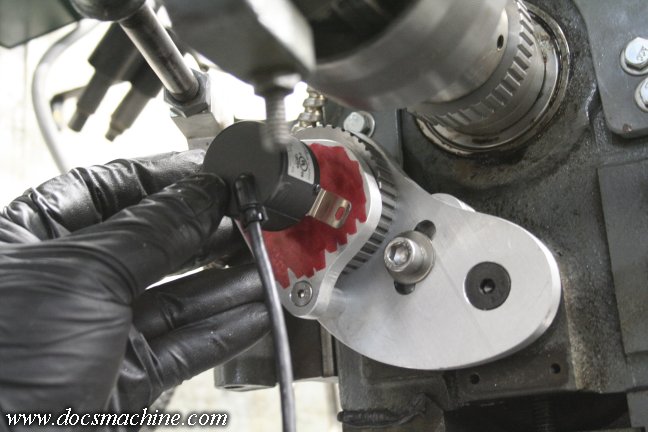
With the shaft and cover plate back in place, it was a simple matter of smearing on a bit
of red marker, sliding the encoder into place, and scribing the slots in the mounting legs.
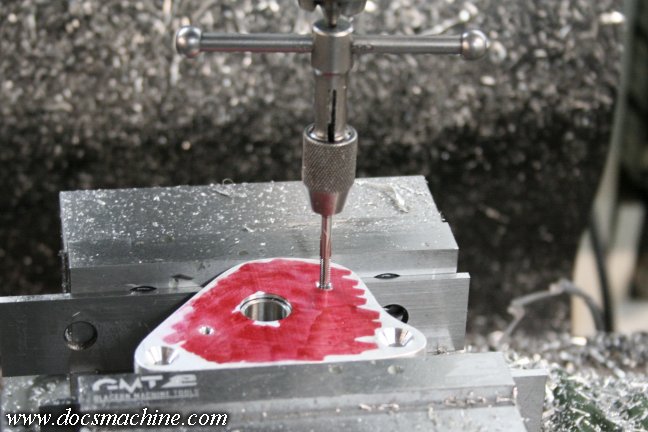
Drill and tap to 6-32...
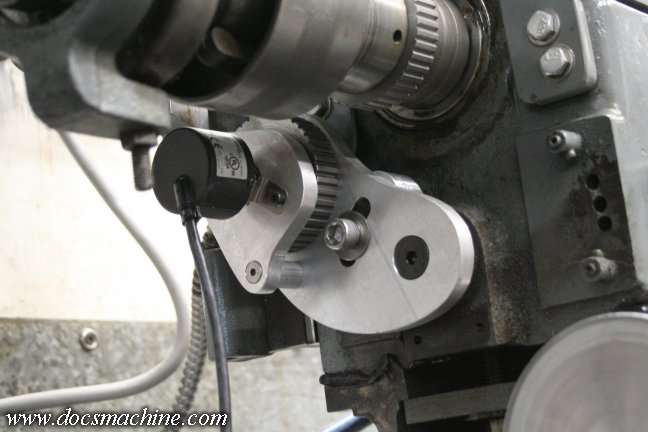
Clean everything up, bolt it back together for a test-fit, and we're almost done.
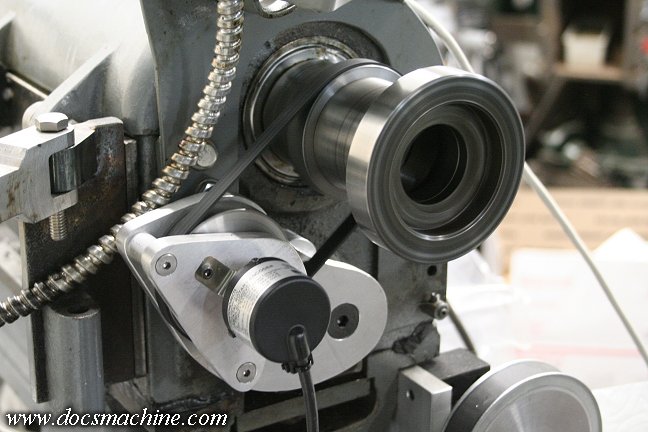
After a few days, the belt arrived and I slipped it on. A quick test, and it looks
like it works just fine. Tracking was
almost perfect, but...
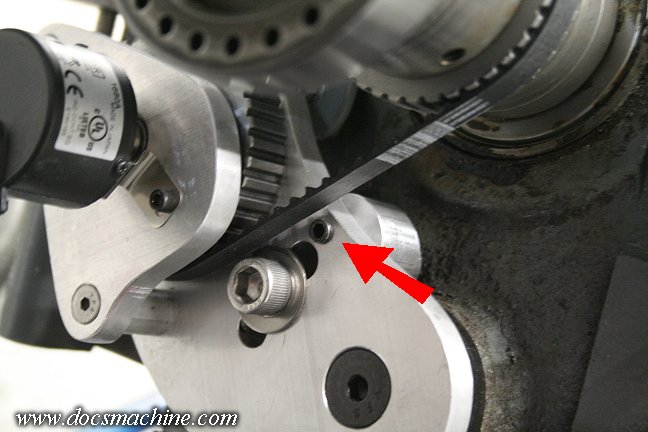
After a bit of tweaking, I finally added this 1/4-28 setscrew, ground flat on the end, in order
to add a slight bit of "adjustment" to fine-tune the tracking. I may consider trying to locate a
flanged wheel for one or the other, so tracking would be less of an issue. But for now, it works.
All text, photos and graphics
Copyright 1998- 2017, Doc's Machine & Airsmith Services. All Rights
Reserved.
Information contained in
these pages is for reference and entertainment
purposes only. Our methods are not always the best,
quickest, safest, or even the correct ones. It's up to you to know how
to use your own machines and tools.
Keep your fingers away from the spinny blades o' death and you should
be all right.


