[
Return to Main Page ] [
Return to Projects Index
] [
Doc's Machine & TWB Store] [
Contact Us ]
[
The Whiteboard Webcomic
]
Converting a Logan 11" x 32" Lathe over to full CNC, Part 8:
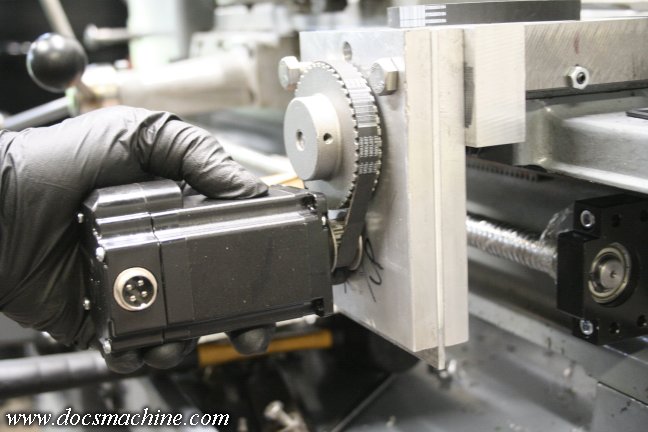
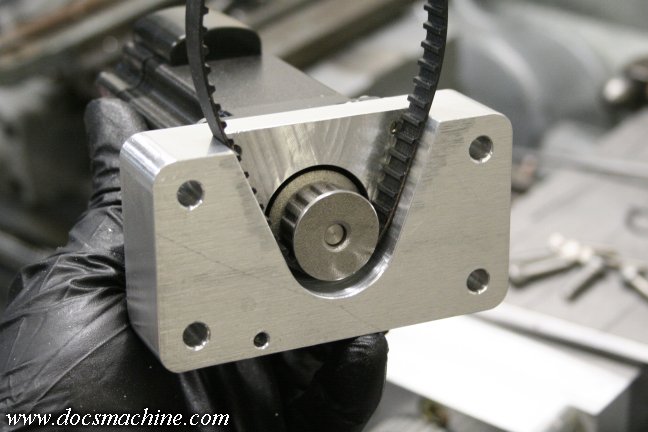
With the cross-slide bearing block mounted and the drive pulley fitted, it was time to mount the stepper.
I'd picked up a fairly short belt in order to keep things compact, and as I found out, the classic method of
using short round standoffs wouldn't work, as two of the mounts would interfere with the belt.
Fortunately, the spacing away from the block turned out to be almost exactly one inch,
so I decided to go with a mount that would straddle the pulley and belt.
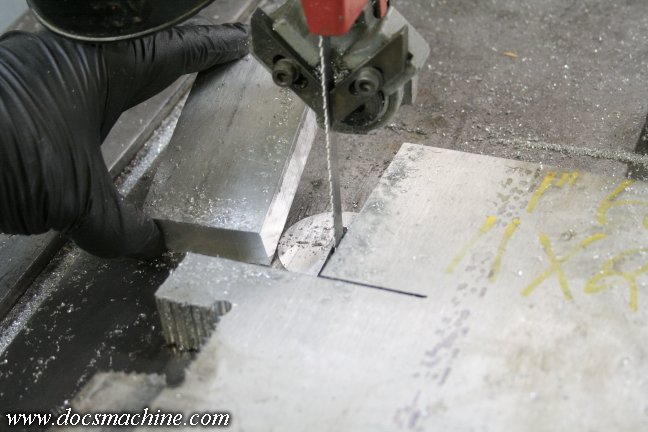
I didn't have any standard 1" flatbar of the dimensions I wanted, but luckily enough I had a chunk of 1" plate
and a really nice bandsaw. This 4" x 2-1/2" section took about 20 seconds to zip out.
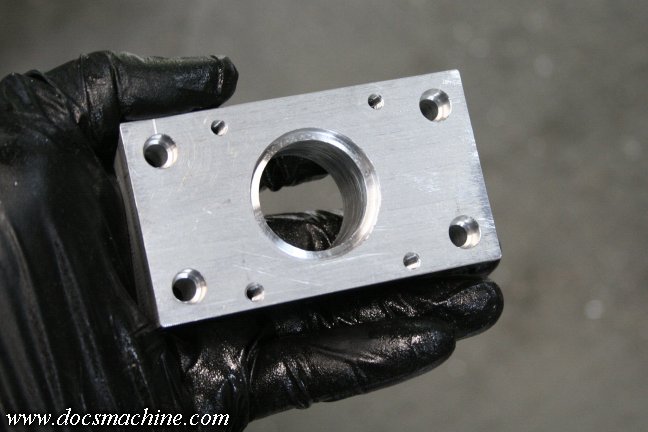
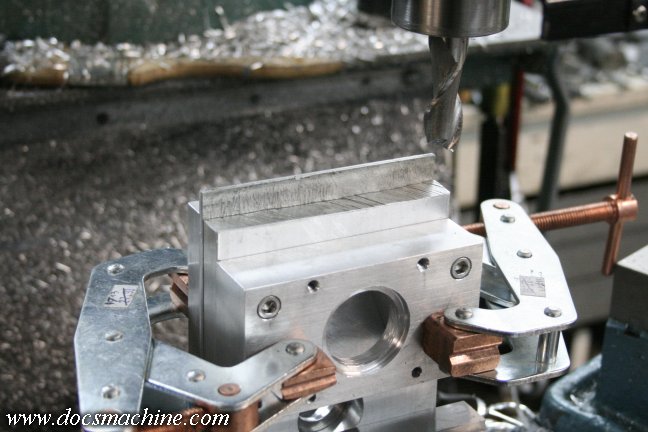
After a little plotting and a dash of planning, about an hour later I had this quite workable mounting block.
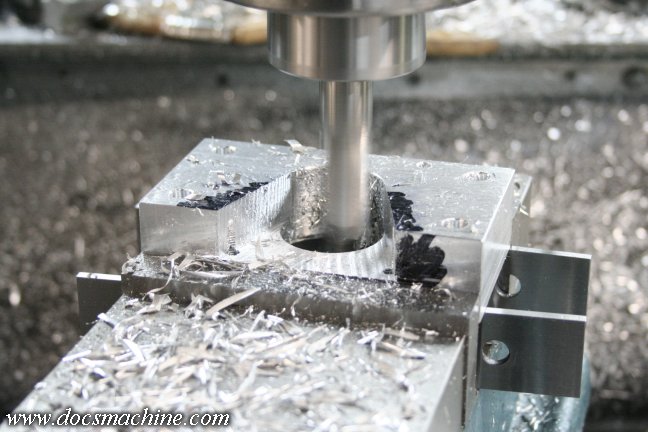
I eyeballed a few lines, and using a mill vise with a swivel base, I milled out clearance for the belt and pulley.
And presto. Fits perfectly the very first time. I drilled the four outboard mounting holes just a little extra oversize,
so that there's just a smidgen of adjustment to allow for tightening the belt. If that proves insufficient,
I can always mill the holes into short slots to add additional adjustment.
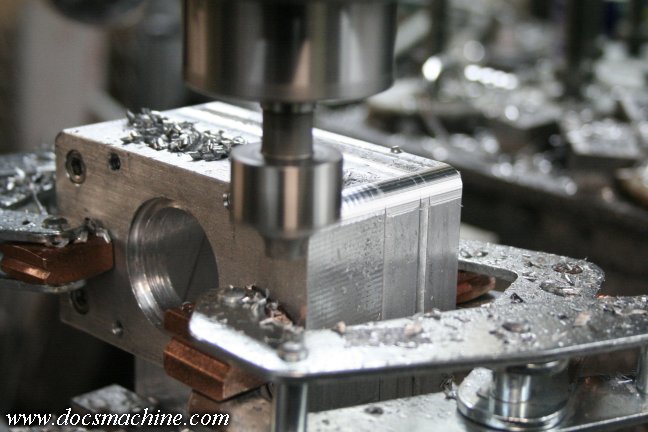
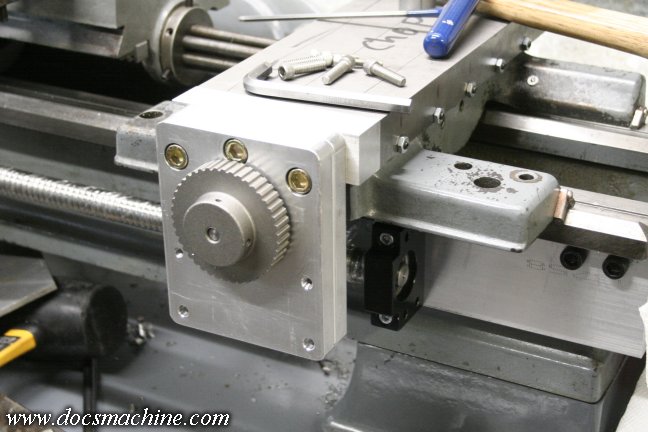
Now, you'll note that the bottoms of the three plates are still rough cut- I'd left them long as I was still
"designing on the fly", and didn't know precisely where things would land. With the stepper mount finished,
I milled the three blocks so they were about even with it.
Then, just for a little pizzazz and to lend an air of finish and design to it, I milled a rounded corner to the whole lot.
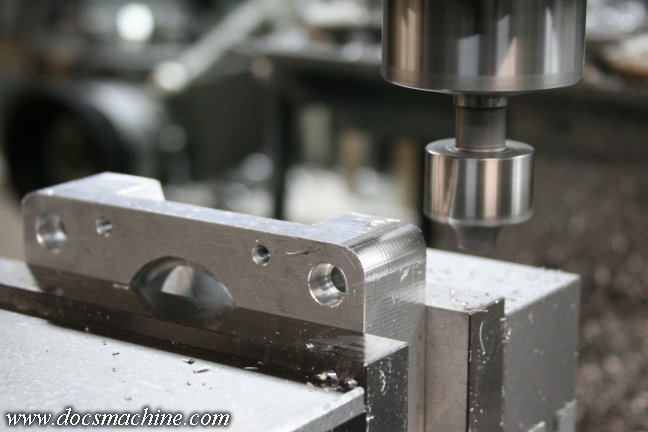
I then flipped the stepper block and spiffed it up a bit too.
The early testing had revealed it was a bit difficult to get the belt onto the stepper pulley, thanks to the fairly tall
flanges. To fix this, I simply turned down the outer flange a touch, which provided ample clearance.
Note I also took a moment to counterbore the bearing block mounting holes, and replaced the hex bolts with
Allen bolts. I also had to trim about half an inch off the bottom of the spacer block, so that it would allow
the cross slide to travel rearward a bit past the end of the cast iron block.
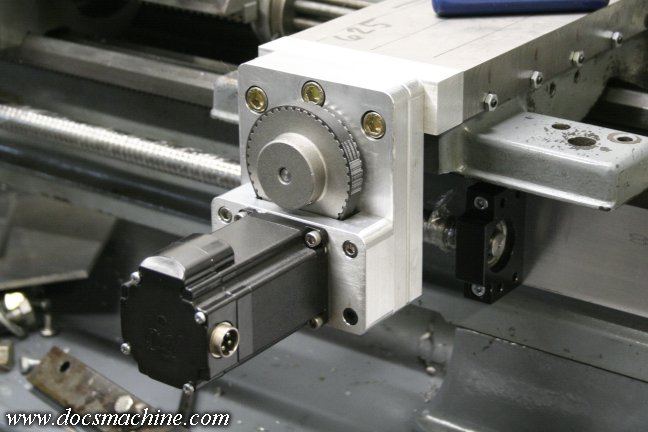
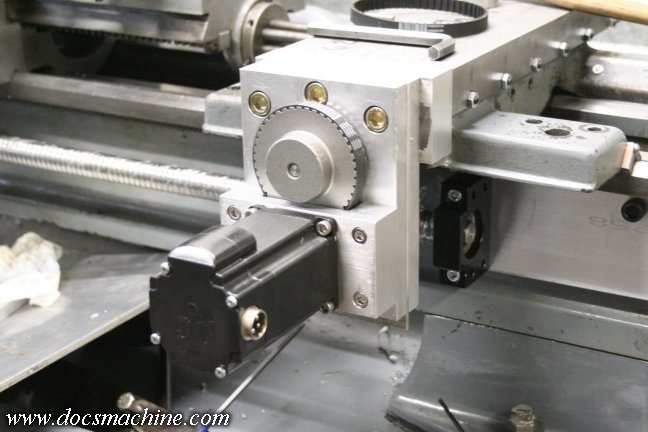
And finally, the stepper fully mounted, and ready for some preliminary testing.
On later consideration, I will probably be redesigning the stepper mount block, so that it's the
same size as the bearing blocks, and thus will fully enclose the belt reduction drive.
I may eventually shoot for water-tight for the use of flood coolant, but for the
moment, I'm just thinking keeping chips out of the belts.
All text, photos and graphics
Copyright 1998- 2016, Doc's Machine & Airsmith Services. All Rights
Reserved.
Information contained in
these pages is for reference and entertainment
purposes only. Our methods are not always the best,
quickest, safest, or even the correct ones. It's up to you to know how
to use your own machines and tools.
Keep your fingers away from the spinny blades o' death and you should
be all right.


