[
Return to Main Page ] [
Return to Projects Index
] [
Doc's Machine & TWB Store] [
Contact Us ]
[
The Whiteboard Webcomic
]
Converting a Logan 11" x 32" Lathe over to full CNC, Part 15:
Now for the wiring. Electrical bits are not my strong suit, so stand by for clouds of Magic Smoke to appear. :)
For the leads to the steppers, I found some fairly flexible four-conductor wire for the job. It's not shielded,
but it'll get me to the testing stage. I fully expect that most of the wiring will be replaced or modified at some
point during this build and/or eventual use, so I'm not wasting too much time on making it pretty.
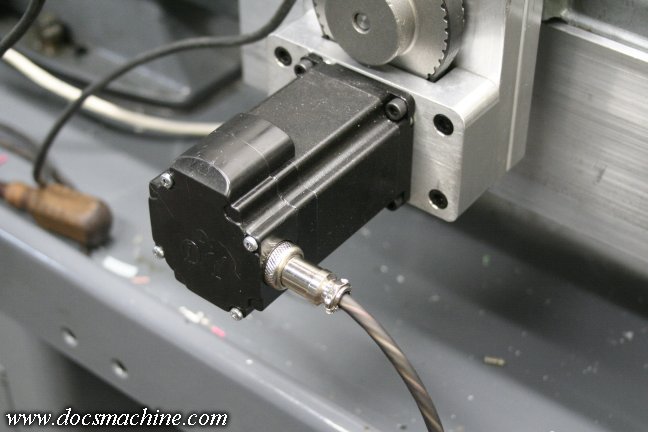
Thanks to the previously-documented endcap, wiring the Y stepper was as easy as just soldering
an XLR connector to the end of the wire, and screwing it on.
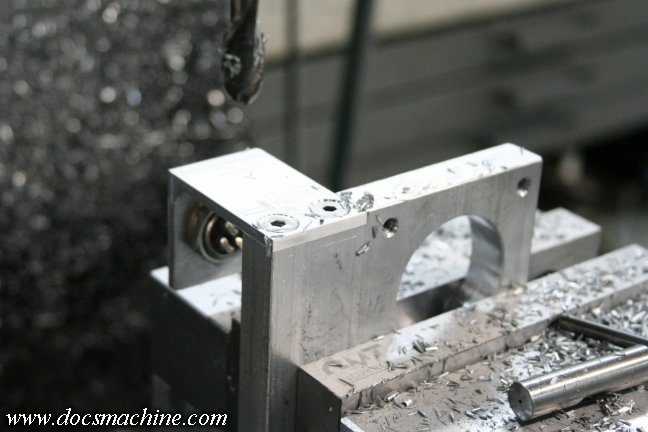
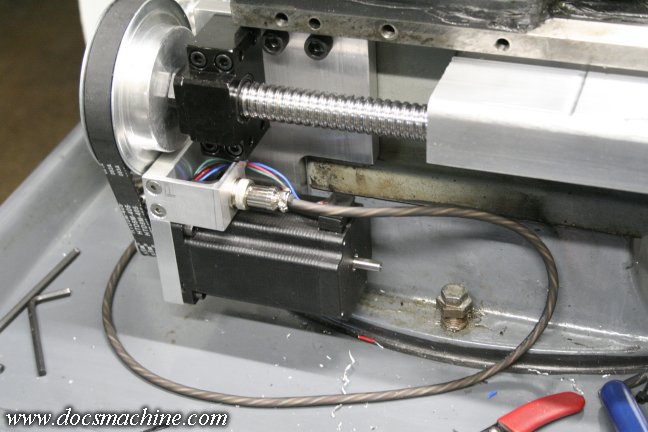
The Z stepper wasn't so easy. I still wanted a removable connector for the inevitable testing and troubleshooting
phases, and I wanted some sort of strain relief so I wouldn't damage the wires coming out of the motor.
The same endcap wouldn't fit this stepper, so after a bit of thought, I came up with a bracket to bolt
to the stepper mount. Not as clean as the cool endcap, but it'll work.
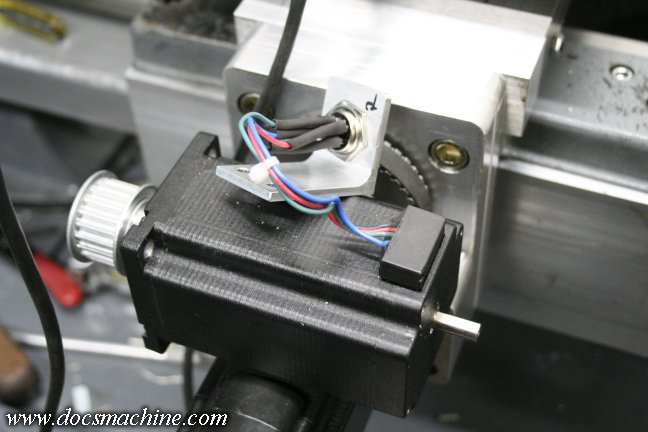
With the bracket finished and fitted, it was a simple matter to solder on another XLR connector.
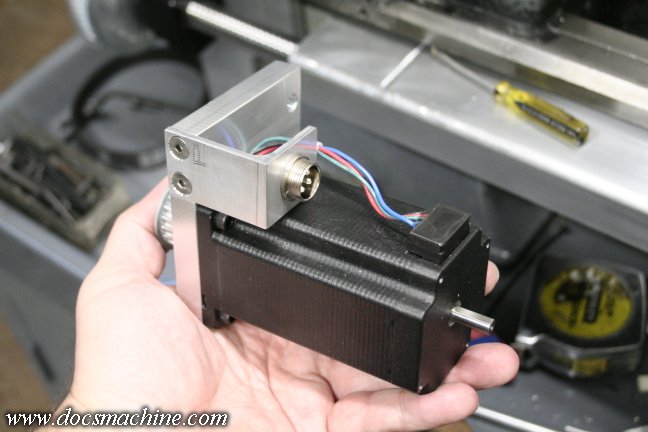
And it all assembles like so...
And bolts back in place like this. The cable routing is of course just temporary, I'm thinking of running some
tubing around the lathe bed like conduit, to protect the cables, and the whole stepper and belt drive assembly
will eventually get a sheetmetal cover to keep chips and gunk out of the system.
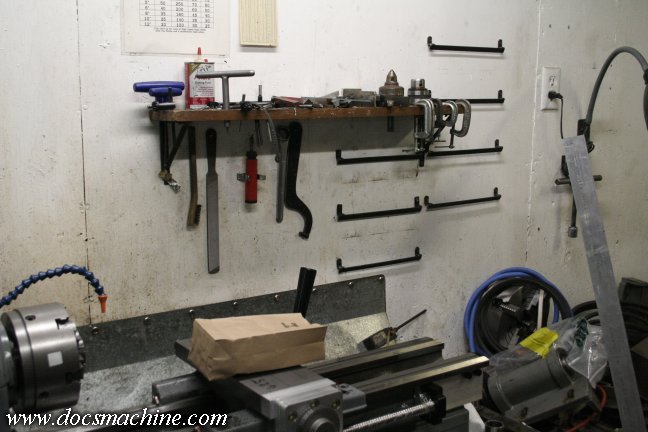
I don't have much workbench area around the machine, and even less at the moment since I'm working on
a second machine (not a CNC conversion) in the same part of the room. So, since I won't be using some
of the old manual-lathe tooling, I decided to take it all down to open up some wall-hangin' room.
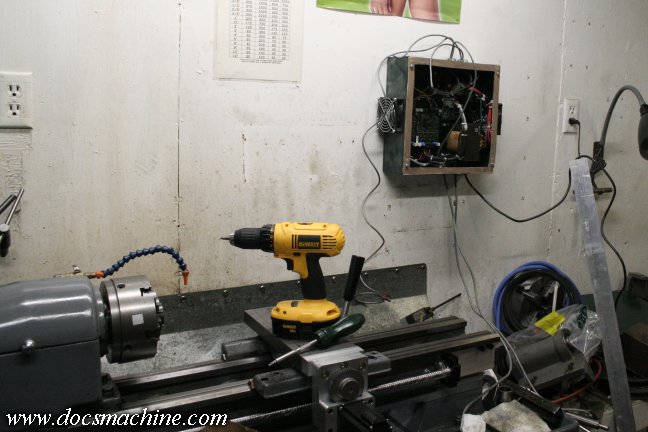
With the old tool shelf and racks removed, it was an easy job to screw the controller enclosure to the wall.
A handy 110v outlet on the left provides power, a (currently cluttered) shelf below it will provide space
for the PC, and it's mounted away from potential thrown chips or flying broken parts.
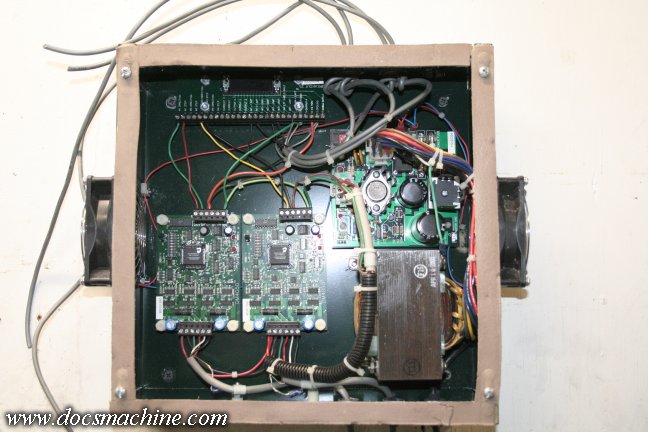
I bought this controller, preassembled but used, from another local DIY CNC'er, for a decent price.
I was assured it was working, and used all Microkinetics components. The 36V power supply and
stepper controllers were okay, but the parallel-port card and breakout board proved to be somewhat
antique. The card fits in an ISA slot, which has been obsolete since before the Windows ME days,
and came with a driver on a 5-1/4" floppy (!)
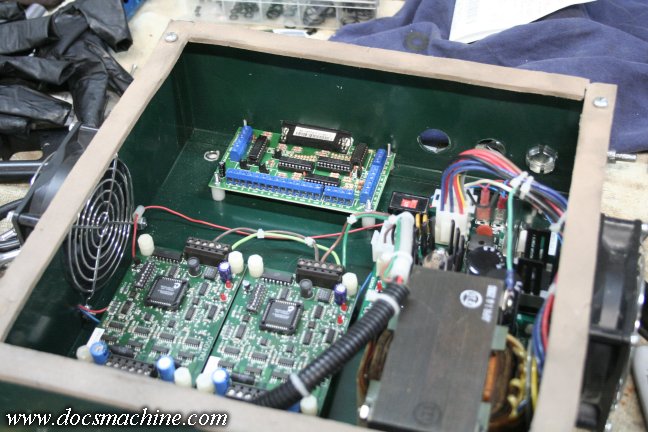
That card got replaced with a shiny new C-10 bidirectional breakout board from CNC4PC.com.

I wanted some connectors for the lines to the eventual limit switches, spindle encoder and E-stop
switches, so I picked up some standard DB-9 sockets and fitted them to the side of the case.
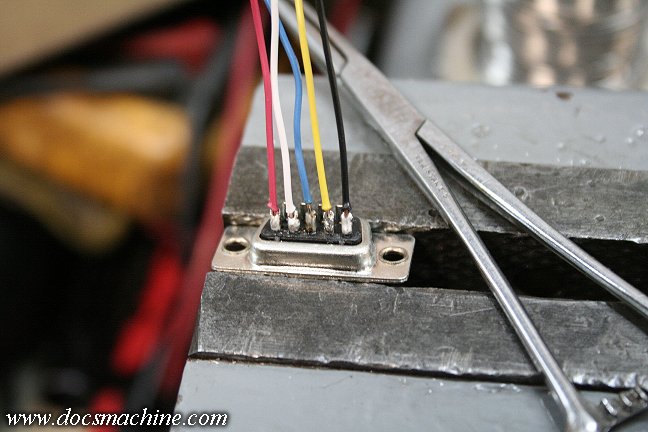
I'd hoped that the ribbon cables that came preassembled to the connectors would be long enough, but
they proved to be just a bit too short for my liking. I removed the ribbon cable, and replaced it with
some individual wires, using eight of the nine available connections.

Now, the fun part. I am NOT an electrician, and I have very little experience with anything more sophisticated
than putting batteries in a flashlight (which I can manage to do correctly two tries out of three, most days.)
I'm the type that needs instructions that say "plug this wire in here, dummy!" and of course neither the port
card nor the controllers come with that kind of information. I
think I have this correct, so...
All text, photos and graphics
Copyright 1998- 2016, Doc's Machine & Airsmith Services. All Rights
Reserved.
Information contained in
these pages is for reference and entertainment
purposes only. Our methods are not always the best,
quickest, safest, or even the correct ones. It's up to you to know how
to use your own machines and tools.
Keep your fingers away from the spinny blades o' death and you should
be all right.


