[
Return to Main Page ] [
Return to Projects Index
] [
Doc's Machine & TWB Store] [
Contact Us ]
[
The Whiteboard Webcomic
]
Converting a Logan 11" x 32" Lathe over to full CNC, Part 20:
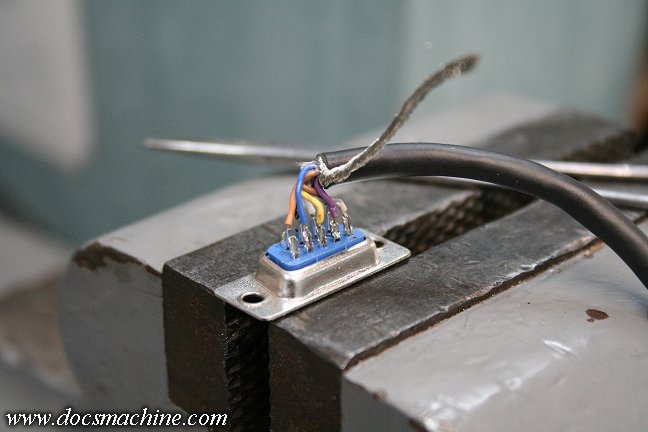
With the encoder itself mounted, all that was left was to wire it. I used a standard solder-in DB9
plug kit from eBay (since there aren't any Radio Shacks left) and got it properly connected.
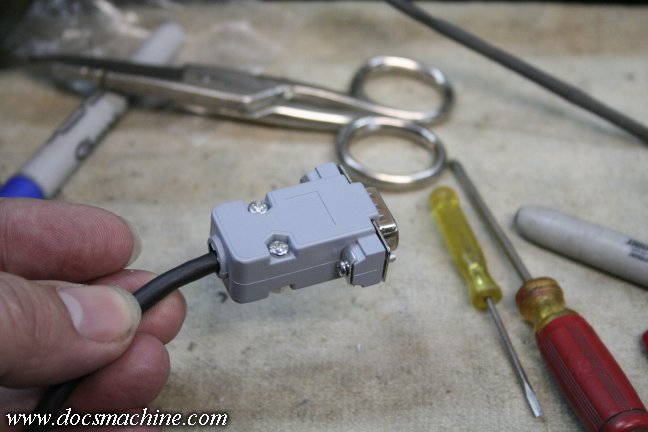
Assemble the plug body, and that's it.
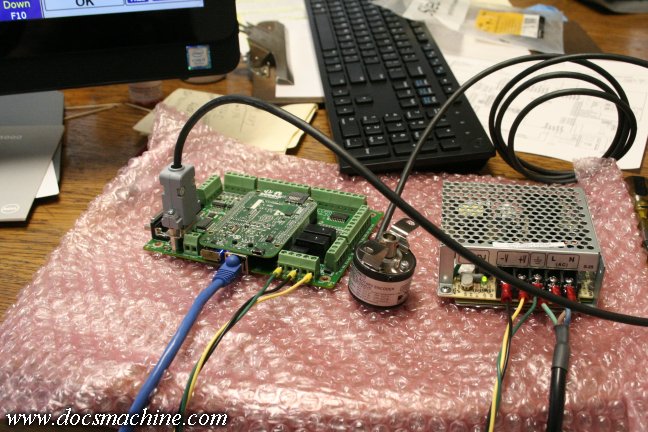
For a quick bench test, I wired up the board and power supply, plugged in the
encoder, and booted up the PC. Spinning the encoder shaft by hand
showed a positive spindle reading on the screen, so she checks out.

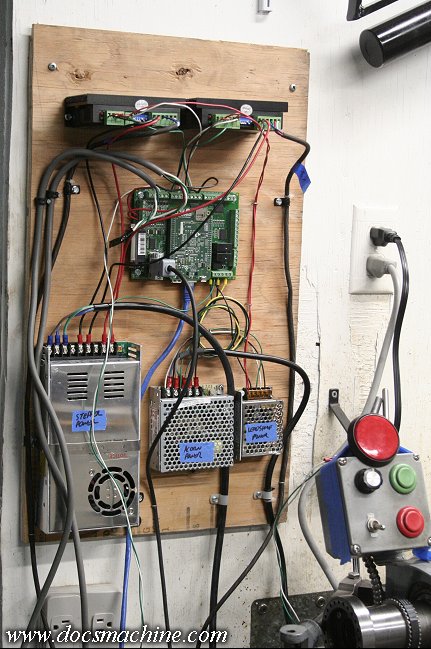
Now it's finally time to wire this whole mess up properly. I don't yet have a
decent enclosure I like, and I'm not sure how I'd want to lay things out
anyway, so for the time being, for a very rough prototype stage, I
screwed the modules to a piece of plywood.
The top two boxes are Leadshine stepper drivers,
the green board is the Centroid Acorn,
the leftward silver box is the stepper power supply,
the middle silver box is the Acorn power supply,
and the small box is the driver power supply.
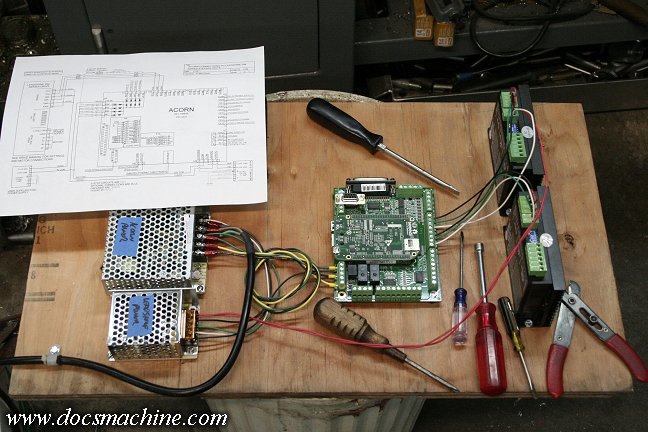
Following the instructions supplied with the Acorn, and the diagrams from the drivers,
it was a relatively easy job to connect power and step/direction signals.
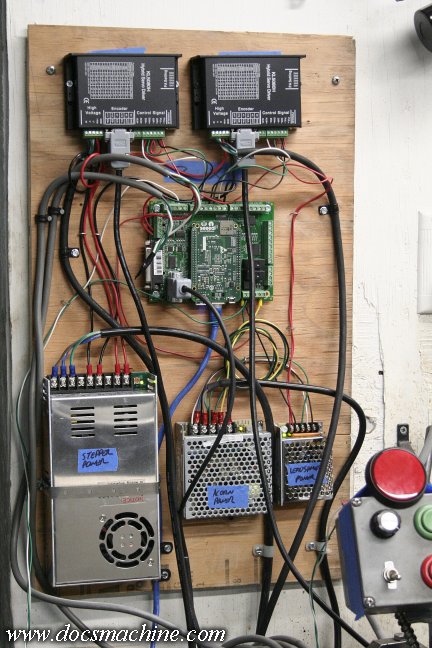
Once I had it mostly wired, I screwed it to the wall behind the Logan,
and connected the encoder, ethernet cable, both stepper motors, two
as-yet-unmounted limit switches, and a makeshift E-stop button,
unceremoniously- and temporarily- taped
to the top of the lathe control box. :)
After a second look at the how-to videos, I powered up the new system, booted up the PC, gave the
various parameters a quick configuration (most of which was done for me, as the computer came pre-
configured and pre-loaded with CNC12 Lathe) then, after a few hiccups, was able to launch the CNC
program. Unfortunately, one of my brand-new Leadshine stepper drivers turned out to be effectively
DOA- it would power up, and give me a green light, but would not move the motor.
I eventually tried three different steppers, and on both channels (X and Z) from the Acorn, but
it never worked. I have another on the way and the old one in the return mail.
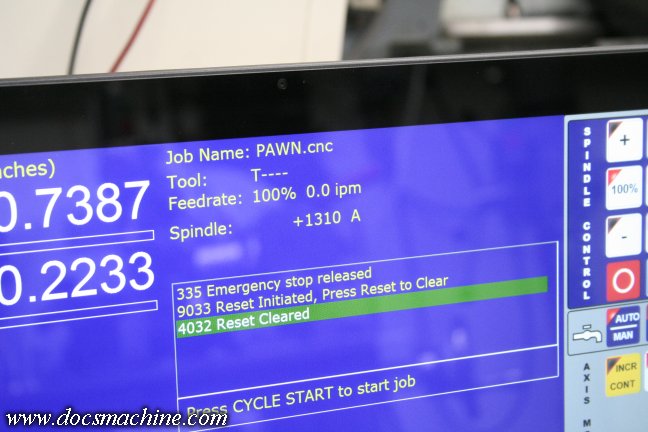
On the positive side, the spindle encoder, as you can see here, works perfectly,
and also agrees precisely with my non-contact laser tachometer.
Since I needed at least one new driver anyway, I splurged a bit and upgraded to
Automation Technologies closed-loop 'hybrid' steppers, which came with their
own dedicated drivers. It took a minute to figure out the wiring, and extend the
absurdly short 18" power cables supplied with the motors (the encoder cable
comes with an extension) but eventually everything plugged right in and
powered up just fine.
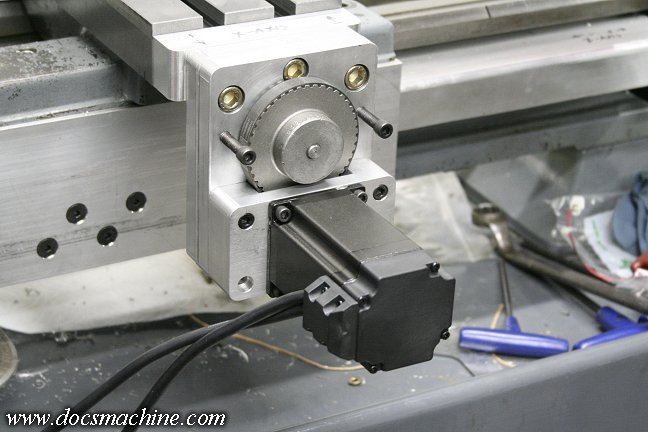
The motors are 3-pole 282 oz-in steppers with an attached 1000-line (4K pulse) encoder. As they're a
NEMA-23 frame just like the 270 oz-in steppers I took off, they bolted right into place with no fuss.
Once everything was in place and wired, I booted up CNC12 and tried the manual jog. The new motors
worked perfectly, a bit quieter than the old steppers, and sounded a bit smoother. One axis was working
"backwards", but that was an easy fix. I could have flipped it in the CNC12 "Wizard", but the drivers have
a DIP switch on the side- just flick that and the directions are reversed.
After that, it was just a little work to get the steps-per-revolution and turns ratios properly set in the "Wizard".
They'll need to be dialed in a little more precisely later, but this gets me in the ballpark.
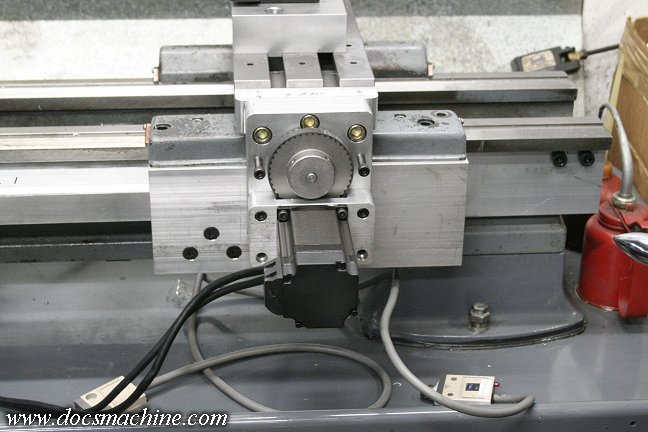
Next up, we need some limit switches, I picked up these industrial Omron units off of eBay, and got
them wired into the Acorn board easily enough, but now I had to figure out how to mount 'em.
For the X-axis (the cross-slide) I whipped up this quick bracket out of some 2x1/4" aluminum angle
to hold the switch just slightly outboard of the axis belt drive. Doing it this way means I'll have to have
the machine "home" in X-negative (toward the workpiece) but I was at a loss as to how to mount
the switch so it was actuated at the end of the X-positive. I know the software can be set to home
it this way, but operationally, I'm not yet sure that's a good idea. We'll see.
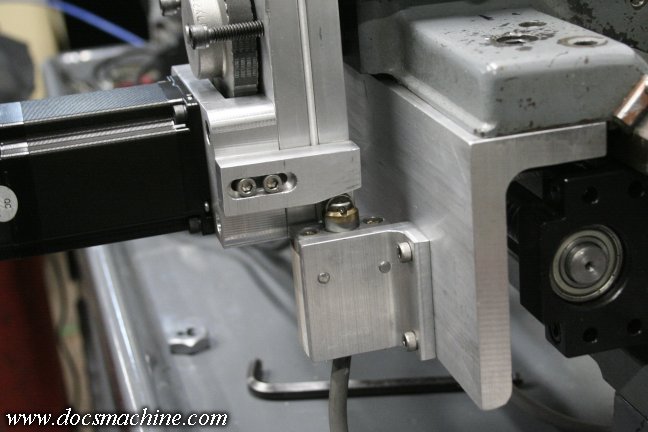
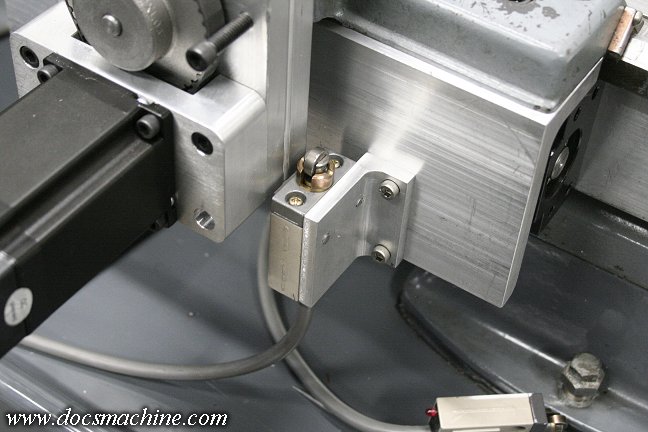
Finally, to actuate the switch, I drilled and tapped the stepper motor mount and
whipped up this little adjustable sliding bar to contact the switch roller.

And it works! It's set to trip about 1/8" of axis travel before the leadscrew bottoms out on the
belt assembly, hopefully that'll be enough. Next up, the Z-axis switch should be almost as easy!
All text, photos and graphics
Copyright 1998- 2017, Doc's Machine & Airsmith Services. All Rights
Reserved.
Information contained in
these pages is for reference and entertainment
purposes only. Our methods are not always the best,
quickest, safest, or even the correct ones. It's up to you to know how
to use your own machines and tools.
Keep your fingers away from the spinny blades o' death and you should
be all right.


