[
Return to Main Page ] [
Return to Projects Index
] [
Doc's Machine & TWB Store] [
Contact Us ]
[
The Whiteboard Webcomic
]
Anayak "Exacto" Vertical Mill Rebuild, part 12:
I'm not going to post a part-by-part reinstall, as that would take approximately eleventy-million photos. I did
take a great deal of part-by-part pics as I was dismantling it, because I have no manual or exploded view of
any kind, and there's some tricky bits in there. So, keeping it a bit simpler, as the feed direction shaft had
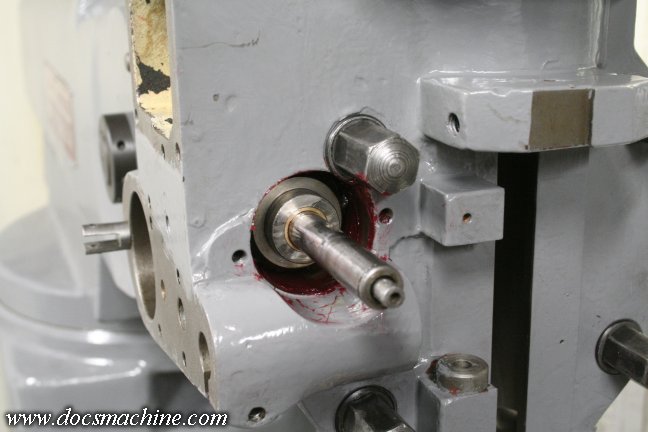
already been installed, I just had to throw some grease in there and add the second bevel gear.
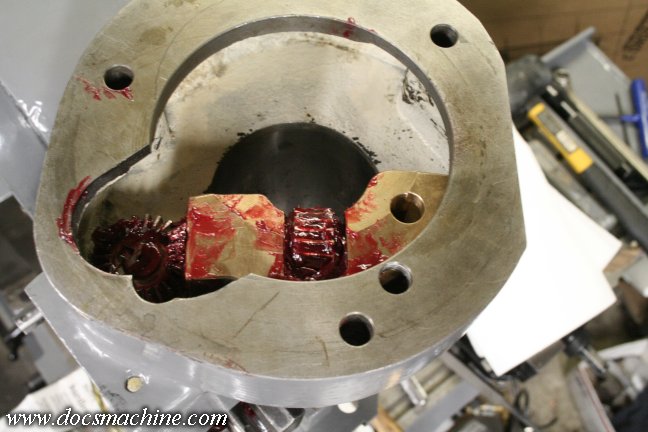
Then, there's a three-gear cluster and shaft that goes into the side case, after which the freshly-cleaned and
freshly greased feed-engagement block can be dropped in from the top and settled into it's socket.
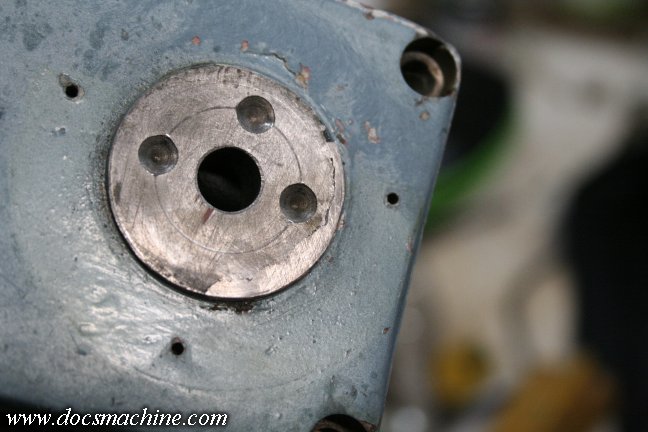
On the right is the three-gear custer, and on the left is the shaft coming down from the engagement block.
The upper and lower "extra" holes- the ones away from the corners- take screw-in retaining pins.
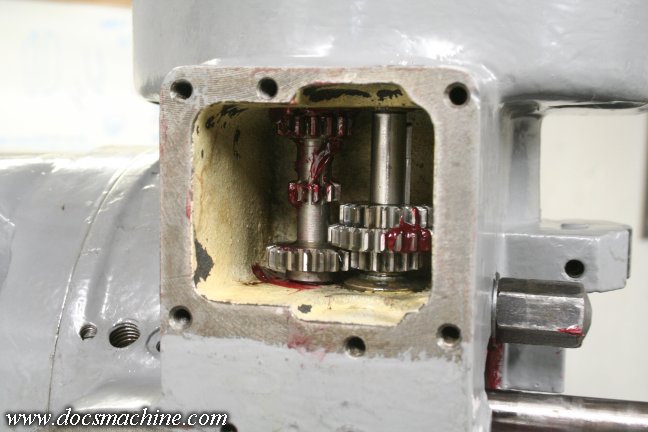
With the rest of that assembly, and the feed selector cover temporarily emplaced, I was able
to install the quill lock, the quill itself, and the quill downfeed shaft.
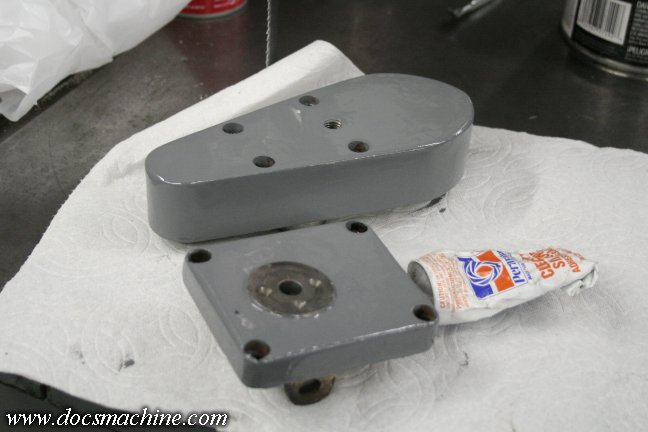
Shortly after that, I removed the feed selection lever plate and cleaned and painted it. It was interesting to
note that the factory apparently 'saved' this casting that didn't fill completely, by applying solder
to the edge of the lever boss, visible here from about 2 to about 6 o'clock.

And, while I was painting that, I cleaned and painted the back-gear section of the head...
And the feed clutch assembly cover.
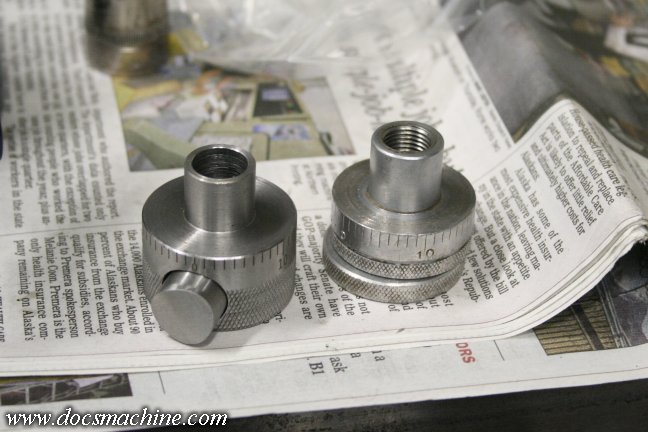
One thing I was looking forward to installing, was this new pushbutton feed-stop nut for the power downfeed.
The factory piece, like on most other knee mills like this, is just a threaded nut- to adjust it, you have to spin it
up and down the threaded shaft. The pushbutton one makes that much easier, just push the spring-loaded part
and slide it up or down, after which it locks back into place. I've had one on my other mill for years.
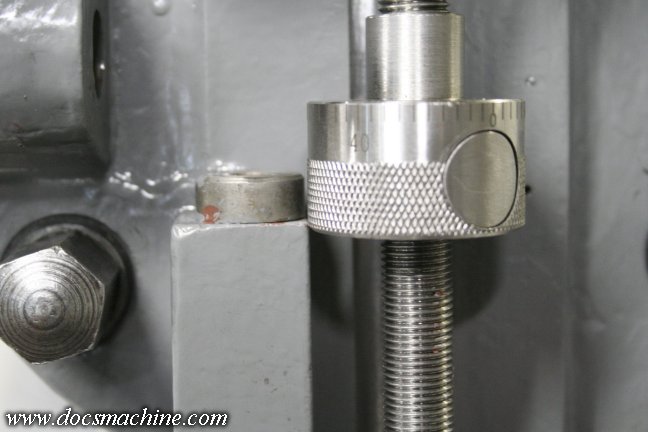
The problem here, though, is the new nut turned out to be slightly too big, adn it hits the cast-in boss on the head.
I couldn't turn the nut down, as I'd lose the knurling and the graduations, so I had to "adjust" the casting.
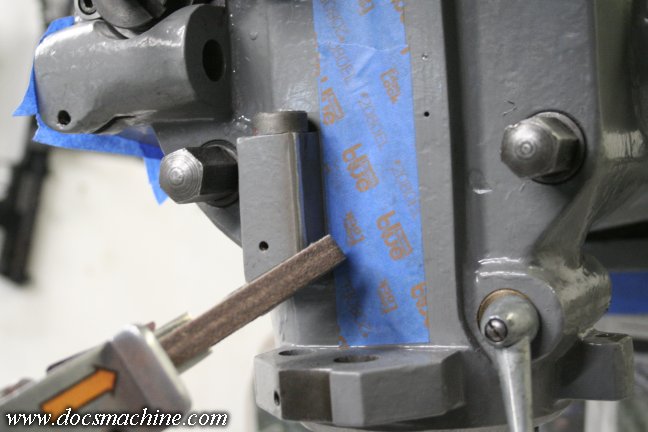
After carefully taping everything up to keep grit out, I lightly broke the corner of the boss with a
die grinder and a rotary file, and then smoothed it town with an air belt sander.
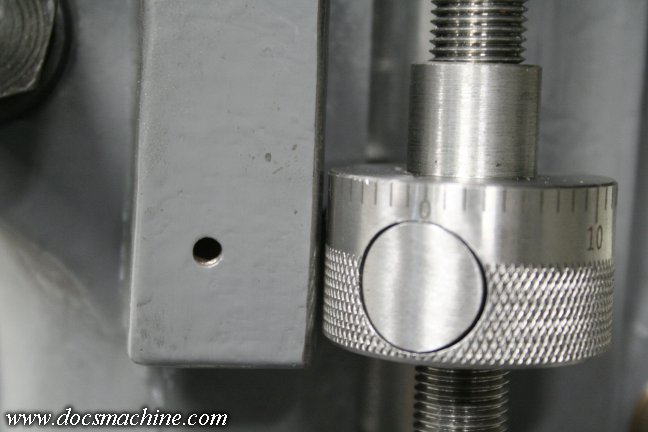
And now there's plenty of room!
All text, photos and graphics
Copyright 1998- 2017, Doc's Machine & Airsmith Services. All Rights
Reserved.
Information contained in
these pages is for reference and entertainment
purposes only. Our methods are not always the best,
quickest, safest, or even the correct ones. It's up to you to know how
to use your own machines and tools.
Keep your fingers away from the spinny blades o' death and you should
be all right.


