


|
|
|
|
The column just needed a little attention with the Scotchbrite and some WD-40,
then a good
cleaning and some paint on the mounting flange.
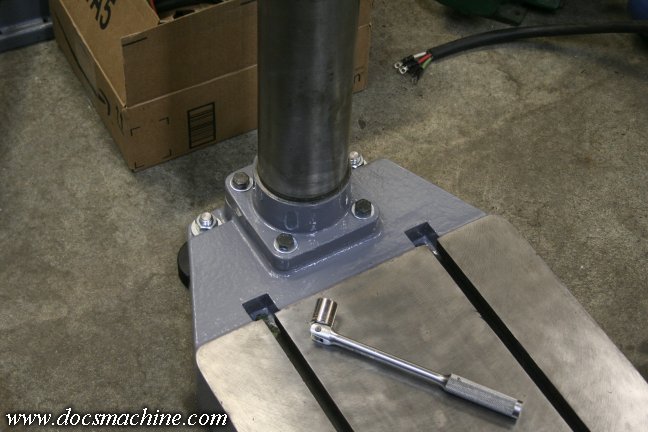
The column just bolts in place with the original hardware and new washers.
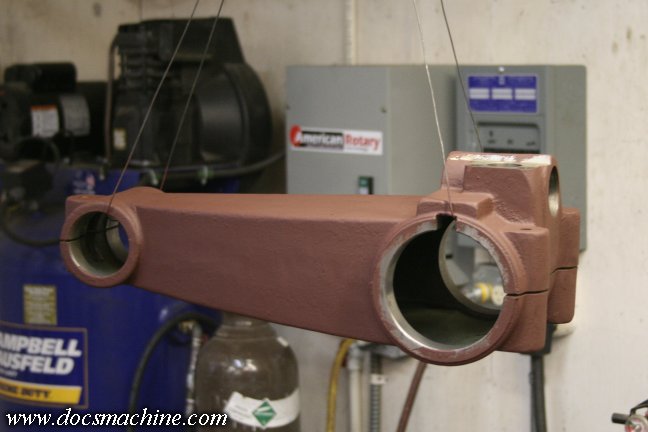
The table support arm also gets a good pressure-wash, degrease and paint.
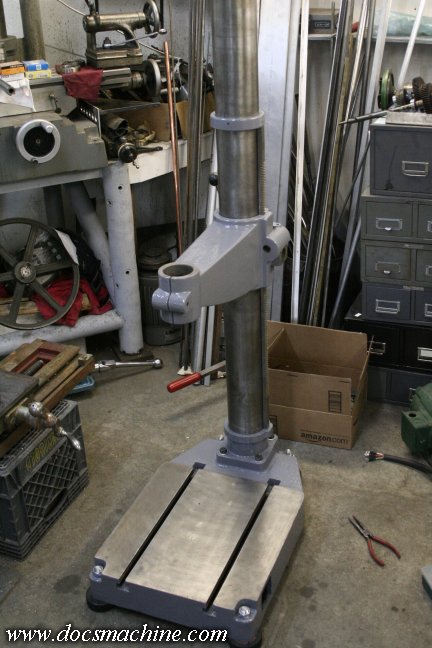
Add the rack, the rack-support rings and the arm, and we have a column
from which
we can build the rest of the drill.
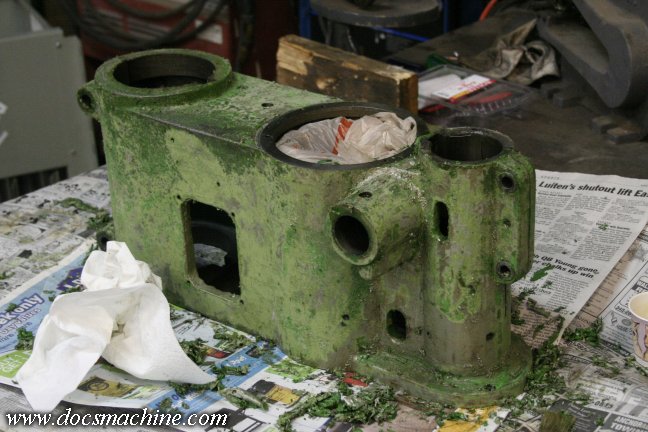
With the column done, it was time to attack the head. The paint was in bad shape,
so I chemically stripped most
of it- as I couldn't easily remove the stator,
I wasn't able to pressure-wash it, but I degreased it as best I could.
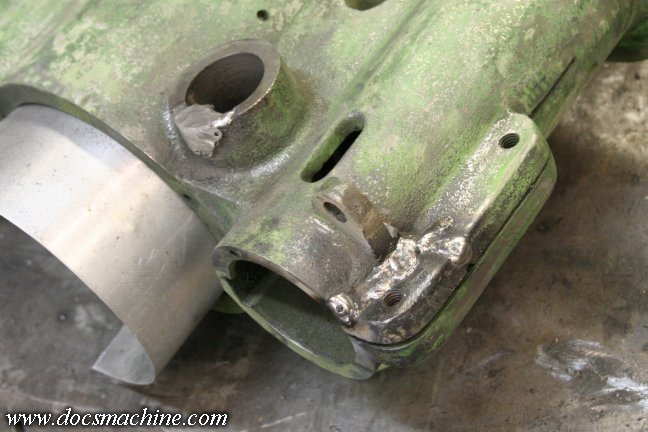
Now we're getting into stuff that actually needed to be repaired. As noted, this drill had fallen over at some
point,
and suffered some damage because of it. This crack, however, I believe predated the crash. I suspect
either
somebody overtightened the pinch bolt, or perhaps it was just a flaw in the casting.
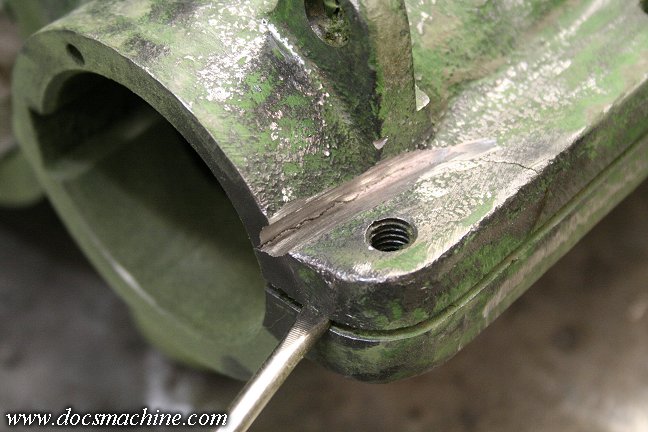
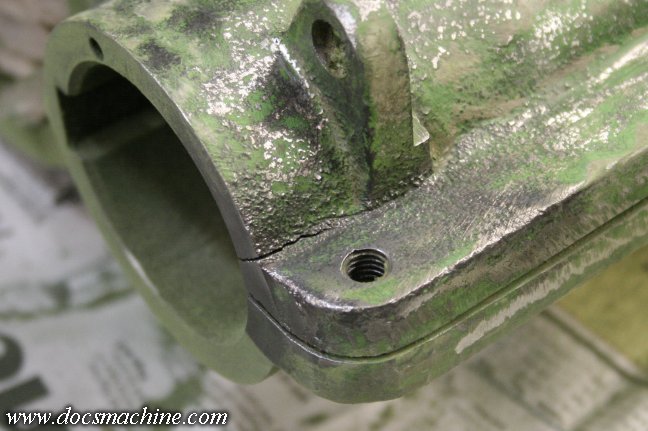
As you can see, nearly the entire ear had cracked off, so I Vee'd out the crack in preparation
for welding.
As with the other machines, I'll be using Muggyweld rods with a DC stick welder.
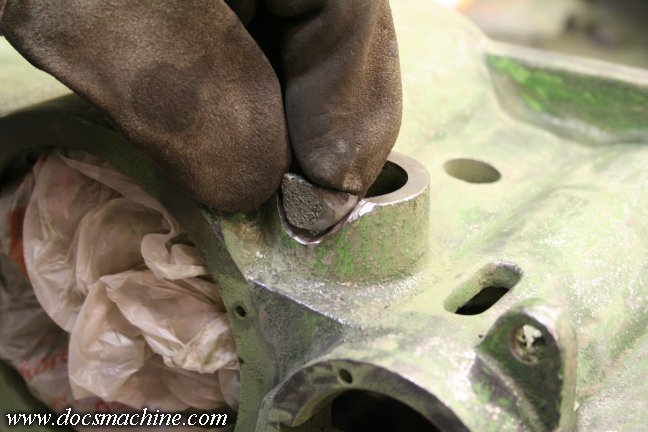
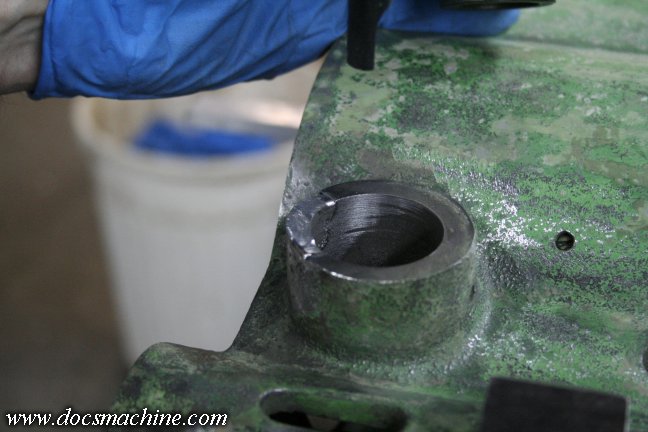
One bit of damage that did come crom the crash, however, was the housing for the quill spring.
It had cracked off the housing, taking a small bit of the iron with it. I ground out the damage, Vee'd
the
edges a bit, and ground a chunk from the broken switchbox (which won't be used) to fit the notch.
I used a thin piece of aluminum flashing to help protect the motor windings from any sparks, and
carefully
welded up both parts. The Muggy is pretty tolerant, but I was still careful with the heat.
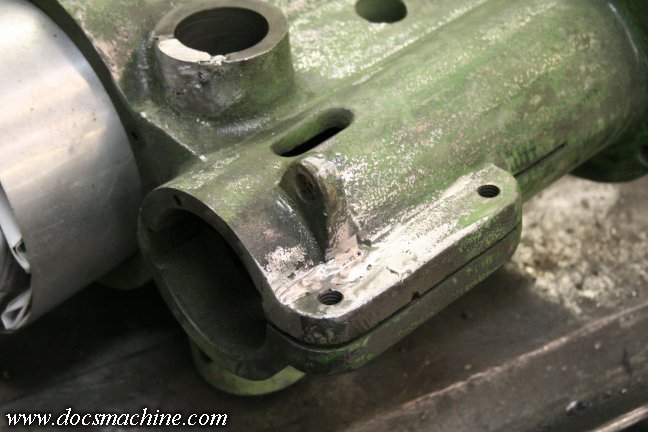
After letting it fully cool, I ground down the welds and smoothed them out,
trying to preserve the shape and contour of the casting.
The quill spring boss, however, had some excess weld, and the inserted piece
was a bit thicker than the
original casting, so I needed to machine it back to round.
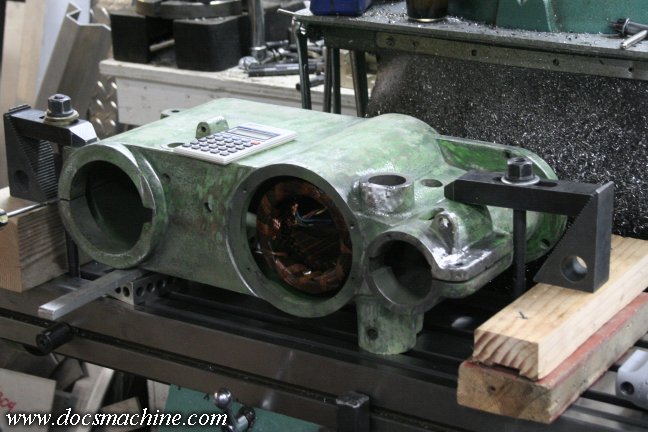
That meant a trip over to the vertical mill...
And then it was a simple matter to locate the hole, and bore it back to size.
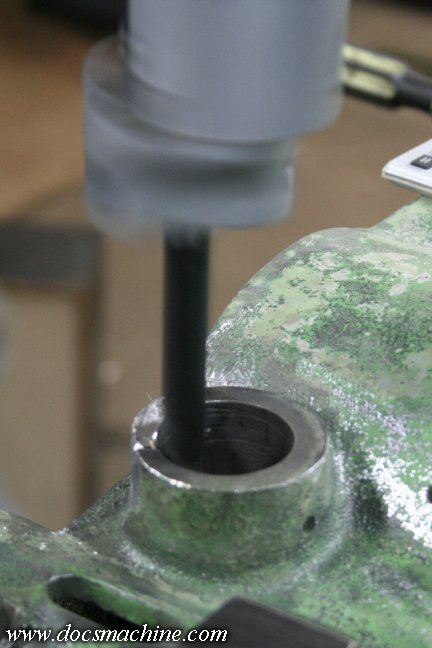
Close enough. :)
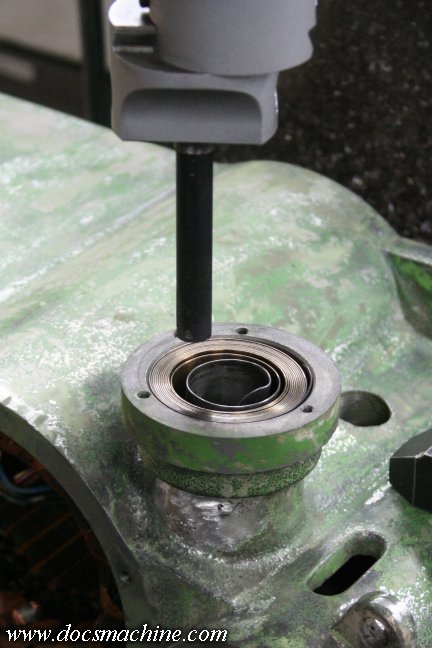
As a quick check, the spring housing slides right into place.
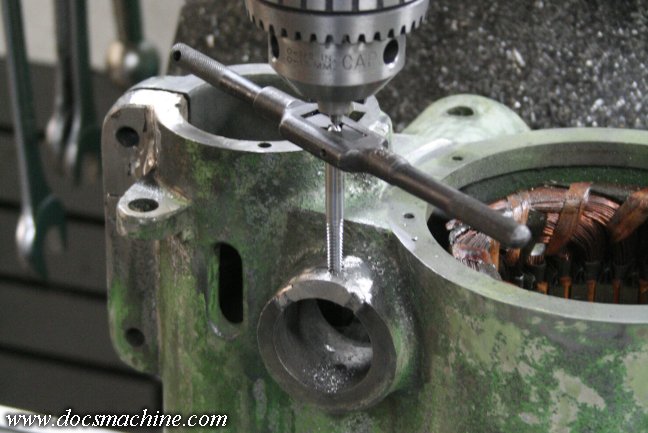
The housing is held in place by a setscrew- which is what broke out the casting- so now
it needed
a new hole drilled and tapped in the right spot.
 |
 |
 |