


|
|
|
|
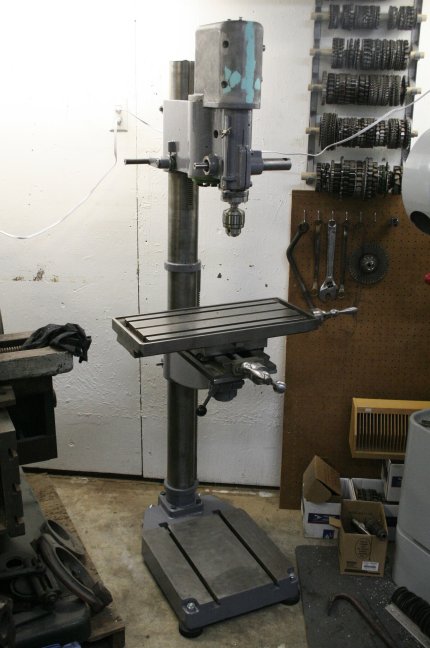
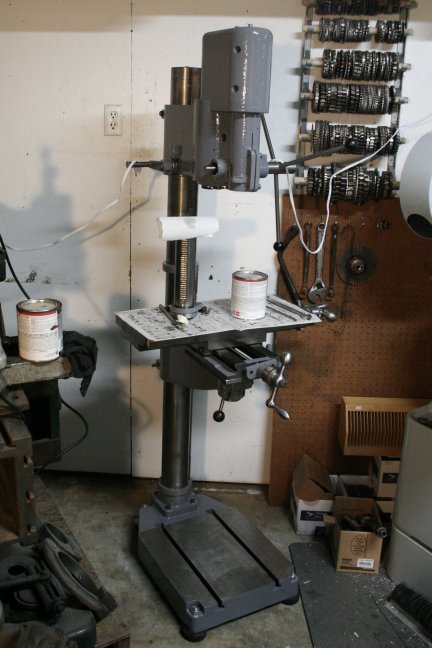
We're getting close! The head is mostly assembled, the table is pretty much done, the base
and
column are done, the rubber feet... I even found a nice Jacobs Superchuck for it!
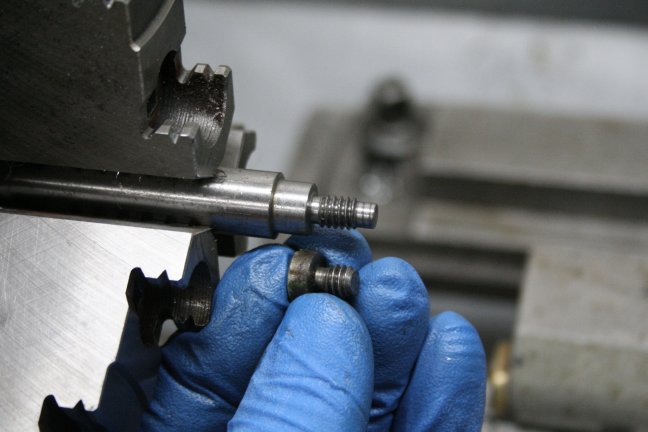
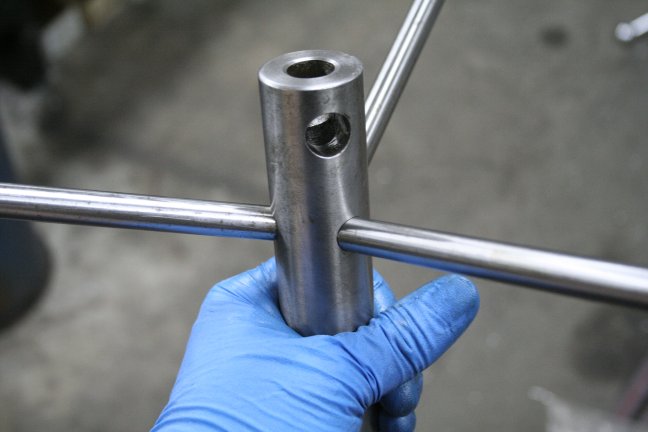
So now we need to work on the quill lever. As noted in Part 1, the tip of the original retaining screw
had
been sheared off in the crash, so I needed to fabrciate a new one. A few minutes on the lathe...
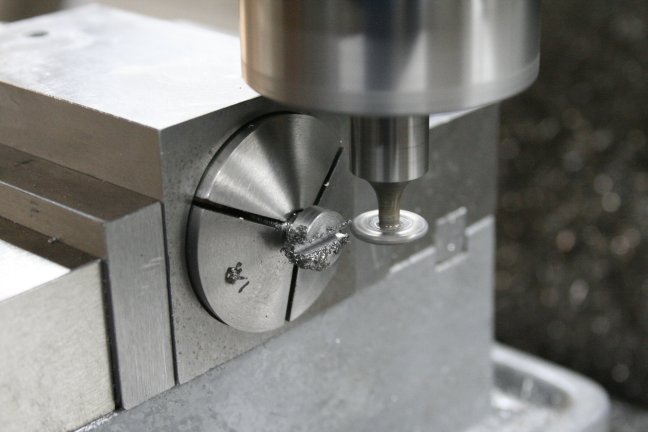
And then a quick slot in the mill is all it took.
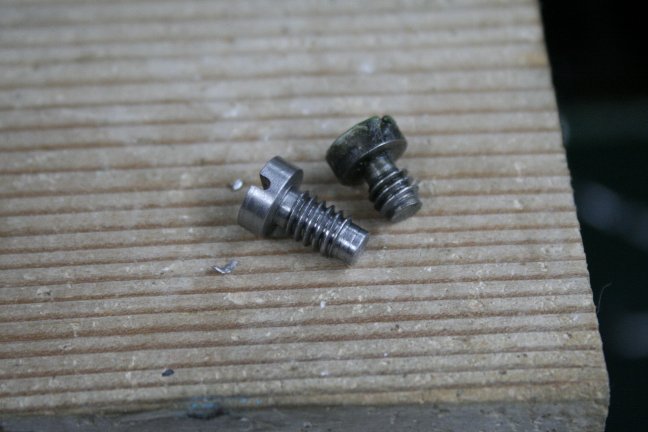
A pretty good facimile if I do say so myself.
Tested for fit, and it works great.
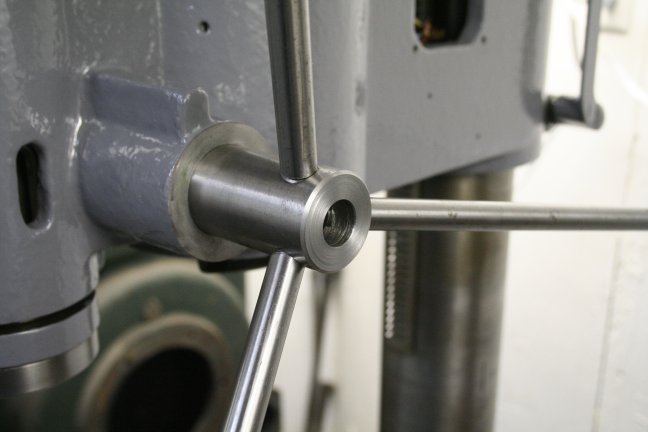
Now, I wasn't a big fan of the single sliding arm for the quill feed. Nothing really wrong with it,
it's simply not my
preference. Fortunately, there was plenty of material on the gear shaft to redrill it
for a more conventional set of
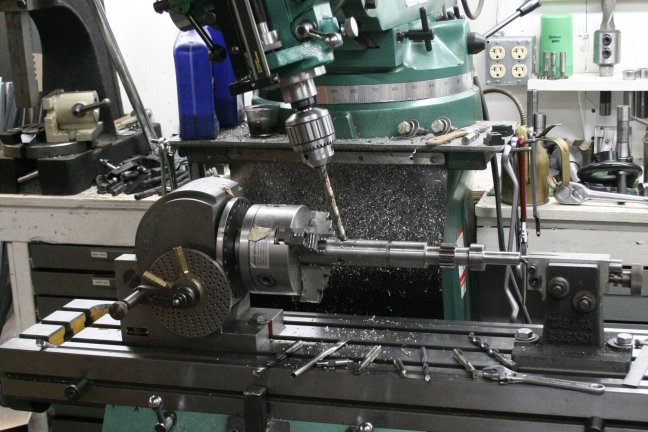
spider arms. To do so, I set up the dividing head on the mill, and tilted the
head over about ten degrees.
That let me drill and tap the three holes in place, and all evenly spaced.
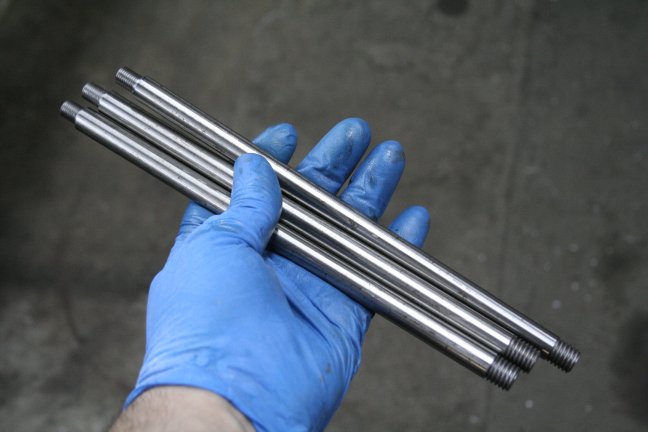
The new arms were easily fabricated from bars of 1/2" 4140 steel.
1/2" coarse on one end, 3/8" fine at the other.
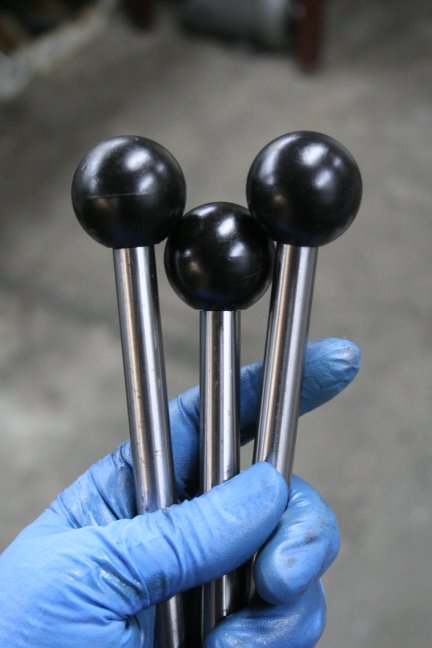
The 3/8" ends get topped off with some black phenolic ball knobs from eBay.
And screwed into place, just like they were meant to be there.
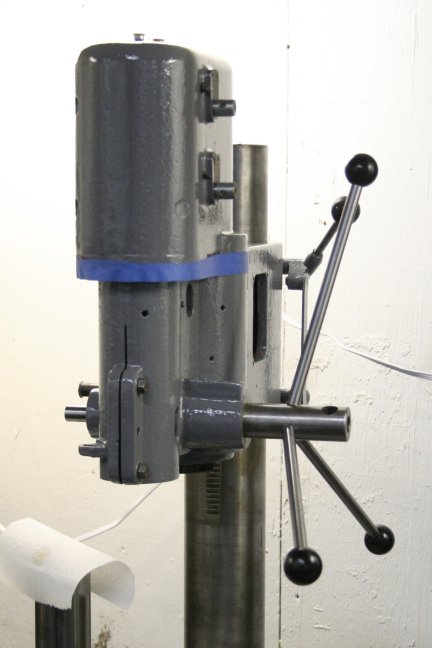
A quick fit test, and again, they work great. I may have made them a tad long, but that's
an easy
fix later if it becomes a problem. Also note the fresh coat of paint on the gearbox.
While I had the paint out, I took care of several other details as well; the end of the quill,
parts of the table, the clamping handles, and other accessories and touch-ups.
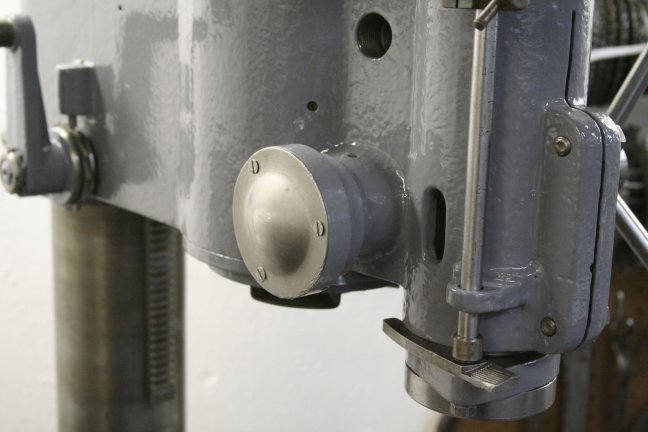
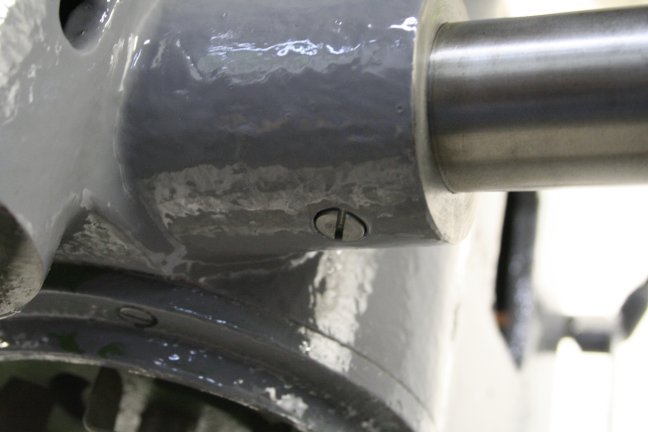
With that, I could finally reinstall the quill spring. It was tricky to get the "clockspring" properly
tensioned, but with
a bit of patience- and six or eight tries- I got it sorted out. Note the lever just
above the spindle nose. Flip that out
and raise the quill all the way and any tool in the spindle
is automatically ejected. It's a neat and handy feature.
And, with the new spider handles tested and proven, I shortened the excess
off the
gear shaft- eventually I plan to find or make a cap to cover the end.
Next up- the electricals!
 |
 |
 |