[
Return to Main Page ] [
Return to Projects Index
] [
Doc's Machine & TWB Store] [
Contact Us ]
[
The Whiteboard Webcomic
]
Rebuilding A Junker Cutlass Into A Kinda-Sorta Faux-Four-Two Musclecar, Part 8:

Next up, the antisway bar. I decided to upgrade from the factory 7/8" bar, to the larger
1-1/8" bar out of a Toronado... simply because I had one. :)
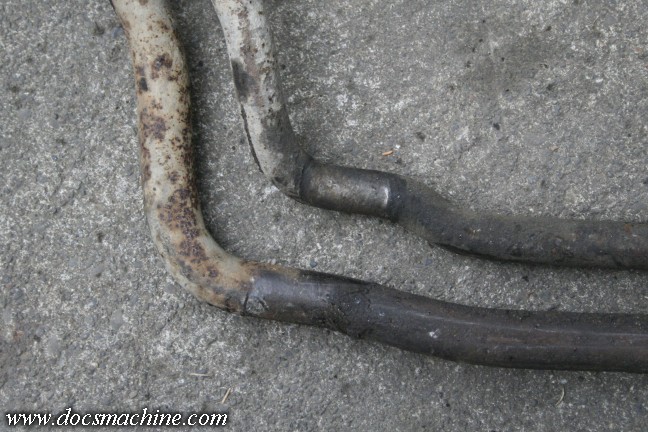
Now, while I had it, that didn't mean it was a bolt-on. It's hard to tell from that photo,
but the eyes on the ends are slightly wider apart than the stock bar (the inner/upper one)
and the flat portion for mounting the pivot bushings is also somewhat wider.

But after a bit of checking, I figured it'd be fairly easy to make some adapters- each
mounting bushing just needed to be moved a mere 1-1/4" outboard. So I made these plates;
the holes would accept the stock bolts in the stock location, and the studs would accept
the bushing brackets, an inch and a quarter to the side.
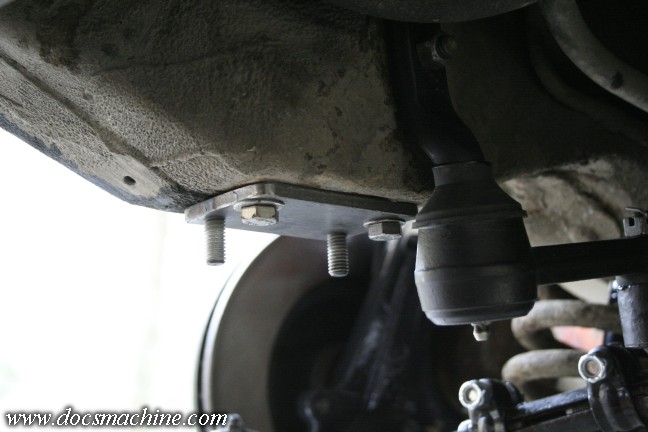
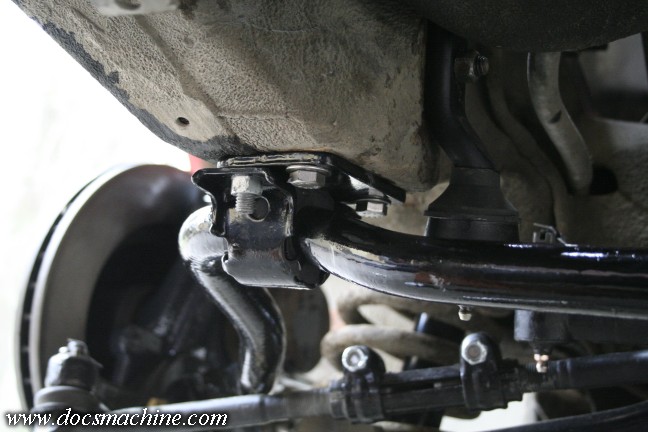
Mounted like so.
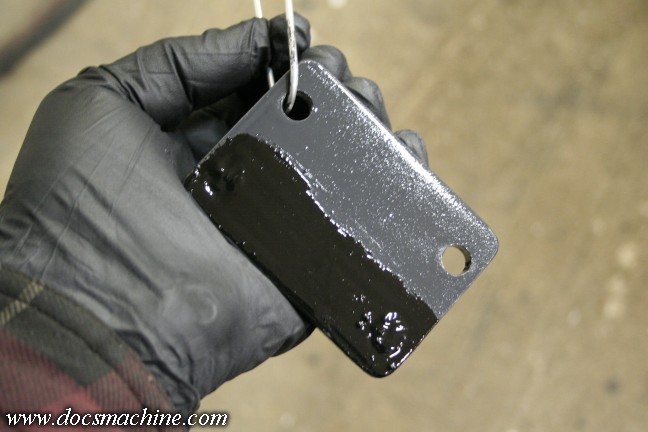
After checking for fit, I painted the parts with more POR-15. And here's a trick for using P'15:
The main color for this stuff is gloss black, and when putting on the recommended second coat,
it's often hard to tell the difference between the very glossy black dry paint and the glossy
black wet paint.
And of course, the better and more complete the coverage, the better protected the part is.
So what I started doing is adding a little grey. POR-15 is only available in a few colors,
including black and grey. I had some grey left over from a prior project, so when I dip
some out into little disposable paper cups, I also dip a dab of grey and mix it.
That gives me a dark grey for a first coat, and so when I do the second coat in full,
normal black, it's easy to see where you've painted and where you've missed.
Left to cure overnight, and done.
Word of warning: Do not paint the threads. You'll never get the nuts on. :)
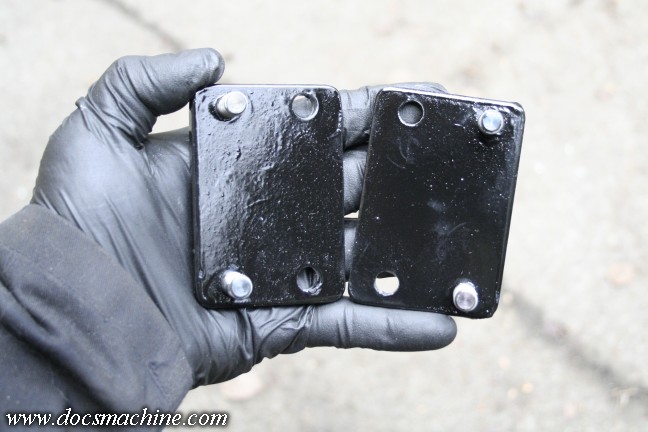
And, I also painted the sway bar at the same time (using the same technique)
so after they'd all cured, installation was simple.

And connected at the A-arms with the new urethane bushing kit, you can see there's a little
cant to the bolts, thanks to the slightly wider eye spacing. I don't think it'll be an issue,
but we'll see.
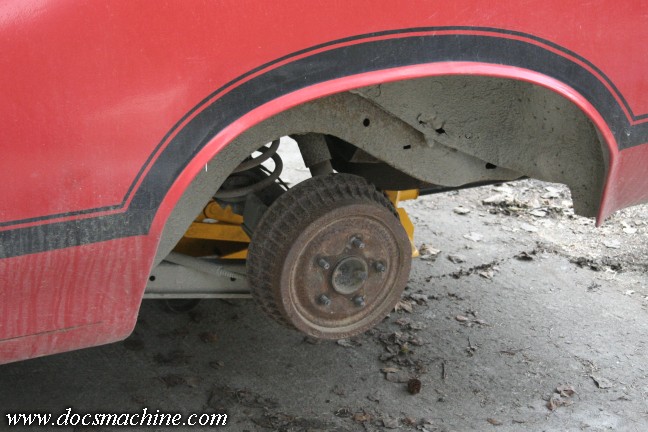
Finally, I was able to reinstall the wheelwell, using a couple new J-nuts and new stainless bolts.
Now, with everything connected, I was able to start bleeding the brakes. Since it's a brand-new
master cylinder, the first thing one needs to do is "bench bleed" it. You just need some hoses,
fittings or tubes to connect the outlets back up to the reservoirs, and pump the pedal.
With that done, I was able to reinstall the copper-nickel lines and bleed the fronts,
then move around to the back and bleed the rears.
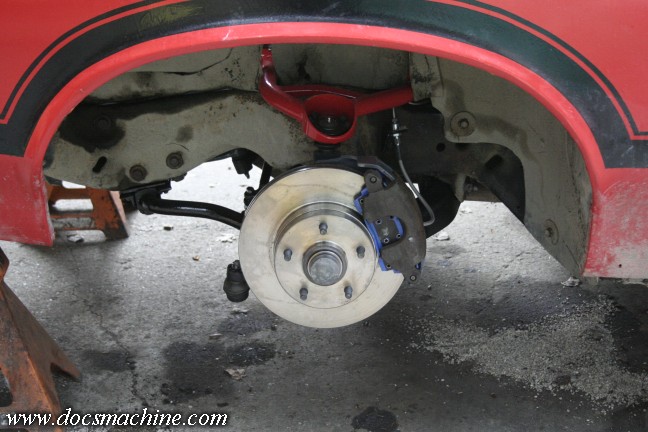
Double check everything... I think it's done!
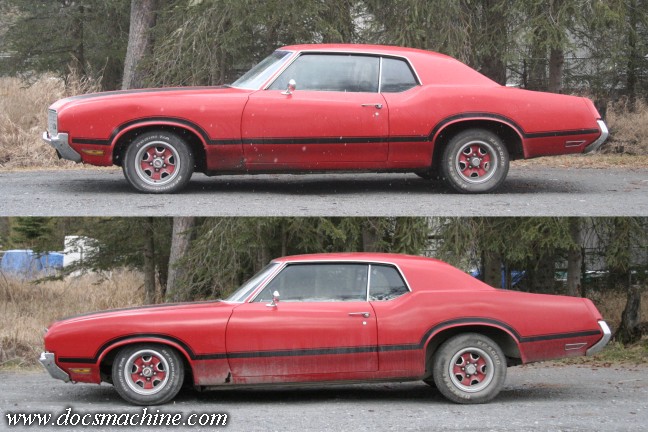
Hey, it was finally time to fire it up! Toss the battery back in- as best I could- and do
a couple gentle laps of the house, see if anything falls off, if anything hits something
it's not supposed to, or see if it careens off a cliff and explodes in midair.
Fortunately none of those things happened. :)
Unfortunately, there's several issues. As I said up above, it's very low. Lower than I thought it would be.
All text, photos and graphics
Copyright 1998- 2025, Doc's Machine & Airsmith Services. All Rights
Reserved.
Information contained in
these pages is for reference and entertainment
purposes only. Our methods are not always the best,
quickest, safest, or even the correct ones. It's up to you to know how
to use your own machines and tools.
Keep your fingers away from the spinny blades o' death and you should
be all right.


