[
Return to Main Page ] [
Return to Projects Index
] [
Doc's Machine & TWB Store] [
Contact Us ]
[
The Whiteboard Webcomic
]
Removing a Jammed 'Cocker Valve Locknut, Part 2: Using the Tool
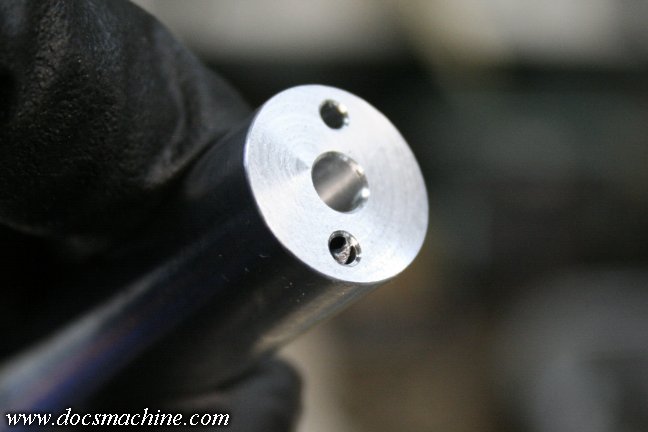
To properly use the tool, I slid the drill in 'til the tip was flush with the valve end.
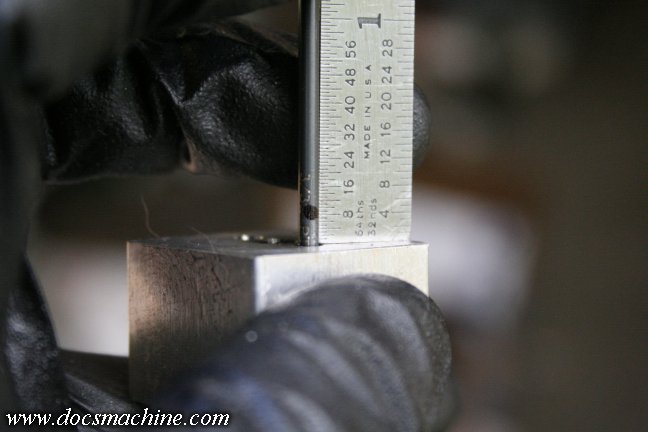
At the square end, I measured and marked about 1/8". The depth isn't important, but of course you don't
want to drill any deeper than the thickness of the locknut. Doing so WILL ruin the body.
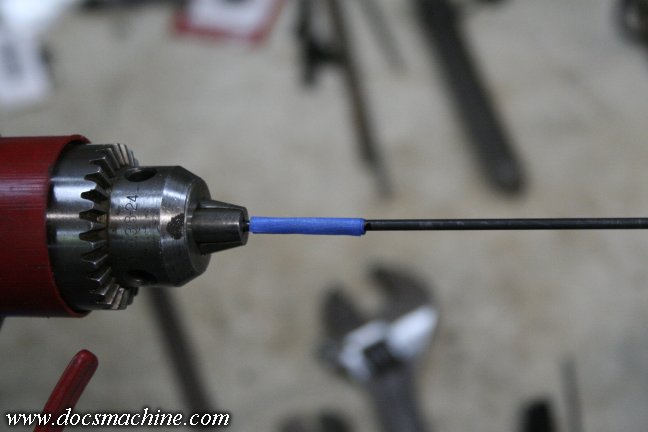
Above that mark, I decided to put a bit of tape, in order to better see the depth as I was drilling.
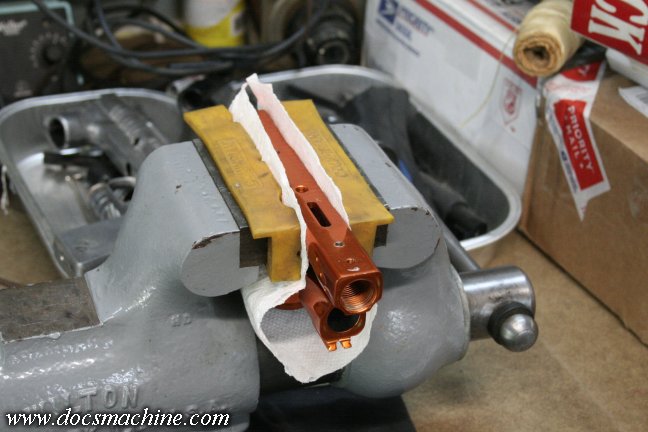
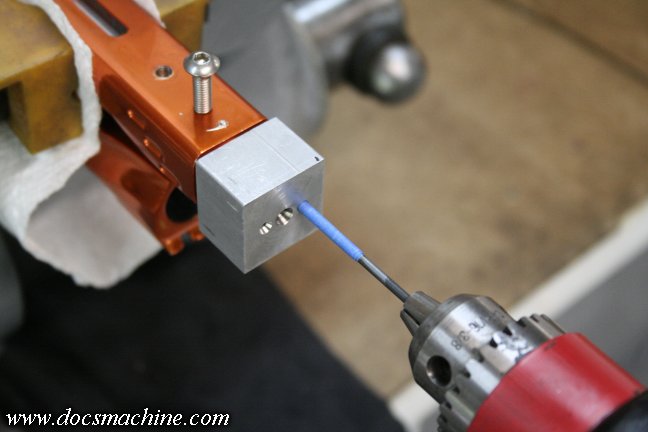
Now we prep the body. I turned my vise sideways to better access the end for drilling, and used both my
rubber vise jaw pads,
and a paper towel to protect the shiny, polished anno finish of the 'Cocker body.
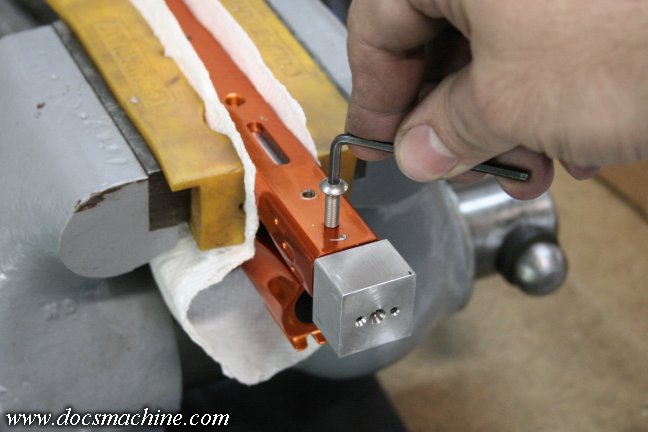
The tool is slid in 'til it hits the valve face, and then a spare 10-32 screw is lightly snugged in through
the beavertail bolt hole to hold it in place.
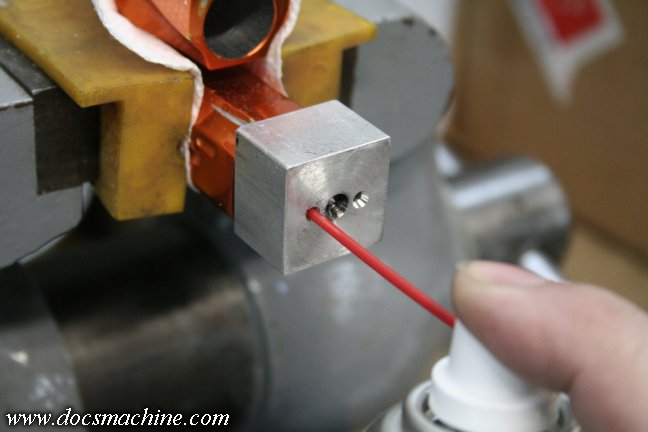
Give the first drill passage a squirt of WD-40, not necessarily to lube the cutting action,
but to lube the drill itself as it spins in the channel.
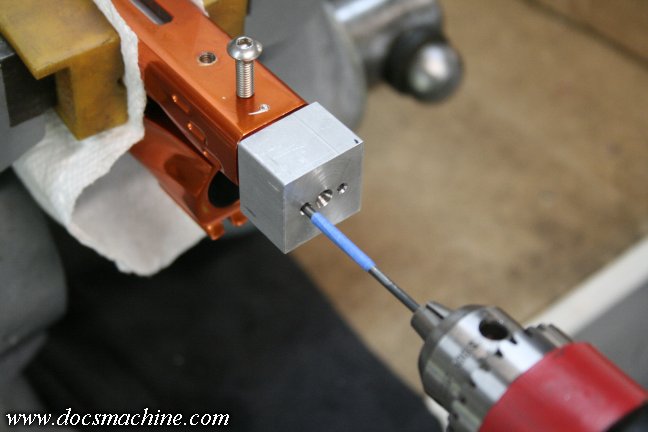
And, very carefully, start to drill. The tool keeps the drill centered on the lock nut. It almost
can't wander
off course. But you still need to be careful- the nut is somewhat hard, and if you try to drill too fast, you can
dull the drill and make a hard spot you can't drill through.
You also have to "peck" a few times, to make sure the chips can clear, but eventually you'll drill through
to the mark on the shank of the drill- about a 1/8" deep hole in the locknut.
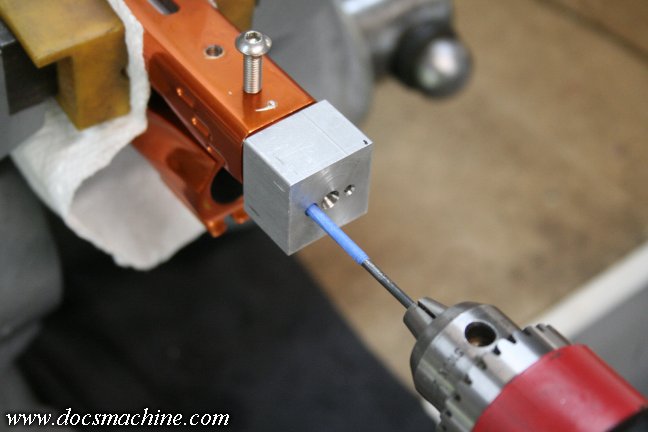
And, without disturbing the setting of the tool, switch over and drill the other side.

Remove the screw and the tool, and blow out any chips and swarf.
Next up, we pop that badboy out of there!
All text, photos and graphics
Copyright 1998- 2017, Doc's Machine & Airsmith Services. All Rights
Reserved.
Information contained in
these pages is for reference and entertainment
purposes only. Our methods are not always the best,
quickest, safest, or even the correct ones. It's up to you to know how
to use your own machines and tools.
Keep your fingers away from the spinny blades o' death and you should
be all right.


