[
Return to Main Page ] [
Return to Projects Index
] [
Doc's Machine & TWB Store] [
Contact Us ]
[
The Whiteboard Webcomic
]
Converting a Logan 11" x 32" Lathe over to full CNC, Part 12:
This part of the project started with a template of sorts, bent out of some scrap sheetmetal, in order to get
some decent dimensions. I was going to have the finished piece made out of some 22 ga stainless I had,
but I don't own a brake large enough, and the local shop with a CNC press brake had some computer issues.
Instead, I found I could mill the part out of a section of 3" x 3/8" aluminum angle.
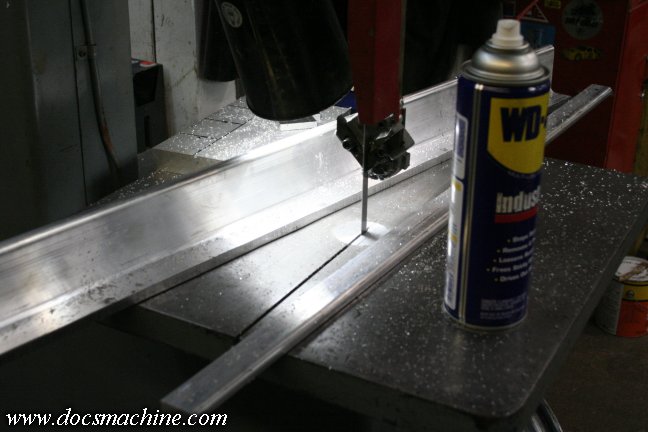
The 'long' leg was just right, but the 'short' leg needed to be cut down by about half.
Again the bandsaw makes short work of that.
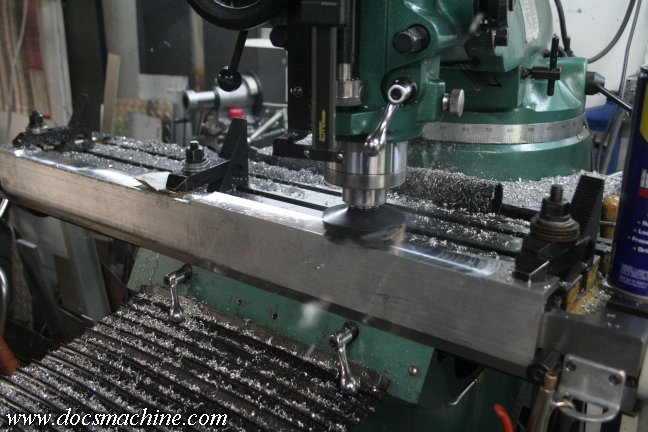
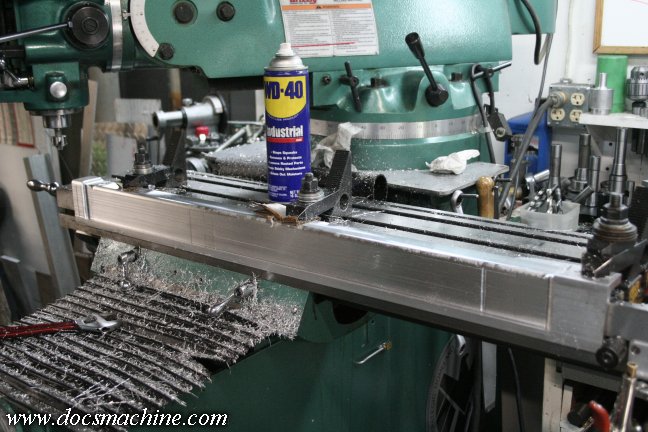
Now, while my mill is a clone of a full-size Bridgeport, I still only have about 28" of actual travel on the table,
but this part needed to be about 32" to 34" long. I bought a piece 36" long, and clamped it directly to the front
of the table- the excess becomes "waste" area, used only for clamping. To cover the full length of the part,
I simply shifted the center clamp left and right as needed, and rotated the mill turret to one side then the other.
The 'front' face I milled down with a high-rake facing cutter, down to about 3/16" thickness.
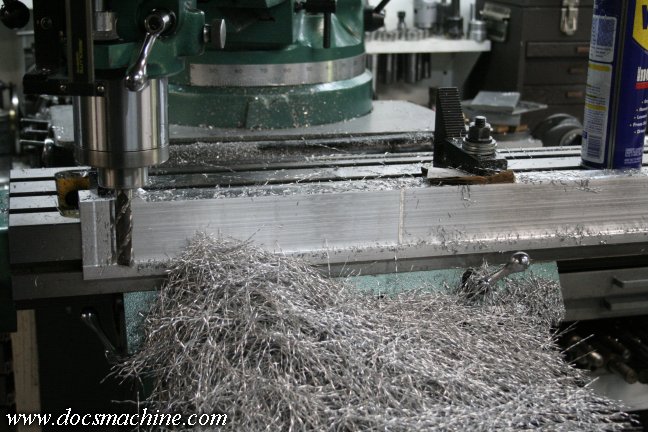
Rather than repositioning the workpiece, I used a long, sharp endmill to side cut the remaining face,
leaving a lip of about 1/2" wide at the edge. The line just off to the right of center, is where the two
separate cuts meet. I'd faced the section on the right down to the desired thickness, and had then
rotated the head to the left, so I could finish the cut. With care I was able to 'blend' the two
cuts very closely, and almost invisibly.
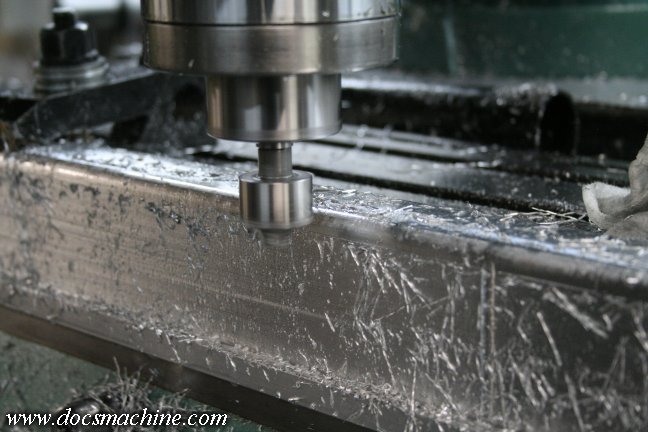
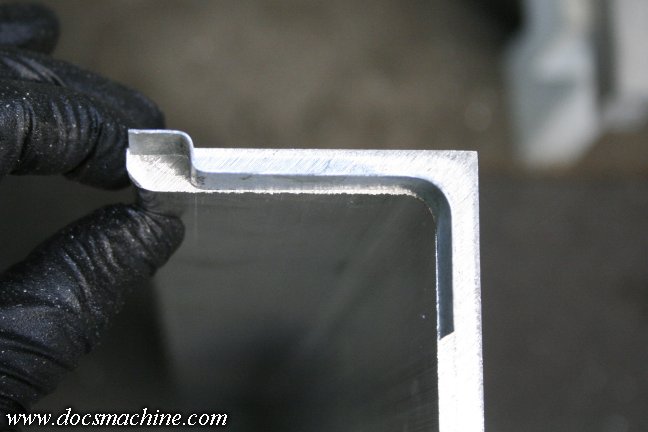
Mostly for appearances sake, I then smoothed the top 'corner' with a 3/8" radius cutter.
And
voila`! After about two hours of milling, I had my part, and with
only one "whoops" from when my hand slipped on the Y-axis crank.

With the milling done, I bandsawed the waste ends off and deburred. The long leg is about 0.100" thick,
which was the max I could fit in there due to clearances, and the short leg is approximately 0.185".
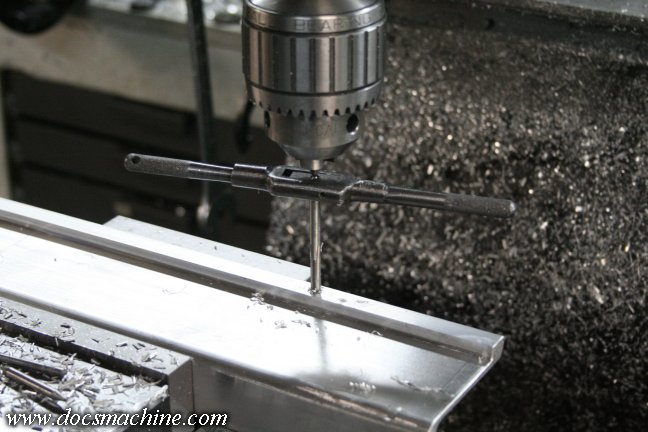
After a quick test-fit, I marked the mounting holes, then drilled and tapped them.
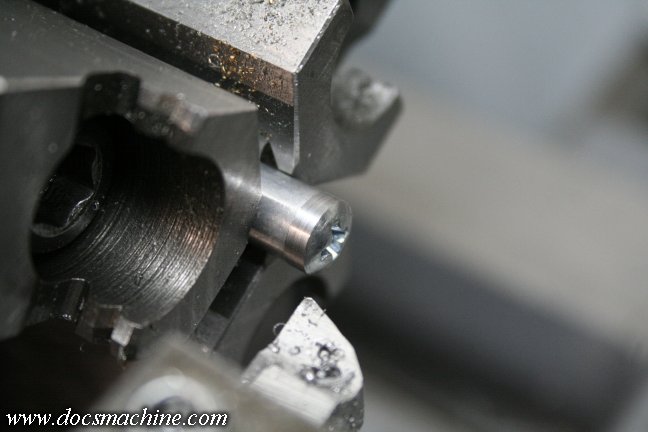
And finally, one of those annoying little things that always crops up on a job like this. I had to modify some screws.
The carriage "rack" on this lathe was almost certainly originally held on with "cheese head" screws. Screws whose
heads were cylindrical and straight-sided, like a wheel of cheese. At some point a previous owner had replaced
those with allen-head screws, which had to be faced down in order to clear the carriage. That left very little of the
hex, which gave a wrench very little "bite". I wanted to go back to a proper screw, but no local supplier carried
cheese heads, so I took some normal pan head screws, ran them into an old aluminum stand off, and trimmed 'em.
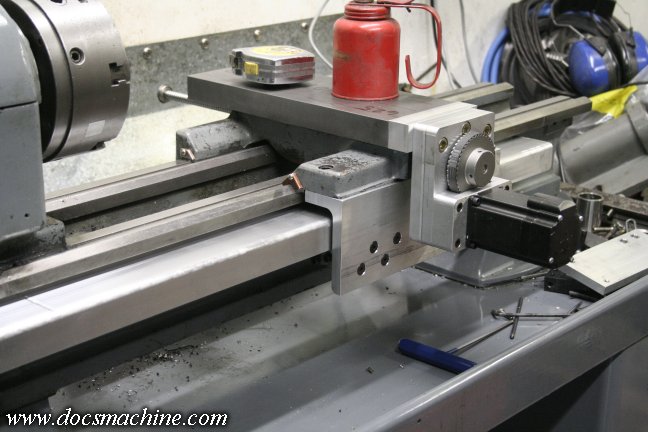
Mounted, installed and tested, I now have a full-length leadcrew cover, to protect it from
chips, falling parts, and possibly even- eventually- coolant. Next up, we start wiring!
All text, photos and graphics
Copyright 1998- 2016, Doc's Machine & Airsmith Services. All Rights
Reserved.
Information contained in
these pages is for reference and entertainment
purposes only. Our methods are not always the best,
quickest, safest, or even the correct ones. It's up to you to know how
to use your own machines and tools.
Keep your fingers away from the spinny blades o' death and you should
be all right.


