|
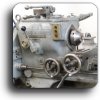
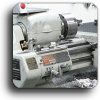
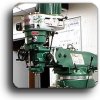
New! 1939 Warner & Swasey No. 2 Turret Lathe
Part 1: Acquisition, unloading and inspection.
Part 2: A bit of colletry.
Part 3: Powering up and button-pressin'!
Part 4: Diagnosing and beginning disassembly of the closer
Part 5: Removal of the whole mess, then disassembly
Part 6: Yep, more disassembly!
|
 |
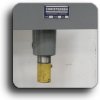
Grizzly MiniMill CNC Conversion
Part 1: Checking out the already-converted mill
Part 2: Fitting a proper ballscrew to the Y-axis
Part 3: Fitting a ballscrew to the X-axis |
 |
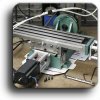
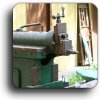
1962 Nichols Horizontal Horizontal Mill, 2008 Build
Part 1: Pickup and preliminary inspection
Part 2: Continuing evaluation, certification by ShopCat
Part 3: Beginning the teardown
Part 4: Major disassembly
Part 5: Stripping the paint
Part 6: Removing the spindle
Part 7: Removing the motor arm, patching holes
Part 8: First paint and modding the belt cover
Part 9: Stripping the motor and beginning reassembly
Part 10: Installing the knee, saddle and table
Part 11: The handwheels and other details
|
|
1962 Nichols Horizontal Mill, 2020 Rebuild
Part 1: Taking 'er down and sending parts off for grinding
Part 2: Repainting to a proper Machine Grey
Part 3: Spindle bearings and other detail bits
Part 4: Time to refit the table and way bar
Part 5:
|
 |
1956 Sheldon EXL-56 10" x 36" Lathe
Part 1: Discovery and purchase
Part 2: Repairing stand legs and adding adjustable feet
Part 3: Adding remote start/stop buttons for the VFD
Part 4: Repairing and painting the stand
Part 5: Modding the oil drip tray
Part 6: Carriage oilers, depth stop and belt drive
Part 7: Enclosing the base cabinet
Part 8: Whipping up a chip drawer
Part 9: Adding drawers to the cabinet
|
 |
1956 Logan 955 11" x 24" Lathe
Part 1: Aquisition and preliminary setups
Part 2: Upgrading to 3-Phase and a VFD
Part 3: Adding a quick coolant system
Part 4: Upgrading the cabinet for coolant, part 1
Part 5: Upgrading the cabinet for coolant, part 2
Part 6: Upgrading the cabinet for coolant, part 3
Part 7: Adding a better bed turret and tooling
|
 |
Anayak Exacto Vertical Mill
Part 1: Pickup and preliminary examination
Part 2: Initial disassembly and evaluation
Part 3: Cleaning and painting the main castings
Part 4: Installing the knee and lift screw
Part 5: Cleaning and installing the saddle
Part 6: Machining replacement leadscrew nuts
Part 7: Installing the new nuts and both leadscrews
Part 8: Table and handwheel cleaning and installation
Part 9: Saddle oil pump and way locks
Part 10: Initial disassembly of the head
Part 11: Painting and beginning reassembly of the head
Part 12: Power downfeed mechanism and depth stop
Part 13: Power downfeed key and clutch mechanism
Part 14: Backgear engagement handle and linkage
Part 15: Spindle drive pulley and motor installation
Part 16: Evaluating and repairing the spindle
Part 17: Reassembling and reinstalling the quill
Part 18: Re-reassembling the spindle, again
Part 19: Making a junction box cover for the motor
Part 20: Finishing and installing the box and wiring
Part 21: Installing the VFD and the start-stop switch
Part 22: Installing the speed pot and a power cutoff
Part 23: Detail bits and a new table stop
Part 24: A new knee crank spline collar
|
 |
Logan conversion to CNC
Part 1: Disassembly and beginning of the carriage modification
Part 2: Machining a new cross slide base
Part 3: Machining and fitting the cross-slide gib
Part 4: Wiring the cross-slide stepper motor
Part 5: Starting the cross-slide stepper mount
Part 6: Refining the mount and adding the pulley
Part 7: Preliminary mounting of the Z-axis ballscrew
Part 8: X-axis stepper motor mounting block
Part 9: Z-axis stepper motor mounting brackets
Part 10: Machining a new carriage "apron"
Part 11: Machining Z-axis ballnut mount
Part 12: Machining Z-axis ballscrew cover
Part 13: X-axis drive belt cover
Part 14: Adding T-slots to the cross-slide
Part 15: Stepper and controller wiring
Part 16: A toolpost and a couple quick tests!
Part 17: Switching to an Centroid controller and new encoder
Part 18: Building the encoder drive belt assembly
Part 19: Finishing the drive belt and adjuster
Part 20: Preliminary test wiring and X limit
Part 21: Z limit switch and setting the turns ratio
Part 22: Tool offsets and we finally run an actual part!
Part 23: Time to move the controller into an enclosure
Part 24: Finishing the enclosure and adding cable chains
Part 25: Adding a carriage lube system
Part 26: Making a slide extension and leadscrew support
|
|
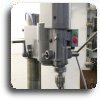
Arboga E-825-L Gear-Head Drill Press
Part 1: Purchase and preliminary inspection
Part 2: Initial head disassembly
Part 3: Gearbox and motor disassembly
Part 4: Base prep and making adjustable feet
Part 5: Column assembly and crack welding
Part 6: Head and gearbox reassembly
Part 7: Quill reassembly and table repair
Part 8: Table cleaning and reassembly
Part 9: Spider handle modification and install
Part 10: Rewiring the hi/low speed range controls
Part 11: Remaking the broken gear selector handles
|
|
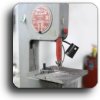
1948 DoAll LHF 16" Bandsaw
Part 1: Pickup and preliminary cleanup
Part 2: Fitting a new table-blade insert
Part 3: Removing and disassembling the gearbox
Part 4: Rebushing the central shaft
Part 5: Reassembling the gearbox
Part 6: Drive wheel spacer and shifter linkage
Part 7: Drive wheel crowning and new guide buttons
Part 8: New gearbox shaft seal
Part 9: Improved speed control linkage
Part 10: Wrap-up and a speed check
|
|
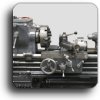
1943 Springfield 16" x 56" Gear Head Lathe
Part 1: The ignoble beginning, a wrecker and a quick check
Part 2: A couple preliminary fixes and a quick powered test!
Part 3: Disassembly, inspection and cleaning
Part 4: Beginning assembly of the bases and bed
Part 5: Installing and painting the headstock
Part 6: Oil pump and new oil lines
Part 7: Oil filter with a custom fitting
Part 8: Repairing the 3-way shift lever
Part 9: Assembling and installing the 3-way shifter
Part 10: Milling a new shift assembly endcap
Part 11: Cleanout plate and drip tray
Part 12: Fitting a carriage stop
Part 13: Wiring the motor
Part 14: Beginning disassembly of the QC gearbox
Part 15: Continuing disassembly of the gearbox
Part 16: Finishing disassembly of the gearbox
Part 17: Disassembly and cleaning of the carriage
Part 18: Cross-slide repair and paint
Part 19: Reworking the cross-slide leadscrew nut
Part 20: Cleaning and reassembling the reversing gearbox
Part 21: Cleaning and painting the QCGB casting
Part 22: Repairing the QCGB range selector lever
Part 23: Repairing the QCGB gear selector tumbler
Part 24: Cleaning and painting the leadscrew support block
Part 25: Miscellaneous cover and part clean & paint
|
|
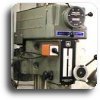
1985 Jet 8" x 24" Mill-Drill
Part 1: Dusting off a long-dead project
Part 2: Reassembling and installing the spindle
Part 3: Installing the quill springs and downfeed gear
Part 4: Rebuilding the vari-drive jackshaft
Part 5: Rebuilding the front vari-drive pulley and adjuster
Part 6: Installing the spindle drive and belts
Part 7: Installing the new 3-Phase motor
Part 8: Troubleshooting some vibration
Part 9: Finishing up some details
Part 10: A first test cut, and a first disappointment
Part 11: Let's try regrinding the spindle
|
 |
2003 Grizzly 9" x 42" Vertical Mill
Part 1: Pickup and preliminary cleanup.
Part 2:
Part 3:
Part 4:
Part 5:
|
 |
1968 Christensen 40-Ton Hydraulic Press
Part 1: Dragging it home and checking it out
Part 2: Painting and preliminary plumbing
Part 3: Machining a new HP pump shaft
Part 4: Machining a new LP pump piston
|
 |
1905 Stockbridge Shaper
Part 1: Pickup and preliminary cleanup
Part 2: Immediately regret purchase
Part 3: Consider stuffing into Salvation Army donation box
Part 4: Google "Can shapers be turned into something useful?"
Part 5: |
|
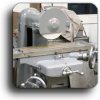
Early Covel Type 15 Surface Grinder
Part 1: Disassembly and preliminary painting
Part 2: Reassembling the spindle
Part 3: Installing the motor and mount
Part 4: Installing the knee and lift screw mechanism
Part 5: Installing the table and reciprocating wheel
Part 6: Fabricating a new cross-slide screw
Part 7: Mounting and wiring the VFD
Part 8: Finishing it up and taking if for its' first grind!
|
 |
1909 Rockford Drilling Machine
Part 1: Discovery, picking up and hauling home
Part 2: Analysis and disassembly
Part 3: Derusting with reverse electrolysis
Part 4:
Part 5:
|
|
Shapeoko 3 CNC Router
Part 1: Unbox, assemble, Hello World!
Part 2: Fabbing mounts for a water-cooled spindle
Part 3: More enclosureousness
Part 4: Forming first Plutonium hemisphere
|
 |
Wellsaw M1000 Horizontal Bandsaw
Part 1: Use it for a few years, then take it apart
Part 2: Fixing the cracked cast iron legs
Part 3: Starting to reassemble the frame
|

|
KMG Style Belt Grinder
Part 1: Initial assembly, and lots of waiting
Part 2: The first belt tensioner arm
Part 3: The platen and tool rest
Part 4: A better tensioner arm
Part 5: A motor, a VFD and a test grind!
|


